background image

Summary of Contents for PS950SF2SS

Page 1: ...aning the Range Exterior 23 Cleaning the Range Interior 24 Cleaning the Glass Cooktop 25 Probe 26 Maintenance 27 Troubleshooting Tips 3o PS920 30 Slide In Range PS950 30 Slide In Range For a Spanish v...

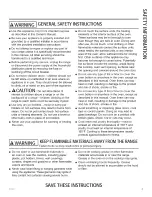
Page 2: ...ket Never completely remove the leveling legs or the range will not be secured to the anti tip device properly To reduce the risk of tipping the range the range must be secured by a properly installed...

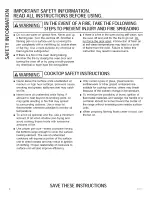
Page 3: ...ent time for cooling first Other surfaces of the appliance may become hot enough to cause burns Potentially hot surfaces include the cooktop areas facing the cooktop oven vent opening surfaces near th...

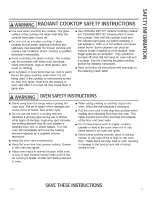
Page 4: ...gs Boilovers cause smoking and greasy spillovers that may catch on fire Never leave oil unattended while frying If allowed to heat beyond its smoking point oil may ignite resulting in fire that may sp...

Page 5: ...detailed instructions Read and follow all instructions and warnings on the cleaning cream label A WARNING i OVEN SAFETYINSTRUCTIONS Stand away from the range when opening the oven door Hot air or stea...

Page 6: ...Care should be taken not to rub damage or move the gasket Do not use oven cleaners No commercial oven cleaner or oven liner protective coating of any kind should be used in or around any part of the...

Page 7: ...ass cooktop caused by hardened spills of sugary materials or melted plastic that are not cleaned according to the directions in the Owner s Manual Replacement of house fuses or resetting of circuit br...

Page 8: ...luding your phone number or write to General Manager Customer Relations GE Appliances Appliance Park Louisville KY 40225 Accessories Looking For Something More GE offers a variety of accessories to im...

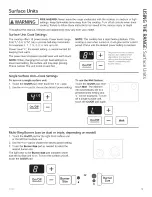
Page 9: ...short period of time until the desired power setting is reached The power level with a fraction indicates the additional half step setting You may hear clicking sounds indicating the control is maint...

Page 10: ...ng to heat cold food Do not use warm setting for more than 2 hours The Warming Zone is located in the back center of the glass surface To use the Warming Zone 1 Touch the Warming Zone On Off pad 2 To...

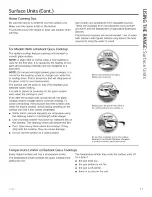
Page 11: ...hot cookware on the glass surface even when the cooktop is cool Even after the surface units are turned off the glass cooktop retains enough heat to continue cooking To avoid overcooking remove pans...

Page 12: ...bottom pot will leave a residue that will permanently stain the cooktop if not removed immediately Stoneware not recommended Poor performance May scratch the surface Cast Iron not recommended unless...

Page 13: ...of day for the oven to turn on then press Start Press the desired cooking mode and temperature then press Start A Cook Time may also be programmed if desired Follow the directions under Cook Time for...

Page 14: ...the oven to turn on then press Start Press the desired cooking mode and temperature then press Start A Cook Time may also be programmed if desired 10 ii Follow the directions under Cook Time for sett...

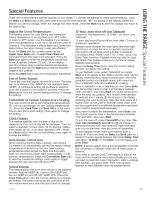
Page 15: ...oFF Sound Volume This feature allows the oven tone volume to be adjusted between high HI bEEP HI medium Std bEEP Std low Lo bEEP Lo and off oFF bEEP oFF Press the Cook Time pad to view the current set...

Page 16: ...shake the graphite lubricant and place 4 small drops on the two bottom tracks of the left and right sides Open and close the rack several times to distribute the lubricant To order additional graphite...

Page 17: ...he material finish and size of cookware affect baking performance Shiny pans can produce more evenly cooked baked goods such as cakes and cookies Dark coated and dull pans absorb heat more readily tha...

Page 18: ...mode press the Convection Bake pad enter a temperature and then press Start Always preheat when using this mode Broiling Modes For better broiling when two cavities are available the lower oven is re...

Page 19: ...by pressing the Probe pad and entering the desired food temperature then pressing the cook mode pad Bake or Convection Bake and entering the desired cooking temperature and press Start C m Proper Pro...

Page 20: ...n chicken breasts Watch food closely when broiling Keep the door open when broiling in the legs thighs Broil Lo 2 or 3 lower oven For best performance when broiling center food below the broil Bake he...

Page 21: ...food below the broil heating element Poultry Broil skin side down first Watch food closely when Bone in chicken breasts legs Broil Lo 1 broiling Keep the door closed when broiling in the thighs Bake u...

Page 22: ...t covered under your warranty Remove serving spoons etc before placing containers in warming drawer Temperature Selection Chart To keep several different foods hot set the control to the food needing...

Page 23: ...they will damage the finish Range Exterior Clean with a mild soap and water or vinegar and water solution Rinse with clean water and dry with a soft cloth When cleaning surfaces make sure that they a...

Page 24: ...time and pressing Start For heavily soiled ovens the maximum 5 hour clean time is recommended If you wish to use the default time press the Start pad immediately after pressing the Clean pad The oven...

Page 25: ...Ceramic Cooktop Cleaner on the entire burned residue area 3 Using the included CERAMA BRYTE Cleaning Pad for Ceramic Cooktops rub the residue area applying pressure as needed 4 If any residue remains...

Page 26: ...rface of your cooktop not covered by the warranty unless the spill is removed while still hot Special care should be taken when removing hot substances Be sure to use a new sharp razor scraper Do not...

Page 27: ...om skin will damage the bulb and shorten its life 3 Push the bulb straight into the receptacle all the way 4 Place the tabs of the glass cover into the grooves of the socket Turn the glass cover clock...

Page 28: ...or will not fully open the indentation is not seated correctly in the bottom edge of the slot Push the hinge locks up against the front frame of the oven cavity to the locked position Close the oven d...

Page 29: ...fuse or switching off the circuit breaker Make sure the drawer heating element is cool NOTE Allow warming drawer to cool before removing pan NOTE Wipe spills promptly after each use Never place use or...

Page 30: ...r permanent damage surface plastic placed on the hot cooktop section in the Cleaning the glass cooktop section Pitting or indentation of Hot sugar mixture spilled on the Call a qualified technician fo...

Page 31: ...temperature and reset the controls Oven controls improperly set See the Using Steam Clean section Oven door is not closed Make sure you close the door to start steam clean cycle Excessive smoking duri...

Page 32: ...r to preheat Remove items to reduce preheat time Adding more racks to the oven will cause the oven to take longer to preheat Remove some racks The different cooking modes use different preheat methods...

Page 33: ...del Homo 17 Utensilios 17 Modos de Coccion 18 Guia de Coccion 20 Cajon para Calentar 22 Cuidado y Limpieza Limpieza de la Cocina Exterior 23 Limpieza de la Cocina Interior 24 Como limpiar la estufa de...

Page 34: ...a no quedara bien sujeta al dispositivo anti volcaduras Para reducir et riesgo de volcar ta cocina esta debe sujetarse mediante un soporte anti volcaduras con una adecuada instalaci6n Ver las instrucc...

Page 35: ...fden Otras superficies del aparato pueden calentarse Io suficiente como para provocar quemaduras Las superficies potencialmente calientes incluyen la estufa las teas orientadas hacia la estufa la aber...

Page 36: ...mes grasosos que pueden prenderse fuego Nunca deje aceite sin atenci6n mientras frie Si se deja calentar m_s aid del punt de humeo el aceite puede encenderse provocando un incendio que podria propagar...

Page 37: ...s de la etiqueta de la crema de limpieza I A ADVERTENCIA1 INSTRUCCIONESDE SEGURIDAD DEL HORNO rl m Z r X n Z Mant6ngase alejado del horno al abrir la puerta del mismo El aire caliente o el vapor que s...

Page 38: ...un buen sellado Se debe tenet cuidado de no frotar dadar ni mover la junta No use limpiadores para homo No se deber_ usar limpiadores comerciales para homo ni revestimientos de protecci6n para hornos...

Page 39: ...remas y pa_os recomendados Da_os a la estufa de vidrio provocados pot derrames endurecidos de materiales azucarados o plastico derretido que no se limpiaron de acuerdo con las instrucciones det Manual...

Page 40: ...a traves de nuestro sitio web con todos los detaltes incluyendo su nOmero tetef6nico o escriba a General Manager Customer Relations GE Appliances Appliance Park Louisville KY 40225 _Busca Algo Mas iG...

Page 41: ...energia con una fraccion indica la configuracion adicional de medio paso Usted puede it chasquidos que indican que el control esta manteniendo su configuracion deseada Unidad de superficie _nica Conf...

Page 42: ...horas La Warming Zone zona de alentamiento se encuentra en la parte trasera central de la superficie de vidrio Para utilizar la Warming Zone zona de alentamiento 1 Presione la tecla Warming Zone On Of...

Page 43: ...de superficie se hayan apagado la estufa de vidrio retiene suficiente calor para continuar ta cocci6n Para evitar la sobrecocci6n quite tas ollas de tas unidades de superficie cuando los alimentos es...

Page 44: ...pobre Raya la superficie CeramJca No se recomienda Desempeffo pobre Puede rayar la superficie HJerro fundido No se recomienda a menos que se encuentre especificamente diseffado para estufas de vidrio...

Page 45: ...mar la hora del dia en que desea que el horn se encienda y presione Start Iniciar Presione el rood de cocci6n deseado y la temperatura y luego presione Start Iniciar Si Io desea tambien puede ser prog...

Page 46: ...cienda y presione Start Iniciar Presione el rood de cocci6n i0 ii i2 13 deseado y la temperatura y luego presione Start Iniciar Si Io desea tambien puede ser programado un tiempo de cocci6n Siga las i...

Page 47: ...HI Pitido Alto medio Std bEEP Std Pitido Estandar y apagado oFF bEEP oFF Pitido Apagado Presione la tecla Cook Time Tiempo de Cocci6n para visualizar al configuraci6n actual o para modificar la confi...

Page 48: ...corrido deslizable con una toalla de papet agite et tubricante de grafito y coloque 4 gotitas en los dos recorridos inferiores de los lados izquierdo y derecho Abra y cierre et estante varias veces pa...

Page 49: ...ctan et horneado Las otlas oscuras revestidas y opacas absorben el calor mas rapidamente que las ollas ctaras y britlantes AI usar ollas que absorben et calor mas rapidamente tas comidas podran result...

Page 50: ...este mode presione ta tecla Convection Bake Hornear per Conveeoi6n ingrese una temperatura y luego presione Start Inieiar Siempre realice et precalentamiento al usar este mode Mode para Asar Para un m...

Page 51: ...e la configuraci6n deseada para la sonda y el modo de cocci6n presionando la tecla Probe Sonda e ingresando la temperatura deseada para la comida luego presione la tecla de modo de cocci6n Homeado Tra...

Page 52: ...ar Alto Ase Pechugas patas muslos con del lado de la piel hacia abajo primero Preste atenci6n a la comida al asar huesos Asado Bajo 2 o 3 la Mantenga la puerta abierta al asar en el homo inferior Para...

Page 53: ...sar Mantenga la puerta cerrada al asar en el homo superior Preste Pescado Asado Bajo 1 atenci6n a ta comida al asarla Para un mejor rendimiento centre la comida debajo del elemento calentador para asa...

Page 54: ...rantia Quite las cucharas de servicio etc antes de colocar recipientes en et caj6n calentador Tabla de seleccion de temperatura Para mantener calientes diferentes tipos de alimentos establezca el cont...

Page 55: ...daSar_n el acabado Exterior de la Cocina Limpie et mismo con agua y jab6n o una soluci6n de vinagre y agua Enjuague con agua limpia y seque con una tela seca AI limpiar supeficies asegQrese de que est...

Page 56: ...s num icas para ingresar un tiempo diferente y presionando Start Iniciar Si desea usar el tiempo por omisi6n presione la tecla Start Iniciar inmediatamente luego de presionar la tecla Self Clean Limpi...

Page 57: ...as del limpiador de estufas ceramicas CERAMA BRYTE sobre toda et area de residuos pegados 3 Utilizando el patio de limpieza CERAMA BRYTE para estufas ceramicas incluido frote et area sucia aplicando p...

Page 58: ...bierto por ta garantia a menos que et derrame se quite mientras esta caliente Debe tenerse mucho cuidado al remover sustancias catientes AsegQrese de utitizar un raspador nuevo y afitado No utitice ho...

Page 59: ...en linea recta dentro del recept_culo hasta et tope 4 Coloque tas lengQetas de la cubierta de vidrio dentro de los surcos del portalamparas Gire la cubierta de vidrio en sentido de las manecillas del...

Page 60: ...ci6n de bloqueo 5 Cierre la puerta del horno Bloqueo de la bisagra EmpL_je los bloqueos de la bisagra hacia abajo para desbloquear Posicion de retiro Brazo de l la bisagra _ Bloqueo de la bisagra Empu...

Page 61: ...e que et etemento calentador det caj6n este frio NOTA Deje que et caj6n calentador se enfrien antes de quitar et recipiente NOTA Limpie los derrames rapidamente despues de cada uso Nunca coloque utili...

Page 62: ...de forma diferente Para evitar rayones use los procedimientos de limpieza recomendados Verifique que las bases de los recipientes esten limpias antes del uso y utilice recipientes con bases lisas Ver...

Page 63: ...demasiado sucio El ciclo de limpieza autom tica rue seleccionado pero la puerta no est cerrada La puerta del homo est bloqueada debido a que la temperatura interior del homo no descendi6 por debajo de...

Page 64: ...mpieza tiempo de coccibn o de inicio Resulta dificil destizar tas Las parrillas de color plateado brillante se bandejas del horn limpiaron en un ciclo de auto limpieza Emisibn de vapor desde la Cuando...

Reviews: