background image

18

49-2000375   Rev. 2

Cleaning The Oven - Interior

The interior of your new oven can be cleaned manually or by using Steam Clean or Self Clean modes.

Spillage of marinades, fruit juices, tomato sauces and basting liquids containing acids may cause discoloration and 

VKRXOGEHZLSHGXSLPPHGLDWHO\/HWKRWVXUIDFHVFRROWKHQFOHDQDQGULQVH

Manual Cleaning

'RQRWXVHRYHQFOHDQHUVXQOHVVFHUWLILHGIRUVHOI

cleaning oven), strong liquid cleansers, steel wool, or 
scouring pads on the interior of the oven. Clean with 
a mild soap and water, or vinegar and water solution. 

Rinse with clean water and dry with a soft cloth. When 
cleaning surfaces, make sure that they are at room 
temperature.

Steam Clean Mode

Steam clean is intended to clean small spills using water 
and a lower cleaning temperature than Self-Clean. 

To use the Steam Clean feature, wipe grease and soils 
from the oven. Pour one cup of water into the bottom of 
the oven. Close the door. Press the 

More

 option, then 

select 

Steam


Clean

, and press 

Start

. You should not 

open the door during the 30 minute steam clean as this 
will decrease the steam clean performance. Wipe out any 
excess water and any remaining soil. 

NOTE:

 Water in 

the bottom of the oven may be hot right after finishing the 
cycle.

Self Clean Mode

5HDG6HOI&OHDQLQJ2YHQ6DIHW\,QVWUXFWLRQVDWWKH

beginning of this manual before using Self Clean Mode. 
Self clean uses very high temperatures to clean the oven 
interior. The oven door will lock when using this feature. 

%HIRUHRSHUDWLQJWKHVHOIFOHDQF\FOHZLSHXSJUHDVHDQG

soils from the oven. Remove all items from the oven other 
than enameled (dark color) racks. Shiny or silver racks, 
the meat probe, and any cookware or other items should 
all be removed from the oven before initiating a self clean 

F\FOH&ORVHWKHGRRU,IXVLQJDGRXEOHRYHQVHOHFWZKLFK

oven you would like to clean. Select the 

More

 option, then 

Self Clean

. Choose a 3, 4, or 5 hour cycle, and select 

the illuminated 

Start

 pad to the right of the screen. For 

heavily soiled ovens, the maximum 5 hour clean time is 

UHFRPPHQGHG,I\RXZLVKWRXVHWKHGHIDXOWWLPHSUHVV

Start

 immediately after selecting 

Self Clean

. The oven 

will show that the door has locked and display the amount 
of time remaining in the cycle. Press the illuminated 

Cancel

 pad to the right of the screen if you wish to stop 

the cycle. The oven will turn off automatically when the 
self clean cycle is complete. The door will stay locked 
until the oven has cooled down. After the oven has cooled 
down wipe any ash out of the oven.

We recommend venting your kitchen with an open 
window or using a ventilation fan or hood during the first 
self-clean cycle.

Soil on the front frame of the oven and outside the 
gasket on the door will need to be cleaned by hand. 
Clean these areas with hot water, soap-filled steel wool 
pads or cleaners such as Soft Scrub

®

. Rinse well with 

clean water and dry.

'RQRWFOHDQWKHJDVNHW7KHILEHUJODVVPDWHULDORI
WKHRYHQGRRUJDVNHWFDQQRWZLWKVWDQGDEUDVLRQ,WLV
HVVHQWLDOIRUWKHJDVNHWWRUHPDLQLQWDFW,I\RXQRWLFHLW

becoming worn or frayed, replace it.

Make sure the oven light bulb cover is in place and the 
oven light is off. When using the Self Clean Mode in a 

GRXEOHRYHQRQO\WKHXSSHURUORZHURYHQFDQXWLOL]H

the cycle at one time. Additionally, no other mode may 
be started in the alternate oven cavity while self clean is 
in progress.

IMPORTANT:

 The health of some birds is extremely 

sensitive to the fumes given off during the self-cleaning 
cycle of any range. Move birds to another well-ventilated 
room.

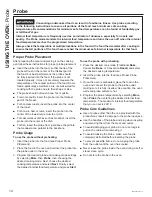
Probe

The temperature probe may be cleaned with soap and 
water or a soap-filled scouring pad. Cool the temperature 
probe before cleaning. Scour stubborn spots with a soap-
filled scouring pad, rinse and dry.

To order additional temperature probes see the 
Accessories and Consumer Support sections at the end of 
this manual.

Ŷ

'RQRWLPPHUVHWKHWHPSHUDWXUHSUREHLQZDWHU

Ŷ

'RQRWVWRUHWKHWHPSHUDWXUHSUREHLQWKHRYHQ

Ŷ

'RQRWOHDYHWKHWHPSHUDWXUHSUREHLQVLGHWKHRYHQ

during a self or steam clean cycle.

CARE AND CLEANING: 

&OHDQLQJ7KH2YHQ,QWHULRU3UREH

Summary of Contents for PTS700R

Page 1: ...49 2000375 Rev 2 05 20 GEA GE is a trademark of the General Electric Company Manufactured under trademark license 30 Single Wall Oven PTS7000 PTS700L PTS700R 30 Double Wall Oven PTD7000 PTD700L PTD700...

Page 2: ...ry GE Appliances product and we think you will too Among other things registration of your appliance ensures that we can deliver important product information and warranty details when you need them R...

Page 3: ...time for cooling first Other surfaces of the appliance may become hot enough to cause burns Potentially hot surfaces include the oven vent opening surfaces near the opening and crevices around the ov...

Page 4: ...t in oven KHQ XVLQJ FRRNLQJ RU URDVWLQJ EDJV LQ WKH RYHQ follow the manufacturer s directions 3XOOLQJ RXW WKH VWDQGDUG UDFNV WR WKHLU VWRS ORFNV or the extension rack to its fully open position is D F...

Page 5: ...s These limits are designed to a provide reasonable protection against harmful interference in a residential installation This equipment generates uses and can radiate radio frequency energy and if no...

Page 6: ...selected Precision cooking cycles vary based on food type see the Cooking Modes section for more detailed information Oven Light To turn on or off the oven cavity lights press the RWK cavity lights w...

Page 7: ...internet and download apps 2 You will need to know the password of your home Wi Fi router Have this password ready while you are setting up your GE Appliances oven 3 On your smart phone or tablet visi...

Page 8: ...ime functions Sabbath mode can only be used with WUDGLWLRQDO DNH 7KLV IHDWXUH FRQIRUPV WR WKH 6WDU Jewish Sabbath requirements Please reference the Sabbath Mode section for more information Sound This...

Page 9: ...ing the Temperature During a Sabbath Bake I WKH WHPSHUDWXUH QHHGV WR EH DGMXVWHG DIWHU SURJUDPPLQJ WKH RYHQ IRU D 6DEEDWK DNH SUHVV RQH of the temperature icons displayed on the Sabbath cycle screen a...

Page 10: ...possible burns place the racks in the desired position before you turn the oven on Flat Racks When placing and removing cookware pull the rack out to the bump stop position on the rack support To remo...

Page 11: ...side paddles on the rack disengage from the oven support 2 Slide the rack toward you to the bump stop position on the rack support 3 Firmly grasp both sides of the rack frame and the sliding rack til...

Page 12: ...eat and or foods RX SUHIHU OHVV GRQH RQ WKH LQWHULRU 7KH RZ VHWWLQJ LV preferred for thicker cuts of meat and foods you like to be FRRNHG DOO WKH ZD WKURXJK W LV QRW QHFHVVDU WR SUHKHDW the oven for t...

Page 13: ...r rising fermenting and proofing bread doughs Press the More option on the main menu then Proof then Start Cover dough well to SUHYHQW GU LQJ RXW UHDG ZLOO ULVH PRUH UDSLGO WKDQ DW room temperature NO...

Page 14: ...e or joint RU FDVVHUROHV RU GLVKHV VXFK DV PHDWORDI LQVHUW WKH probe into the center of the dish RU ILVK LQVHUW WKH SUREH IURP MXVW DERYH WKH JLOO LQWR the meatiest area parallel to the backbone Probe...

Page 15: ...ss less searing and up for greater searing browning when broiling For best performance when broiling center food below the broil heating element Whole turkey 7UDGLWLRQDO DNH Convection Roast 1 or 2 8V...

Page 16: ...food in a single layer on the pan do not overload the pan Always check internal food temperature to confirm minimum safe temperatures have been reached Minimum safe food temperatures can be found on...

Page 17: ...best results Spillage of marinades fruit juices tomato sauces and basting liquids containing acids may cause discoloration DQG VKRXOG EH ZLSHG XS LPPHGLDWHO HW KRW VXUIDFHV cool then clean and rinse C...

Page 18: ...Start pad to the right of the screen For heavily soiled ovens the maximum 5 hour clean time is UHFRPPHQGHG I RX ZLVK WR XVH WKH GHIDXOW WLPH SUHVV Start immediately after selecting Self Clean The ove...

Page 19: ...e hinge bracket if present The hinge bracket must be replaced for proper door functionality 6 Close the oven door Oven Door Hinge in RFNHG Position 1RWFK RI LQJH Securely Fitted QWR RWWRP RI Hinge Slo...

Page 20: ...hot pan Make sure cookware is cool Cookware not suited for broiling 8VH D SDQ VSHFLILFDOO GHVLJQHG IRU EURLOLQJ Aluminum foil used on the broiling pan and grid has not been fitted properly and slit as...

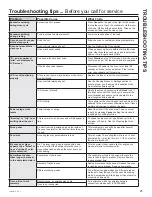
Page 21: ...RIWZDUH XSGDWH I LVVXH persists call service to assess the issue Power outage clock resets Power outage or surge 5HVHW WKH FORFN I WKH RYHQ ZDV LQ XVH RX PXVW reset it by pressing Cancel setting the c...

Page 22: ...WARRANTY GE Appliances Electric Oven Limited Warranty EXCLUSION OF IMPLIED WARRANTIES RXU VROH DQG H FOXVLYH UHPHG LV SURGXFW UHSDLU DV SURYLGHG LQ WKLV LPLWHG DUUDQW Q LPSOLHG ZDUUDQWLHV including th...

Page 23: ...rs and website information The following products and more are available Accessories Accessories 6PDOO URLOHU 3DQ DUJH URLOHU 3DQ URLOHU 3DQ Parts Oven racks Oven elements LJKW EXOEV Probe Cleaning Su...

Page 24: ...rn about special discounts that are available while your warranty is still in effect You can purchase it on line anytime GE Appliances Services will still be there after your ZDUUDQW H SLUHV Q WKH 86...

Page 25: ...ia de marca Horno de Pared Simple de 30 PTS7000 PTS700L PTS700R Horno de Pared Doble de 30 PTD7000 PTD700L PTD700R INFORMACI N DE SEGURIDAD 3 USO DEL HORNO Controles del Horno 6 Horno Doble 7 Settings...

Page 26: ...y creemos que usted tambi n Entre otras cosas el registro de su electrodom stico asegura que podamos entregarle informaci n importante del producto y detalles de la garant a cuando los necesite Regis...

Page 27: ...tico se podr n calentar lo suficiente como para ocasionar lesiones Las superficies potencialmente calientes incluyen la abertura de la ventilaci n del horno superficies cercanas a la abertura y grieta...

Page 28: ...empujar el estante extensible hasta la posici n completamente abierta para levantar comidas pesadas Esto tambi n es una precauci n contra quemaduras por tocar superficies calientes de la puerta o las...

Page 29: ...H GH OD 1RUPDWLYD de la FCC Estos l mites fueron dise ados para a brindar una protecci n razonable contra interferencias nocivas en una instalaci n residencial Este equipo genera usa y puede emitir en...

Page 30: ...e cocci n de precisi n var an de acuerdo al tipo de comida para acceder a informaci n m s detallada consulte la secci n de Modos de Cocci n Oven Light Luz del Horno Para encender o apagar las luces de...

Page 31: ...licaciones 8VWHG GHEHUi FRQRFHU OD FRQWUDVHxD GHO HQUXWDGRU L L GH su hogar Tenga esta contrase a a mano al configurar el horno de GE Appliances 3 En su tel fono inteligente o tableta visite GEApplian...

Page 32: ...ecci n los modos de Broil Asar Warm Calentar Proof Leudar y todas las funciones de tiempo El modo sab tico s lo puede ser usado con la funci n tradicional de Bake Hornear Esta funci n se activa confor...

Page 33: ...las configuraciones que program para Sabbath Bake Horneado Sab tico Ajuste de Temperatura Durante un Horneado Sab tico Si es necesario ajustar la temperatura luego de programar el horno para Sabbath B...

Page 34: ...r posibles quemaduras coloque los estantes en la posici n deseada antes de encender el horno Estantes Planos Al colocar y retirar utensilios de cocina empuje el estante hacia afuera del tope posici n...

Page 35: ...vidad 2 Deslice la parrilla hacia usted hasta que llegue al tope posici n detenida del soporte de la parrilla 3 Tome de manera firme ambos lados de la estructura del estante y deslizando este ltimo in...

Page 36: ...Low Baja es preferida para cortes m s gruesos de carne y FRPLGDV TXH GHVHH TXH VHDQ FRFLQDGDV FRPSOHWDPHQWH 1R es necesario calentar el horno previamente en estos modos Modos de Convecci n Estos modo...

Page 37: ...icionales para utilizar este modo en la Gu a de Cocci n Leudar El modo Proof Leudar est dise ado para elevar fermentar y leudar masas de pan Presione la opci n More M s en el men principal luego Proof...

Page 38: ...o 3DUD FRFLQDU SHVFDGR LQVHUWH OD VRQGD MXVWR DUULED GH OD agalla en la zona m s carnosa paralela a columna Uso de la Sonda Para usar la sonda sin precalentamiento QVHUWH OD VRQGD HQ OD FRPLGD FRQVXOW...

Page 39: ...ara un mejor rendimiento centre la comida debajo del elemento calentador para asar Pavo entero Horneado Tradicional Dorado por Convecci n 1 o 2 8VD XQD ROOD FKDWD WDO FRPR XQD ROOD SDUD DVDU 1R VH UHT...

Page 40: ...R YROWHDU R UHYROYHU OD FRPLGD GXUDQWH OD cocci n 8ELTXH OD FRPLGD HQ XQD VROD FDSD VREUH OD EDQGHMD VLQ sobrecargar la misma Siempre controle la temperatura interior de la comida a fin de confirmar q...

Page 41: ...te y l quidos para humedecer que contengan cidos pueden ocasionar descoloraci n y se deber n limpiar de inmediato Deje que las superficies calientes se enfr en y luego limpie y enjuague Superficies pi...

Page 42: ...Limpieza Autom tica Elija un ciclo de 3 4 o 5 horas y seleccione la tecla Start Iniciar iluminada sobre la parte derecha de la pantalla Para hornos con niveles de suciedad excesiva se recomienda usar...

Page 43: ...e ser colocado nuevamente para un funcionamiento apropiado de la puerta 6 Cierre la puerta del horno Puerta del Horno Bisagra en la posici n de trabado Ranura de la bisagra bien colocada en la parte i...

Page 44: ...R GH FRFLQD LQDGHFXDGR SDUD DVDU 8VH XQD ROOD HVSHFtILFDPHQWH GLVHxDGD SDUD DVDU El papel de aluminio usado para la olla y la rejilla para asar no se ajust ni cort de forma apropiada seg n lo recomend...

Page 45: ...ema persiste comun quese con el servicio t cnico para evaluar el mismo Corte de corriente el reloj se reinicia Corte o exceso de corriente Reinicie el reloj Si el horno se encontraba en uso deber rein...

Page 46: ...R UHTXHULGR 6ROLFLWH HO VHUYLFLR WpFQLFR SDUD UHSDUDU R UHHPSOD DU ODV l mparas excepto las l mparas LED EXCLUSI N DE GARANT AS IMPL CITAS Su nica y exclusiva alternativa es la reparaci n del producto...

Page 47: ...sponibles Accesorios Accesorios Olla para Asar Peque a 8 x 1 x 13 Olla para Asar Grande 12 x 1 x 16 Olla para Asar Extra Grande 17 x 1 x 19 Piezas Estantes del horno Elementos del horno L mparas de lu...

Page 48: ...ntras su garant a a n est vigente La puede adquirir en cualquier momento a trav s de Internet Los servicios de GE Appliances a n estar n all cuando su garant a caduque Q 88 GEAppliances com extended w...

Reviews: