background image

49-88057-2

21

CUIDADO Y LIMPIEZA:

 Cómo limpiar la estufa de vidrio

Cómo limpiar la estufa de vidrio (Continúa)

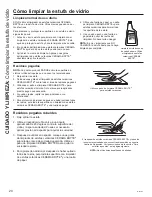
Marcas de metal y rayones

1.   Tenga cuidado de no deslizar ollas y sartenes a través de 

su estufa. Dejará marcas de metal sobre la superficie de la 
estufa.


 Estas marcas pueden quitarse utilizando limpiador de 

HVWXIDVFHUiPLFDV&(5$0$%5<7(

®

 con el paño de 

OLPSLH]D&(5$0$%5<7(

®

 para estufas cerámicas.

2.   Si se permite que ollas con una capa fina de aluminio 

o cobre hiervan en seco, la capa puede dejar una 
decoloración negra en la estufa.


Esto debe quitarse de inmediato antes de calentar de 
nuevo o la decoloración puede llegar a ser permanente.

NOTA:

 Verifique con detenimiento que la base de las ollas no 

sea áspera para no rayar la estufa.

Daños por derrames azucarados y plástico derretido

Se deberá tener especial cuidado al eliminar sustancias calientes, 

a fin de evitar daños permanentes sobre la superficie de 

vidrio.

 Los derrames azucarados (como gelatinas, dulce, caramelo, jarabes) o plásticos derretidos pueden marcar la superficie 

de la estufa (no cubierto por la garantía) a menos que el derrame se quite mientras está caliente. Debe tenerse mucho cuidado al 
remover sustancias calientes.

Asegúrese de utilizar un raspador nuevo y afilado.

No utilice hojas desafiladas o dañadas.

1.   Apague todas las unidades de superficie. Quite las ollas 

calientes.

 8WLOL]DQGRXQJXDQWHGHFRFLQD

 D8VHXQUDVSDGRUGHILOR~QLFRUDVSDGRUSDUDHVWXIDV

FHUiPLFDV&(5$0$%5<7(

®

) para desplazar el 

derrame a un área fría de la estufa.


   b.  Quite el derrame con toallas de papel.

3.   Cualquier derrame restante debe dejarse hasta que la 

superficie de la estufa se haya enfriado.

4.   No use las unidades de superficie de nuevo hasta que 

todos los restos se hayan eliminado por completo.

NOTA:

 Si la superficie de vidrio ya ha sufrido marcas o 

hendiduras, el vidrio de la estufa deberá cambiarse. En ese 
caso, será necesaria la atención de un técnico.

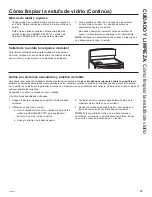
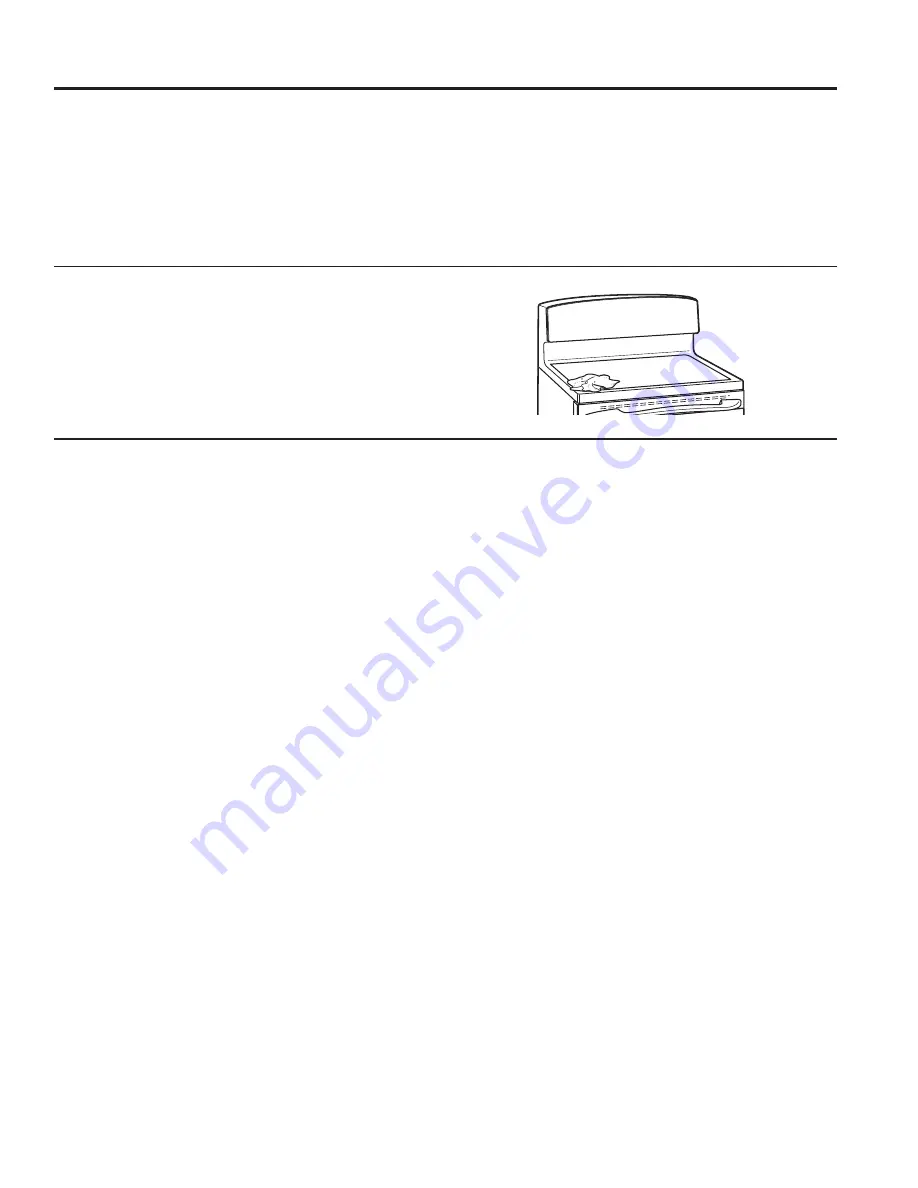
Sellado de la estufa (en algunos modelos)

Para limpiar el sellado de la estufa alrededor de los bordes 
de vidrio, coloque un paño húmedo sobre los mismos durante 
unos minutos y luego limpie con limpiadores no abrasivos.

Summary of Contents for RB720DHBB

Page 1: ...18 GEA GE is a trademark of the General Electric Company Manufactured under trademark license SAFETY INFORMATION 3 USING THE RANGE Surface Units 8 Cookware for Radiant Glass Cooktop 10 Oven Controls...

Page 2: ...nto every GE Appliances product and we think you will too Among other things registration of your appliance ensures that we can deliver important product information and warranty details when you need...

Page 3: ...8VH WKLV DSSOLDQFH RQO IRU LWV LQWHQGHG SXUSRVH DV described in this Owner s Manual H VXUH RXU DSSOLDQFH LV SURSHUO LQVWDOOHG DQG grounded by a qualified installer in accordance with the provided inst...

Page 4: ...GU FKHPLFDO RU IRDP W SH fire extinguisher I WKHUH LV D ILUH LQ WKH RYHQ GXULQJ EDNLQJ VPRWKHU the fire by closing the oven door and turning the oven off or by using a multi purpose dry chemical or fo...

Page 5: ...IRRGV XQGHU D KRRG WXUQ the fan on I SRZHU LV ORVW WR DQ HOHFWULF FRRNWRS ZKLOH D surface unit is ON the surface unit will turn back on as soon as power is restored In the event of power loss failure...

Page 6: ...le still hot using an oven mitt and a scraper See the Cleaning the glass cooktop section for detailed instructions 5HDG DQG IROORZ DOO LQVWUXFWLRQV DQG ZDUQLQJV RQ WKH cleaning cream label WARNING OVE...

Page 7: ...G OVEN SAFETY INSTRUCTIONS on some models The self cleaning feature operates the oven at temperatures high enough to burn away food soils in the oven Follow these instructions for safe operation R QRW...

Page 8: ...D RQ XQWLO WKH XQLW LV FRROHG WR approximately 150 F USING THE RANGE 6XUIDFH 8QLWV Surface Units WARNING FIRE HAZARD Never leave the range unattended with the cooktop on medium or high settings HHS IO...

Page 9: ...ear in a short time NOTE On models with light colored glass cooktops it is normal for the cooking zones to change color when hot or cooling down This is temporary and will disappear as the glass cools...

Page 10: ...pans can cause permanent damage to cooktop glass The enamel can melt and bond to the ceramic cooktop Glass ceramic Poor performance Will scratch the surface Stoneware Poor performance May scratch the...

Page 11: ...the timer off press the Timer pad 8 Delay Time HOD V ZKHQ WKH RYHQ ZLOO WXUQ RQ 8VH WKLV WR VHW D WLPH ZKHQ RX ZDQW WKH RYHQ WR VWDUW Press the Delay Time pad and use the pads to program the time of d...

Page 12: ...reful not to overtighten 4 Replace the knob matching the flat area of the knob to the shaft and check performance Clock on some models The clock on your range is powered by the range itself No batteri...

Page 13: ...s feature are 12 SHdn no SHdn and SAb 12 hour auto shut off turns off the oven after 12 hours of continuous operations 6DEEDWK PRGH GLVDEOHV WKH RYHQ OLJKWV WKH RYHQ OLJKW ZLOO QRW WXUQ RQ ZKHQ WKH GR...

Page 14: ...in a browner crisper and thicker crust If using dark and coated cookware check food earlier than minimum cook time If undesirable results are obtained with this type of cookware consider reducing oven...

Page 15: ...tering and the possibility of fats igniting For best performance center food below the broil heating element Broiling on rack position 6 is not recommended Try broiling foods that you would normally g...

Page 16: ...ted in sauce avoid Broil Hi modes Broil skin side down first Watch food closely when broiling For best performance when broiling center food below the broil heating element Broil Lo Bake 1 or 2 Bonele...

Page 17: ...Painted Surfaces Painted surfaces include the sides of the range and the door top of control panel and the drawer front Clean these with soap and water or a vinegar and water solution R QRW XVH FRPPHU...

Page 18: ...mmonia to loosen the soil Rinse with clean water and polish with a clean soft cloth The drip pans may also be cleaned in a dishwasher Clean the area under the drip pans often Built up soil especially...

Page 19: ...use the default time press the Start pad immediately after pressing the Self Clean pad The oven will turn off automatically when the self clean cycle is complete and the self clean light will be off...

Page 20: ...oktop Cleaner on the entire burned residue area 8VLQJ WKH LQFOXGHG 5 0 5 7 Cleaning Pad for Ceramic Cooktops rub the residue area applying pressure as needed 4 If any residue remains repeat the steps...

Page 21: ...XJDU VSLOORYHUV VXFK DV MHOOLHV IXGJH FDQG V UXSV RU PHOWHG SODVWLFV FDQ FDXVH SLWWLQJ RI WKH VXUIDFH RI RXU FRRNWRS QRW FRYHUHG E WKH ZDUUDQW XQOHVV WKH VSLOO LV UHPRYHG ZKLOH VWLOO KRW 6SHFLDO FDUH...

Page 22: ...FRXQWHUFORFNZLVH WXUQ XQWLO the tabs of the glass cover clear the grooves of the socket Wearing latex gloves may offer a better grip 2 Remove the bulb by turning it counter clockwise To replace 1 Rep...

Page 23: ...of the slots in the range frame To Replace the Door 1 Firmly grasp both sides of the door near the top 2 With the door at the same angle as the removal position rest the notch in the bottom of the le...

Page 24: ...Make sure bottoms of cookware are clean before use and use cookware with smooth bottoms Areas of discoloration on the cooktop Food spillovers not cleaned before next use See the Cleaning the glass coo...

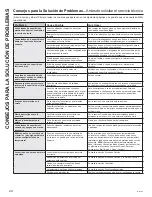
Page 25: ...n is not in Sabbath Mode See the Special Features section Crackling or popping sound This is the sound of the metal heating and cooling during both the cooking and cleaning functions This is normal Wh...

Page 26: ...mber or letter flash in the display You have a function error code Press the Cancel Off pad Allow the oven to cool for one hour Put the oven back into operation If the function code repeats LVFRQQHFW...

Page 27: ...e pad and desired temperature or the Self Clean pad and desired clean time Oven racks are difficult to slide The shiny silver colored racks were cleaned in a self clean cycle Apply a small amount of v...

Page 28: ...28 49 88057 2 Notes...

Page 29: ...49 88057 2 29 Notes...

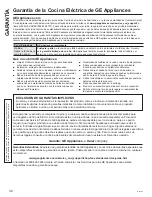
Page 30: ...GHOLYHU 3URGXFW QRW DFFHVVLEOH WR SURYLGH UHTXLUHG VHUYLFH 6HUYLFH WR UHSDLU RU UHSODFH OLJKW EXOEV H FHSW IRU ODPSV WARRANTY GE Appliances Electric Range Warranty EXCLUSION OF IMPLIED WARRANTIES You...

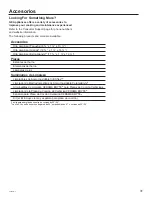
Page 31: ...U 3DQ DUJH URLOHU 3DQ URLOHU 3DQ Parts Oven racks Oven burners Light bulbs Cleaning Supplies CitruShine Stainless Steel Wipes CERAMA BRYTE Stainless Steel Appliance Cleaner CERAMA BRYTE Cleaning Pads...

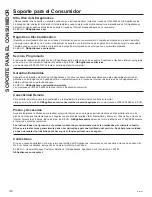
Page 32: ...e available while your warranty is still in effect You can purchase it on line anytime GE Appliances Services will still be there after your ZDUUDQW H SLUHV Q WKH 86 GEAppliances com extended warranty...

Page 33: ...EGURIDAD 3 USO DE LA COCINA Unidades de superficie 8 Utensilio para Placa de Cocci n para Vidrio Radiante 10 Controles del Horno 11 Funciones Especiales 13 Estantes del Horno 14 Papel de Aluminio y Co...

Page 34: ...creemos que usted tambi n Entre otras cosas el registro de su electrodom stico asegura que podamos entregarle informaci n importante del producto y detalles de la garant a cuando los necesite Registre...

Page 35: ...O TXH IXH creado como se describe en este Manual del Propietario VHJ UHVH GH TXH XQ WpFQLFR FDOLILFDGR UHDOLFH XQD correcta instalaci n y puesta a tierra del artefacto de acuerdo con las instrucciones...

Page 36: ...eras telas recubrimientos de pared cortinas y gasolina u otros vapores y l quidos inflamables 1XQFD XVH YHVWLPHQWDV KROJDGDV R DPSOLDV PLHQWUDV utilice el aparato Estas vestimentas pueden prenderse fu...

Page 37: ...XQ FRUWH GH OX HQ XQD FRFLQD HOpFWULFD mientras la unidad superficial est en ON Encendido la unidad se volver a encender cuando regrese la luz En caso de falta de corriente si no se giran todas las p...

Page 38: ...adas ver la secci n C mo limpiar la estufa de vidrio HD FXPSOD FRQ WRGDV ODV LQVWUXFFLRQHV DGYHUWHQFLDV de la etiqueta de la crema de limpieza ADVERTENCIA INSTRUCCIONES DE SEGURIDAD DEL HORNO 0DQWpQJD...

Page 39: ...a 1R XVH OLPSLDGRUHV SDUD KRUQR 1R VH GHEHUi XVDU limpiadores comerciales para horno ni revestimientos de protecci n para hornos de ning n tipo en o alrededor de cualquier parte del horno ADVERTENCIA...

Page 40: ...tro y gire en cualquiera de las direcciones hasta la configuraci n que desee 8QD OX LQGLFDGRUD GH GH VXSHUILFLH HQ 21 QFHQGLGR EULOODUi cuando una unidad superficial est encendida Para superficies de...

Page 41: ...os con estufas de vidrio de color claro es normal que las zonas de cocci n cambien de color cuando est n calientes o enfri ndose Esto es temporal y desaparecer a medida que el vidrio se enfr e a tempe...

Page 42: ...c os puede provocar da os permanentes al vidrio de las estufas El esmalte puede derretirse y adherirse a la estufa cer mica Vidrio cer mico Desempe o pobre Raya la superficie Cer mica Desempe o pobre...

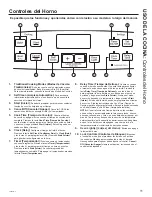
Page 43: ...omplet Para apagar el temporizador presione la tecla Timer Temporizador 8 Delay Time Tiempo de Retraso Genera un retraso FXDQGR HO KRUQR HV HQFHQGLGR 8VH HVWD WHFOD SDUD FRQILJXUDU el momento en que d...

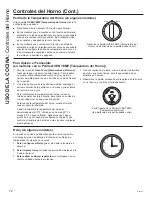
Page 44: ...ontrole el funcionamiento Reloj en algunos modelos El reloj de su cocina es alimentado por la misma cocina No es necesario el uso de bater as El tiempo es exhibido sin temporizador ni alarmas con soni...

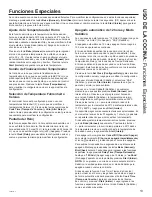
Page 45: ...horas apaga el horno luego de 12 horas de operaciones continuas El modo sab tico desactiva las luces del horno la luz del horno no se encender cuando la puerta sea abierta todos los sonidos el contro...

Page 46: ...odr n resultar m s doradas crocantes y con una capa m s gruesa Si utiliza utensilios oscuros y revestidos controle la comida antes del tiempo m nimo de cocci n Si se obtienen resultados no deseados co...

Page 47: ...sibilidad de que se incendien las grasas No se recomienda asar en el estante de la posici n 6 Intente asar las comidas que normalmente har a a la parrilla Ajuste las posiciones de los estantes para aj...

Page 48: ...RQ VDOVD HYLWH ORV PRGRV URLO L Asar Alto Ase del lado de la piel hacia abajo primero Preste atenci n a la comida al asarla Para un mejor rendimiento centre la comida debajo del elemento calentador pa...

Page 49: ...del panel de control y el frente del caj n L mpielas con jab n y agua o con una soluci n de agua y vinagre No utilice limpiadores de horno comerciales polvos limpiadores esponjillas de acero o abrasi...

Page 50: ...una bolsa pl stica con de taza de amon aco para aflojar la suciedad Enjuague con agua limpia y pula con una tecla suave y limpia Las cubetas de goteo tambi n se pueden limpiar en un lavavajillas Limpi...

Page 51: ...iar Cuando el nivel de suciedad en el horno sea muy alto se recomienda usar el tiempo de limpieza m ximo de 5 horas Si desea usar el tiempo por omisi n presione la tecla Start Iniciar inmediatamente l...

Page 52: ...ufas cer micas 5 0 5 7 sobre toda el rea de residuos pegados 8WLOL DQGR HO SDxR GH OLPSLH D 5 0 5 7 para estufas cer micas incluido frote el rea sucia aplicando presi n seg n sea necesario 4 Si quedan...

Page 53: ...lce caramelo jarabes o pl sticos derretidos pueden marcar la superficie de la estufa no cubierto por la garant a a menos que el derrame se quite mientras est caliente Debe tenerse mucho cuidado al rem...

Page 54: ...vidrio un cuarto de giro en contra de las agujas del reloj hasta que las leng etas de la tapa de vidrio limpien las ranuras de la ficha Si usa guantes de l tex tendr un mejor agarre 2 Retire la l mpa...

Page 55: ...letamente las aberturas en las partes inferiores de los brazos de las bisagras no se apoyaron de forma correcta sobre el extremo inferior de la ranura Retire la puerta de la cocina y repita el Paso 2...

Page 56: ...as o hay part culas gruesas sal o arena entre el recipiente y la superficie de la estufa Se ha deslizado un recipiente a trav s de la superficie de la estufa Para evitar rayones use los procedimientos...

Page 57: ...bbath Mode Modo Sab tico Verifique que el horno no est en Sabbath Mode Modo Sab tico Consulte la secci n Funciones Especiales Sonido de chisporroteo o traqueo ste es el sonido de metal calent ndose o...

Page 58: ...ebido a que la temperatura interior del horno no descendi por debajo de la temperatura de bloqueo Presione la tecla Cancel Off Cancelar Apagar Deje que el horno se enfr e F y un n mero o letra titila...

Page 59: ...de la cocina El caj n est muy cargado o la carga no est equilibrada Reduzca el peso Redistribuya el contenido del caj n Emisi n de vapor desde la ventilaci n Cuando se utilizan los hornos es normal ve...

Page 60: ...28 49 88057 2 Notas...

Page 61: ...49 88057 2 29 Notas...

Page 62: ...R FRQVHFXHQWHV FDXVDGRV SRU SRVLEOHV defectos sobre este producto DxR FDXVDGR GHVSXpV GH OD HQWUHJD 3URGXFWR QR DFFHVLEOH SDUD EULQGDU HO VHUYLFLR UHTXHULGR 6ROLFLWH HO VHUYLFLR WpFQLFR SDUD UHSDUDU...

Page 63: ...ar Extra Grande 17 x 1 x 19 Piezas Estantes del horno Elementos del horno L mparas de luz Suministros de Limpieza Limpiadores de Acero Inoxidable CitriShine LPSLDGRU GH OHFWURGRPpVWLFRV GH FHUR QR LGD...

Page 64: ...a a n est vigente La puede adquirir en cualquier momento a trav s de Internet Los servicios de GE Appliances a n estar n all cuando su garant a caduque Q 88 GEAppliances com extended warranty o comun...

Reviews: