Using the oven.
GEAppliances.com
Sa
fe
ty
In
str
uc
tio
ns
O
pe
ra
tin
g I
ns
tru
cti
on
s
Sa
fe
ty
In
str
uc
tio
ns
O
pe
ra
tin
g I
ns
tru
cti
on
s
Ca
re
a
nd
C
lea
nin
g
Tro
ub
les
ho
ot
in
g T
ip
s
Co
ns
um
er
S
up
po
rt
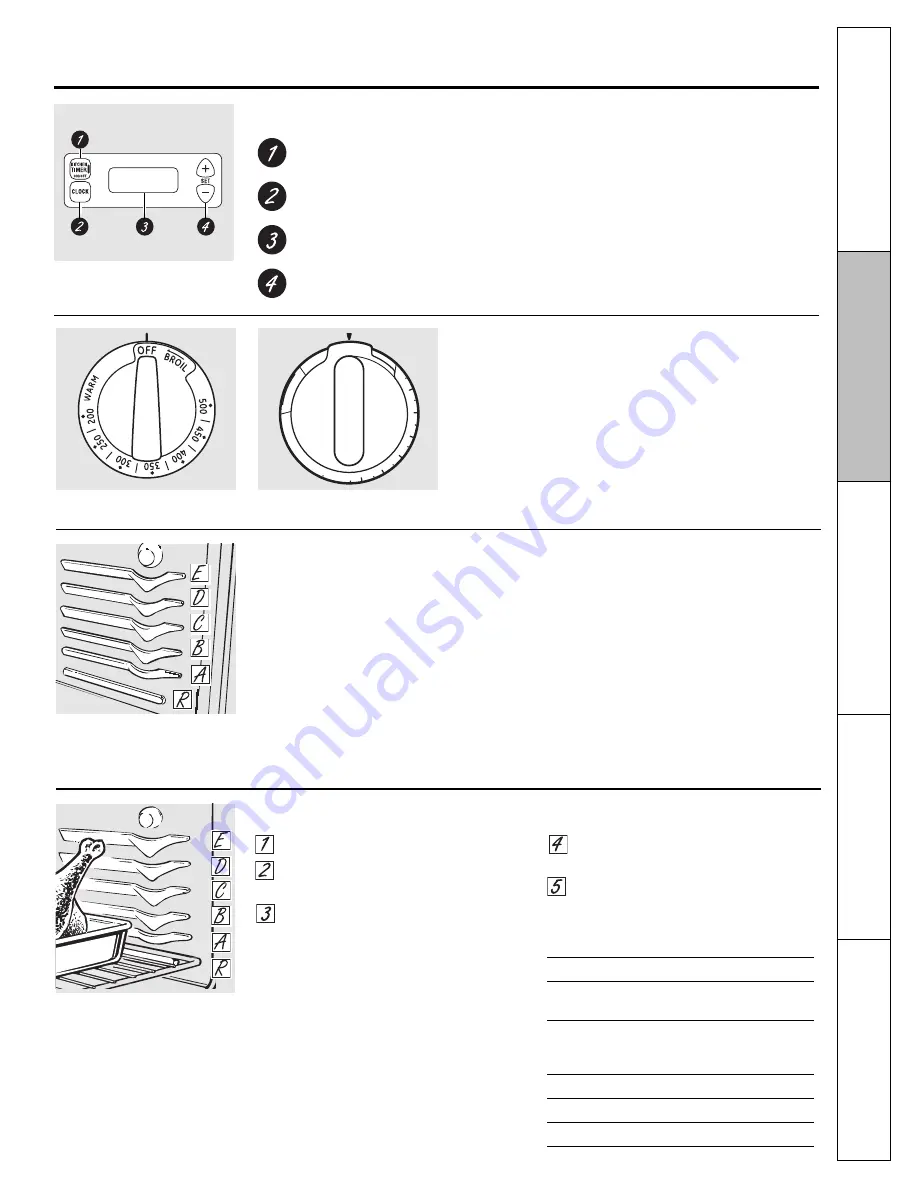
To avoid possible burns, place the racks
in the desired position before you turn the
oven on.
The racks have stop-locks, so that
when placed correctly on the rack supports
(A through E), they will stop before coming
completely out, and will not tilt.
When placing and removing cookware,
pull the rack out to the bump on the
rack support.
To remove a rack,
pull it toward you, tilt
the front end up and pull it out.
To replace,
place the end of the rack
(stop-locks) on the support, tilt up the front
and push the rack in.
NOTE:
The rack is not designed to slide out
at the special low rack (R) position.
Before you begin…
The oven has 5 rack positions.
It also has a special low rack
position (R) for extra large items,
such as a large turkey.
(On some models—
appearance will vary)
(On some models—
appearance will vary)
How to Set the Oven for Baking or Roasting
(on models without an oven temperature knob)
Touch the
BAKE
pad.
Touch the
+
or
–
pads until the desired
temperature is displayed.
Touch the
START/ON
pad.
The oven will start automatically. The display
will show
PRE
while preheating. When the
oven reaches the selected temperature, the
oven control will beep and the display will
show the oven temperature.
To change the oven temperature during BAkE
cycle, touch the
BAKE
pad and then the
+
or
–
pads to get the new temperature.
Check food for doneness at minimum
time on recipe. Cook longer if necessary.
Touch the
CLEAR/OFF
pad when baking
is finished and then remove the food
from the oven.
Type of Food
Rack Position
Frozen pies (on cookie sheet)
C
Angel food cake,
B
bundt or pound cakes
Biscuits, muffins, brownies,
B or C
cookies, cupcakes,
layer cakes, pies
Casseroles
B or C
Turkey
R or A
Roasting
R, A or B
The oven has a special low rack (R)
position just above the oven
bottom. Use it when extra cooking
space is needed, for example,
when cooking a large turkey. The
rack is not designed to slide out at
this position.
OVEN
TEMP
2
0
0
2
5
0
3
0
0
3
5
0
4
00
4
5
0
5
00
B
R
O
I
L
C
L
E
A
N
O
FF
Oven Temperature Knob
(on some models)
Turn this knob to the setting you want.
■
The oven cycling light comes on during cooking.
kITChEN TIMER ON/OFF Pad
Touch this pad to select the timer feature.
ClOCk Pad
Touch this pad before setting the clock.
Display
Shows the time of day and the time set for the timer, cook time or start time.
SET +/- Pads
These pads allow you to set the clock and timer.
Clock and Kitchen Timer
(on some models)
Appearance may vary.
11


