background image

16

49-85209-6

$OKRUQHDUFXDWURFDSDVGHWRUWDDODYH]PXHYDODV
EDQGHMDVFRPRVHPXHVWUDGHPRGRTXHQRTXHGHXQD

encima de la otra.

Cocine la comida completamente para evitar que se 
produzcan enfermedades a partir de la comida. Puede 
encontrar recomendaciones sobre temperatura mínima 
para cocinar de forma segura en 

www.IsItDoneYet.gov

.

$VHJ~UHVHGHXVDUXQWHUPyPHWURGHFRPLGDVSDUDPHGLUOD

temperatura de las mismas.

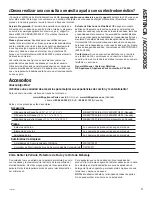
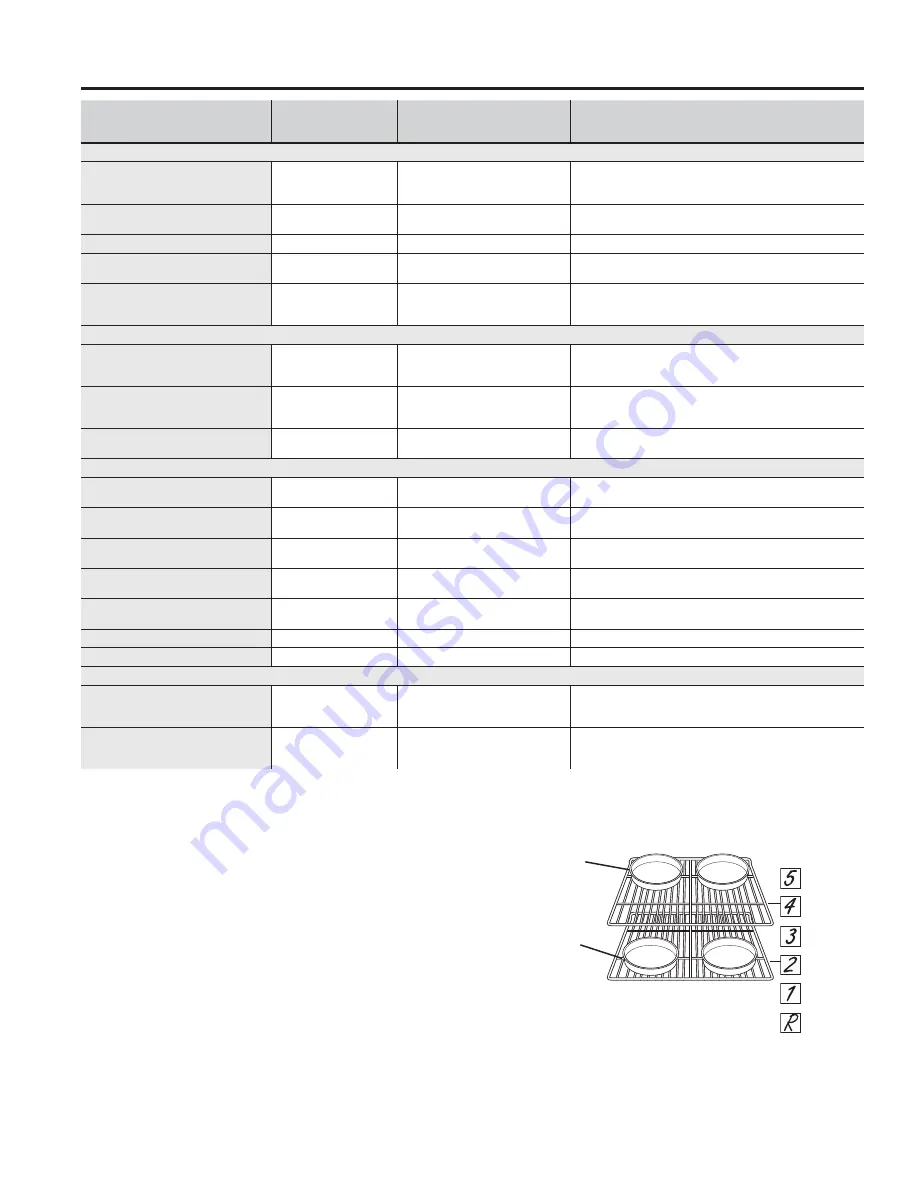
TIPO DE COMIDA

MODO(S) RECO-

MENDADO(S)

POSICIÓN(ES) DE ESTANTES 

RECOMENDADA

SUGERENCIAS ADICIONALES

Productos Horneados

7RUWDVFRQFDSDVWRUWDVUHFWDQ

-

JXODUHVURVFDVSDQHFLOORVSDQ
UiSLGRHQXQ6ROR(VWDQWH

Hornear

R

8VHXWHQVLOLRVEULOODQWHV

7RUWDVFRQFDSDVHQ0~OWLSOHV

Estantes

Hornear

2 y 4

$VHJ~UHVHGHTXHKD\DXQIOXMRGHDLUHDGHFXDGR

9HDODLOXVWUDFLyQ

7RUWDVGHJUDVDSDVWHOGHiQJHO

Hornear

1

8VHXWHQVLOLRVEULOODQWHV

*DOOHWDVJDOOHWLWDVEL]FRFKLWRVHQ
XQ6ROR(VWDQWH

Hornear

8VHXWHQVLOLRVEULOODQWHV

*DOOHWDVJDOOHWLWDVEL]FRFKLWRVHQ
0~OWLSOHV(VWDQWHV

Hornear

2 y 4

$VHJ~UHVHGHTXHKD\DXQIOXMRGHDLUHDGHFXDGR&DPELHOD

XELFDFLyQGHODFRPLGDSDUFLDOPHQWHGXUDQWHODFRFFLyQDILQGH

obtener resultados de cocción más parejos.

Bife y Cerdo

+DPEXUJXHVDV

Asar Alto

C

8VHXQDEDQGHMDSDUDDVDUPXHYDODFRPLGDPiVDEDMRSDUD

que quede más preparada y menos soasada. Preste atención a 

la comida al asarla. Centre la comida debajo del quemador.

%LIHV\&KXOHWDV

Asar Alto

C

8VHXQDEDQGHMDSDUDDVDUPXHYDODFRPLGDPiVDEDMRSDUD

que quede más preparada y menos soasada. Preste atención a 

la comida al asarla. Centre la comida debajo del quemador.

'RUDGRV

Hornear

1 o 2

'HMHVLQFXEULU

use una olla chata tal como una olla para asar. 

No se requiere precalentarla.

Ave

Pollo entero

Hornear

1 o 2

'HMHVLQFXEULUXVHXQDROODFKDWDWDOFRPRXQD

olla para asar.

3HFKXJDVSDWDVPXVORVFRQ

huesos

Asar Alto 

+RUQHDU

%

Ase del lado de la piel hacia abajo primero. Preste atención a la 

comida al asarla.

Pechugas de pollo deshuesadas

Asar Alto 

+RUQHDU

%

0XHYDODFRPLGDPiVDEDMRSDUDTXHTXHGHPiVSUHSDUDGD\

PHQRVVRDVDGD\PiVDUULEDSDUDVRDVDUGRUDUDODVDU

Pavo entero

+RUQHDU

R o 1

'HMHVLQFXEULUXVHXQDROODFKDWDWDOFRPRXQD

olla para asar.

Pechuga de Pavo

+RUQHDU

1 o 2

'HMHVLQFXEULUXVHXQDROODFKDWDWDOFRPRXQD

olla para asar.

Pescado

Asar Alto

%!SXOJDGD

Preste atención a la comida al asarla.

Cazuelas

+RUQHDU

R

Comidas Congeladas a Conveniencia

3L]]DSDSDVIULWDVWDWRUWRWV
SDWLWDVGHSROORIULWDVDSHULWLYRVHQ
XQ6ROR(VWDQWH

+RUQHDU

8VHXWHQVLOLRVEULOODQWHV

3L]]DSDSDVIULWDVWDWRUWRWV
SDWLWDVGHSROORIULWDVDSHULWLYRVHQ
0~OWLSOHV(VWDQWHV

+RUQHDU

2 y 4

8VHXWHQVLOLRVEULOODQWHV

Cambie la ubicación de la comida parcialmente durante la coc-

FLyQDILQGHREWHQHUUHVXOWDGRVGHFRFFLyQPiVSDUHMRV

Guía de Cocción 

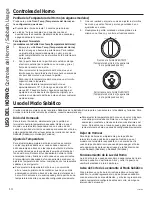
USO DEL HORNO:

 Guía de Cocción

Ubicación

Frontal

Ubicación

Trasera

Summary of Contents for RGB526DEH2BB

Page 1: ...g the Oven 17 Cleaning The Cooktop 18 Cleaning The Door and Drawer 20 Maintenance 21 Troubleshooting Tips 22 Ranges Thermostat Gas Write the model and serial numbers here Model __________________ Seri...

Page 2: ...ed to the floor or wall and slide the range back so the rear leveling leg is under the anti tip bracket If the range is pulled from the wall for any reason always repeat this procedure to verify the r...

Page 3: ...P gas If required these adjustments must be made by a qualified technician in accordance with the installation instructions and local codes The agency performing this work assumes responsibility for t...

Page 4: ...only dry pot holders moist or damp pot holders on hot surfaces may result in burns from steam Do not let pot holders touch surface burners burner grate or oven heating element Do not use a towel or ot...

Page 5: ...en foods with excessive amounts of ice Use proper pan size and avoid pans that are unstable or easily tipped Select cookware that is matched to the size of the burner Burner flames should be adjusted...

Page 6: ...oven when not in use Items stored in an oven can ignite Do not leave items on the cooktop near the oven vent which is in the center of the backguard Items may overheat resulting in a risk of fire or...

Page 7: ...ness Do not leave paper products plastics canned food or combustible materials in the drawer They may ignite Do not touch the heating element or the interior surface of the drawer These surfaces may b...

Page 8: ...ing cleaning instructions Service to repair or replace light bulbs except for LED lamps EXCLUSION OF IMPLIED WARRANTIES Your sole and exclusive remedy is product repair as provided in this Limited War...

Page 9: ...ESSORIES Try the GE Appliances Website www geappliances com service_and_support 24 hours a day any day of the year For greater convenience and faster service you can now download Owner s Manuals order...

Page 10: ...will hear a clicking noise the sound of the electric spark igniting the burner When one burner is turned to LITE all burners will spark Sparking will continue as long as the knob remains at LITE Once...

Page 11: ...r surface or oven cooking It conducts heat very slowly and cools very slowly Check cookware manufacturer s directions to be sure it can be used on gas ranges Stove Top Grills Do not use an after marke...

Page 12: ...ts down a signal will indicate when one minute is left After this signal the display will count down in seconds When time runs out a final signal will sound Press the Kitchen Timer On Off pad to stop...

Page 13: ...wn next time When baking with multiple pans and on multiple racks ensure there is sufficient space between pans to allow air to flow Oven Racks When placing and removing cookware pull the rack out to...

Page 14: ...th or the holiday Opening and closing of the door will not change the state of the oven light Sabbath Mode Power Outage Note If a power outage occurs during a Sabbath bake the unit will return to Sabb...

Page 15: ...tion farther from the burner Cookware Cookware Guidelines The material finish and size of cookware affect baking performance Dark coated and dull pans absorb heat more readily than light shiny pans Pa...

Page 16: ...e chicken Bake 1 or 2 Leave uncovered use a low sided pan such as a broil pan Bone in chicken breasts legs thighs Broil Hi Bake B Broil skin side down first Watch food closely when broiling Boneless c...

Page 17: ...d be wiped up immediately Let hot surfaces cool then clean and rinse Oven Interior The interior of your new oven can be cleaned manually or by using the Steam Clean or Self Clean modes Spillage of mar...

Page 18: ...afety Instructions at the beginning of this manual before using Self Clean Mode Self clean uses very high temperatures to clean the oven interior The oven door will lock when using this feature Before...

Page 19: ...will discolor your burners The ports in the burner heads must be kept clean at all times for an even unhampered flame Clogged or dirty burner ports or electrodes will not allow the burner to operate...

Page 20: ...ing detergent over any baked on spatters on the glass Use a single sided safety razor blade to clean it off Then wipe over the glass with a soapy cloth to remove any residue and dry off The area outsi...

Page 21: ...s completely cool Bulb Socket Tab 31 2 Max length Glass cover Maintenance CARE AND CLEANING Maintenance To Remove the Door 1 Fully open the oven door 2 On each hinge slide the hinge lock up making sur...

Page 22: ...broiling Use a pan specifically designed for broiling Aluminum foil used on the broiling pan and grid has not been fitted properly and slit as recommended If using aluminum foil conform to pan slits I...

Page 23: ...w locking temperature Oven not clean after a clean cycle Oven controls improperly set See the Cleaning the Oven section Oven was heavily soiled Clean up heavy spillovers before starting the clean cycl...

Page 24: ...cleaning of the range section For lower oven drawer models remove the rear access panel by unscrewing the thumb screws in the upper left and right corners Look for the gas shut off lever at the back o...

Page 25: ...s 15 Papel de Aluminio y Cobertores del Horno 15 Gu a de Cocci n 16 Cuidado y Limpieza Limpieza del Horno 17 Limpieza de la Placa de Cocci n 18 Limpieza de la Puerta y el Caj n 20 Mantenimiento 21 Con...

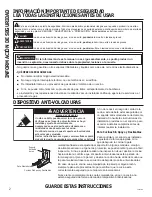
Page 26: ...la pata niveladora trasera se encuentre debajo del soporte anti volcaduras Q FDVR GH TXH OD FRFLQD VHD HPSXMDGD GH OD SDUHG SRU DOJXQD UD yQ siempre repita este procedimiento para verificar que la coc...

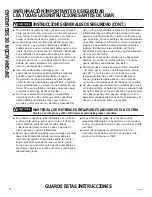
Page 27: ...desenchufe la cocina o desconecte el suministro de FRUULHQWH GHVGH HO SDQHO GH GLVWULEXFLyQ GHO KRJDU retirando el fusible o desconectando el disyuntor VHJ UHVH GH TXH WRGRV ORV PDWHULDOHV GH HPEDODMH...

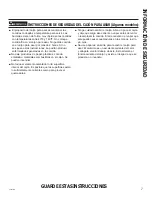
Page 28: ...engan FRQWDFWR FRQ ORV TXHPDGRUHV VXSHUILFLDOHV OD SDUULOOD GH ORV TXHPDGRUHV R HO HOHPHQWR GH FDOHIDFFLyQ GHO horno No use una toalla u otra tela voluminosa para reemplazar el mango de las cacerolas...

Page 29: ...WDPDxR GH ROOD DGHFXDGR SDUD HYLWDU TXH VHDQ LQHVWDEOHV R TXH VXIUDQ FDtGDV IiFLOPHQWH 6HOHFFLRQH XWHQVLOLRV TXH FRLQFLGDQ FRQ HO WDPDxR GHO TXHPDGRU Las llamas del quemador se deber n ajustar de modo...

Page 30: ...uras O XVDU ODV EROVDV SDUD FRFLQDU R GRUDU HQ HO KRUQR siga las instrucciones del fabricante 1XQFD DVH FRQ OD SXHUWD DELHUWD 6H SURKtEH DVDU FRQ la puerta abierta debido al sobrecalentamiento de las...

Page 31: ...V HQ HO FDMyQ 6H pueden incendiar 1R WRTXH HO HOHPHQWR FDOHQWDGRU QL OD VXSHUILFLH interior del caj n Es posible que las superficies est n lo suficientemente calientes como para provocar quemaduras 7H...

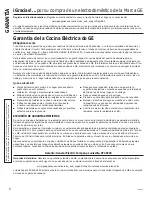
Page 32: ...HUILFLH TXH SXHGHQ VHU HOLPLQDGDV VLJXLHQGR ODV instrucciones de limpieza 6ROLFLWH HO VHUYLFLR WpFQLFR SDUD UHSDUDU R UHHPSOD DU ODV OiPSDUDV H FHSWR ODV OiPSDUDV EXCLUSI N DE GARANT AS IMPL CITAS 6X...

Page 33: ...ppliance Park Louisville KY 40225 ASISTENCIA ACCESORIOS RQVXOWH HO 6LWLR HE GH OHFWURGRPpVWLFRV GH www geappliances com service_and_support GXUDQWH ODV KRUDV FXDO TXLHU GtD GHO DxR 3DUD PD RU FRQYHQLH...

Page 34: ...KDUi XQ UXLGR GH FOLF HO sonido de la chispa el ctrica que enciende el quemador Cuando un TXHPDGRU VH JLUH D 7 WRGRV ORV quemadores generar n chispas El chispeo continuar mientras la SHULOOD SHUPDQH F...

Page 35: ...cocci n en el horno Conduce el calor de forma muy lenta y se enfr a de forma muy r pida Consulte las instrucciones del fabricante de utensilios de cocina para saber con seguridad si se puede usar con...

Page 36: ...R IDOWH XQ PLQXWR XHJR GH OD VHxDO OD pantalla realizar la cuenta regresiva en segundos Cuando el tiempo ILQDOLFH VH HPLWLUi XQD VHxDO ILQDO Presione la tecla Kitchen Timer On Off Encendido Apagado de...

Page 37: ...O HVWDQWH EORTXHDGRUHV HQ ORV VRSRUWHV GHO KRUQR LQFOLQH KDFLD arriba el frente y empuje el estante hacia adentro V SRVLEOH TXH UHVXOWH GLItFLO GHVOL DU ORV HVWDQWHV especialmente luego de la limpieza...

Page 38: ...Inicio del Horneado 3DUD LQLFLDU HO KRUQHDGR VLPSOHPHQWH JLUH OD SHULOOD GHO WHUPRVWDWR KDVWD OD WHPSHUDWXUD GHVHDGD HELGR D TXH HO modelo con termostato responder con un sonido de clic FXDQGR OD SHU...

Page 39: ...silios Pautas de Uso de Utensilios O PDWHULDO HO DFDEDGR HO WDPDxR GH ORV XWHQVLOLRV DIHFWDQ HO horneado DV ROODV RVFXUDV UHYHVWLGDV RSDFDV DEVRUEHQ HO FDORU PiV r pidamente que las ollas claras y bri...

Page 40: ...este atenci n a la comida al asarla Centre la comida debajo del quemador LIHV KXOHWDV Asar Alto C 8VH XQD EDQGHMD SDUD DVDU PXHYD OD FRPLGD PiV DEDMR SDUD que quede m s preparada y menos soasada Prest...

Page 41: ...LDU GH LQPHGLDWR HMH TXH ODV VXSHUILFLHV FDOLHQWHV VH HQIUtHQ OXHJR OLPSLH HQMXDJXH Interior del Horno El interior de su nuevo horno puede ser limpiado de forma PDQXDO R XWLOL DQGR ORV PRGRV 6WHDP OHD...

Page 42: ...en el horno IMPORTANTE Las emanaciones producidas por el ciclo de autolimpieza de cualquier horno afectan la salud de algunas aves de manera notoria Procure llevar sus aves a otra habitaci n bien ven...

Page 43: ...XV SDUWHV 1XQFD OLPSLH ODV FDEH DV GH ORV TXHPDGRUHV HQ HO ODYDYDMLOODV ya que los detergentes usados en lavavajillas descolorar n los quemadores Las hendiduras de las cabezas de los quemadores se deb...

Page 44: ...puerta Aplique detergente para lavar platos sobre cualquier VDOSLFDGXUD TXH KD D VREUH HO YLGULR GHELGR DO KRUQHDGR 8VH el filo de una navaja del lado seguro para despejarlo Luego limpie el vidrio con...

Page 45: ...eng eta Longitud Pi LPD de 1 2 Tapa de vidrio Puerta del Horno Desmontable La puerta es muy pesada Tenga cuidado al retirar y levantar la puerta No levante la puerta usando la manija Para retirar la p...

Page 46: ...sar 8VH XQD ROOD HVSHFtILFDPHQWH GLVHxDGD SDUD DVDU El papel de aluminio usado para la olla y la rejilla para asar no se ajust ni cort de forma apropiada seg n lo recomendado 6L XVDUi SDSHO GH DOXPLQL...

Page 47: ...del horno no se abrir luego de un ciclo de limpieza El horno est demasiado caliente Espere a que el horno se enfr e por debajo de la temperatura de bloqueo El horno no limpia luego de un ciclo de limp...

Page 48: ...XLHUGD GHUHFKD XVTXH la palanca de cierre del gas en la parte trasera de la cocina El quemador no se enciende El enchufe en la cocina no est completamente insertado en el tomacorriente el ctrico VHJ U...

Reviews: