GE Healthcare
Senographe DS
Revision 1
Service Information and Procedures Class A 2385072-16-8EN
Job Card D/R A141 - Image Receptor/Digital Detector
Page no. 1103
Chapter 9
JC-DR-A-141.fm
Note:
A document describing an alternate procedure is provided in the coolant kit. For maximum safety
and minimum risk of spillage, GEMS recommend using the procedure given below:
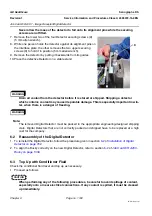
1. When adding coolant, use the container labeled
Topping
.
2. Remove the reservoir cap and check the liquid level.
3. If necessary, add liquid until it reaches the bottom of the cap threads.
4. To flush air from the circuit; proceed as follows:
-
Switch on the unit (switch on the Main Distribution Rack circuit breaker and press the Conditioner
on button in the Generator cabinet).
-
As the coolant circulates and air bubbles are flushed from the coolant circuit, the coolant level
falls. Add liquid as necessary until the level is steady at the bottom of the cap threads.
5. Replace the reservoir cap when you are satisfied that the level is correct.
6. Replace the Generator covers (Refer to
Job Card PHY A042 - Remove/Reinstall Generator Covers
6-4
Load Detector Parameters
The procedure to load the detector parameters varies according to type of Control Station in the system.
Note:
BEFORE Loading Detector Parameters, clear all detector calibrations (select
Service Desktop
/
Calibration/Detector
; then select
Clear Calibrations
and perform the Load Detector Parameters
procedure as indicated).
6-4-1
Load Detector Parameters on V1/V2 Control Stations
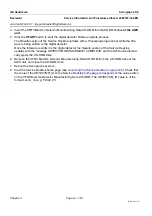
1. Launch the Service Desktop (see
2. From Service Desktop, click the
Utilities
button
.
3. Under
Workstation Tools,
click
DETECTOR REPLACEMENT
.
4. Insert the Mammo Detector Manufacturing Data floppy diskette into the floppy drive
on the AWS unit
(not the IDC).
5. Click the
START
button to start the digital detector firmware update process.
The
Results
section of the Service Desktop updates with a
Processing
progress bar while the firm-
ware is being written to the digital detector.
Once the firmware is written to the digital detector the
Results
section of the Service Desktop
updates with the message
DETECTOR REPLACEMENT COMPLETE
.
6.
7. Remove the floppy diskette from the floppy drive on the AWS unit.
8. Reboot the Senographe system.
9. View the Service Desktop home page (see
). Check that
the value of the
DETECTOR_ID
on the Service Desktop home page corresponds to the value written
on the LFOV1 Mammo Detector Manufacturing Data floppy disk. The
DETECTOR_ID
value is of the
format LLnnn_nn (e.g. FL002_01).
6-4-2
Load Detector Parameters on V3/V4 Control Stations
1. Launch the Service Desktop (see
2. From Service Desktop, click the
Utilities
button
.
3. Under
Workstation Tools,
click
DETECTOR REPLACEMENT
.


