Chapter 9
Page no. 1652
JC-CAL-A-001.fm
GE Healthcare
Senographe DS
Revision 1
Service Information and Procedures Class A 2385072-16-8EN
Job Card CAL A001 - Heater Current Scale Factor
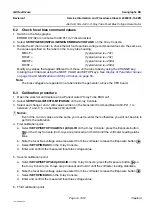
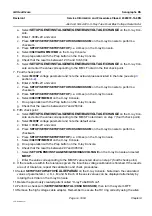
6. Select
SETUP/MeasI
on the X-ray Console.
7. Enter and confirm the measured filament current value from the multimeter for this first calibration
point.
8. Select
SETUP/SETUP/2nd pt/CALIB
on the X-ray Console for the second calibration point.
Note:
The default filament current command value for this second point is +5.000E+00 (5.0) A.
9. Press the Exposure button
on the X-ray Console (no X-rays are produced); hold it until the
ammeter reading stabilizes (this may take a few seconds).
10. If it is required to apply a correction to the measured value, follow the instructions given in
11. Note the filament current value measured by the multimeter.
12. Release the Exposure button
.
13. Select
SETUP/Meas
on the X-ray Console.
14. Enter and confirm the measured filament current value from the ammeter for this second calibration
point.
15. Select
SETUP/SETUP/calcul/VALID
on the X-ray Console. This executes the calculation of the
scale factor and fixed offset of the filament current command from the software.
6-2-3
Check the calibration accuracy.
1. Select
SETUP/1st pt/CALIB
on the X-ray Console.
Note:
Again, the default filament current command value for this first point is +4.000E+00 (4.0) A.
2. Press the Exposure button
on the X-ray Console (no X-rays are produced) and hold it until the
multimeter reading stabilizes (this may take a few seconds).
3. Note the filament current value measured from the multimeter.
4. Release the Exposure button
.
5. Select
SETUP/SETUP/2nd pt/CALIB
on the X-ray Console.
Note:
Again, the default filament current command value for this second point is +5.000E+00 (5.0) A.
6. Press the Exposure button
on the X-ray Console (no X-rays are produced) and hold it until the
multimeter reading stabilizes (this may take a few seconds).
7. Note the filament current value measured from the multimeter.
8. Release the Exposure button
.
9. Whatever Fluke 87 type is used (first generation, type 3 or type 5), the expected results are the fol-
lowing
•
4.0 ±0.12 (+/-3%) A for the first point and
•
5.0 ±0.15 (+/-3%) A for the second point
If the results are within these tolerances, the calibration for this X-ray tube track is finished. If the
results are out of tolerance, repeat the calibration procedure in
and the check procedure
for the same X-ray tube track.
Note:
Performing the calibration procedure once is normally sufficient for correct calibration.
If it is necessary to perform the calibration procedure more than once, the measured values of cur-


