background image

28

I

NDICADOR

 L

UMINOSO


DE

 C

ARGA

El indicador se ilumina cuando el auricular se está cargando sobre la base del
aparato Spacemaker ®.

S

ALIDA

Oprima el botón de salida (“EXIT”) para cancelar cualquier comando que usted
haya iniciado.

C

ONTRALUZ


DE


LA

 P

ANTALLA

Cuando el aparato Spacemaker ® está inactivo, usted puede oprimir y sostener el
botón de salida (”EXIT”) para apagar la contraluz de la pantalla, oprima y
sostenga para volver a encenderla.

B

OTÓN


DE

 C

ANALES

Mientras habla, usted puede necesitar cambiar manualmente el canal para poder
reducir la estática. Oprima y suelte el botón de canales (“channel/ delete/ cid”)
para avanzar al siguiente canal claro. El número del canal actual aparece en el
lado izquierdo de la pantalla.

V

OLUMEN


DEL

 A

LTAVOZ

Mientras está usted hablando, oprima los botones de las flechas (“CID +” / “CID –
“) (hacia arriba o hacia abajo) para ajustar el nivel de volumen. Hay ocho niveles
de volumen. Oprima el botón de la flecha hacia arriba (+) para aumentar el nivel
de volumen, u oprima la flecha hacia abajo (-) para disminuirlo. El nivel de
volumen actual aparece a la derecha de la pantalla. El nivel más bajo de volumen
es “VOL 1” y “VOL 8” es el más alto.

E

NMUDECEDOR


DEL

 M

ICRÓFONO

Utilice la función del enmudecedor para tener una conversación privada, fuera de
la línea. La persona del otro lado de la línea no le puede escuchar, pero usted
todavía puede escuchar a esa persona.

1. Cuando el altavoz está activado (

ON

), oprima el botón enmudecedor del

micrófono para activar esta función.

2. El indicador del enmudecedor (“

MUTE

”) parpadea a la derecha de la pantalla y

el indicadore luminos del altavoz se ilumina.

3. Oprima nuevamente el botón del micrófono para cancelar el enmudecedor y

volver a su conversación telefónica.

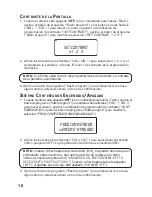
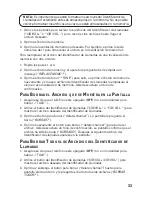
CH  22    00 :00    MUTE

Summary of Contents for SPACEMAKER 26976

Page 1: ...THIS MANUAL IS AVAILABLE FOR FREE COMPLIMENTS OF BUYMEBUYME COM TO ORDER THIS PRODUCT PLEASE CALL TOLL FREE 1 877 992 8963 OR VISIT WWW BUYMEBUYME COM ...

Page 2: ...We bring good things to life 900MHz SPACEMAKER Under the Counter CallWaiting Caller ID Cordless Speakerphone Answering System with Digital AM FM Radio andTimer User s Guide 26976 ...

Page 3: ...ipment connected to the telephone line ensure the installation of this product does not disable your alarm equipment If you have questions about what will disable alarm equipment consult your telephone company or a qualified installer 2 Rights of theTelephone Company Should your equipment cause trouble on your line which may harm the telephone network the telephone company shall where practicable ...

Page 4: ...ceiving antenna is connected If these measures do not eliminate the interference please consult your dealer or an experienced radio television technician for additional suggestions Also the Federal Communications Commission has prepared a helpful booklet HowTo Identify and Resolve Radio TV Interference Problems This booklet is available from the U S Government Printing Office Washington D C 20402 ...

Page 5: ...ED WITH YOUR UNIT 11 BEFORE MOUNTING 11 MOUNTING PROCEDURE 12 HANDSET AND WALL BASE UNIT LAYOUT 15 SPACEMAKER UNIT LAYOUT 15 SPACEMAKER UNIT SETUP 16 DAY TIME SETUP 16 RINGER SETUP 16 SYSTEM SETUP 16 LANGUAGE 16 LOCAL AREA CODE 17 TONE PULSE DIALING 17 DISPLAY CONTRAST 18 ANSWERING SYSTEM ON OFF 18 SETTING THE RINGS TO ANSWER 18 SETTING THE SECURITY CODE FOR REMOTE ACCESS 19 SPACEMAKER UNIT 19 DEF...

Page 6: ...CID RECORD SHOWING IN THE DISPLAY 33 DELETING ALL CID RECORDS 34 DIALING A CID NUMBER 34 CHANGING THE CID NUMBER FORMAT 34 RADIO OPERATION 34 AM ANTENNA 34 FM ANTENNA 35 TURNING ON THE RADIO 35 BAND 35 RADIO VOLUME 35 CHANGING STATIONS 35 STORING PRESET STATIONS 35 USING PRESET STATIONS 35 CLOCK 35 MEMORY 35 STORING A NAME AND NUMBER IN MEMORY 36 CHANGING A STORED NUMBER 36 STORING A REDIAL NUMBER...

Page 7: ...ou take a few minutes right now to read through this user s guide IMPORTANT In order to use all of the Caller ID features of this phone you must subscribe to either the standard Name Number Caller ID Service or Call Waiting Caller ID Service To know who is calling while you are on the phone you must subscribe to Call Waiting Caller ID Service IMPORTANT Because cordless phones operate on electricit...

Page 8: ...ons Never touch non insulated telephone wires or terminals unless the telephone line has been disconnected at the network interface Use caution when installing or modifying telephone lines Temporarily disconnect any equipment connected to the phone such as faxes other phones or modems Wall base unit Telephone line cord AC Power converter for Spacemaker Unit Spacemaker Unit Handset Handset battery ...

Page 9: ...iances radiators and direct sunlight Avoid areas of excessive moisture or extremely low temperature Avoid dusty locations Avoid other cordless telephones or personal computers TELEPHONE JACK REQUIREMENTS To use this phone you need an RJ11C type modular telephone jack which might look like the one pictured here installed in your home If you don t have a modular jack call your local phone company to...

Page 10: ...e outlet and it is firmly installed If not choose another electrical outlet to plug into HANDSET NOTE The handset battery compartment cover are packaged together 1 Connect the battery to the jack located inside the battery compartment NOTE It is important to maintain the polarity black and red wires to the jack inside the compartment as shown in the illustration 2 Close the battery compartments by...

Page 11: ...cemaker cradle 2 The charge indicator on the Spacemaker Unit turns on to indicate the handset battery is charging 3 Allow the handset to charge for 12 hours prior to first use If you don t properly charge the handset battery performance is compromised UNDER CABINET MOUNTING TOOLS REQUIRED Drill and 1 4 drill bit Ruler or tape measure Nail or awl Scissors Screwdriver phillips Countersink optional M...

Page 12: ...elf to the bottom of the overhang is more than 5 8 you will need to use a wood shim The shim can be located between the cabinet shelf bottom and the spacers Make sure the wood is at least as thick as the excess over 5 8 If a shim is necessary longer screws available at most local hardware stores are required Printed in China Model 26976A CUT OUT ON SOLID BLACK LINE CORTE SOBRE LA LÕ NEA S LIDA NEG...

Page 13: ...he front edge of the cabinet b Tape the template in place and go to step 2 If your cabinet has an overhang a Measure the thickness of the overhang b Fold the front of the template downward along the printed guideline closest to the thickness of your cabinet c Tape folded down portion to backside of the overhang and tape the template to the cabinet underside 3 8 Minimum Front edge of cabinet Mounti...

Page 14: ... under a wood cabinet you may want to countersink the drilled hole from the INSIDE of the cabinet This will eliminate the use of washers and allow the screw head to be flush with the floor of your cabinet If you cannot countersink the holes use the supplied washers 3 Remove the template and drill shavings from inside and underneath the cabinet 4 If your cabinet does NOT have an overhang go to Step...

Page 15: ...l 3 screws are installed TIP Do not fully tighten until all 4 screws are installed 8 Extend the cord towards an electrical outlet and secure by using the cord hooks to hold the cord out of the way For a more attractive appearance place the cord hooks at the back edge of the cabinet on or next to wall directly over the electrical outlet to be used To attach cord hooks peel off the adhesive on the b...

Page 16: ...ALL BACK charge MIN HOUR DAY TIMECHECK press to check hold to change RINGER HI LO OFF FLASH program button PAUSE button mem button FORMAT button CID VOL or buttons CHAN delete button ringer button HI LO OFF TONE exit button timer button TALK CALLBACK button REDIAL button display DAY TIME CHECK button HOUR button MIN button RINGER switch tune seek skip button tune seek review button message indicat...

Page 17: ...nd time settings RINGER SETUP The Ringer Switch is located in the charge cradle of the Spacemaker Unit and is pre set to LO NOTE If you turn the ringer off the display shows when the unit is in standby mode SYSTEM SETUP There are eight programmable menus available Language Area Code Tone Pulse Dialing Contrast Answerer ON OFF Ring to Answer Security Code and Default Setting NOTE Press the EXIT but...

Page 18: ... next digit 3 Press CID VOL arrow key to change the value of the blinking digit 4 Press the flash program button to store if a change is made you will hear a confirmation tone TONE PULSE DIALING Set your phone according to the type of service you are subscribed to 1 When speakerphone is OFF not inTALK mode press flash program button and CID VOL CID VOL arrow keys to move the pointer to point at SE...

Page 19: ...on tone ANSWERING SYSTEM ON OFF 1 When speakerphone is OFF not inTALK mode press flash program button and CID VOL CID VOL arrow keys to move the pointer to point at ANSWER ON OFF press flash program button to show SET ANSWERER ON OFF 2 Use the CID VOL CID VOL arrow keys to select ON or OFF Default is ON NOTE When the pointer points at ON the unit announces ANSWER ON PRESS REVIEW KEY TO RECEIVE SET...

Page 20: ...t prevents unauthorized access to your answering system Default security code is 1 2 3 and you may only change the security code at the Spacemaker Unit SPACEMAKER UNIT 1 When speakerphone is OFF not inTALK mode press flash program button and CID VOL CID VOL arrow keys to move the pointer to point at SECURITY CODE press flash program button to show SECURITY CODE 1 2 3 with the first digit blinking ...

Page 21: ...firm 4 If you select YES you will hear a confirmation tone and the Spacemaker Unit resets to the following default values LANGUAGE ENGLISH LOCAL AREA CODE TONE PULSE DIALING TONE DISPLAY CONTRAST 1 ANSWERER ON OFF ON RINGTO ANSWER 5 SECURITY CODE 1 2 3 HANDSET SETUP RINGER SETUP 1 When the phone is OFF not inTALK mode press ringer HI LO OFF button to show RINGER SETTING HIGH LOW OFF 2 Use the CID ...

Page 22: ...s the corresponding ringer tone accordingly 5 Press the ringer HI LO OFF button again to store if a change is made you will hear a confirmation tone SYSTEM SETUP There are four programmable menus available Language Area Code Tone Pulse Dialing and Default Setting NOTE To program these settings the handset should be OFF not in TALK mode Press the TONE exit button to return to standby mode LANGUAGE ...

Page 23: ... default 3 Press the flash program button to store if a change is made you will hear a confirmation tone DEFAULT SETTINGS If you prefer to use the system s original settings follow the steps below to return the answering system to the factory default settings 1 Press flash program button until DEFAULT SETTING YES NO shows in the display 2 Use the CID VOL CID VOL arrow keys to select YES or NO NO i...

Page 24: ...and begin speaking 2 When finished pressTALK CALLBACK again to hang up MAKING A CALL 1 PressTALK CALLBACK button when you hear a dial tone dial a telephone number OR Dial the phone number first then press theTALK CALLBACK button 2 When finished press theTALK CALLBACK button again to hang up LINE IN USE When the Spacemaker speakerphone is ON inTALK mode LINE IN USE shows in the display of the hands...

Page 25: ... back on FLASH Use the flash program button to activate custom calling services such as call waiting or call transfer which are available through your local phone company TIP Don t use the TALK CALLBACK button to activate custom calling services such as call waiting or you ll hang up the phone IN USE INDICATOR LIGHT The page in use indicator at the wall base unit is lit when the phone is ON It fla...

Page 26: ... misplaced handset Press the page button on the wall base unit The handset beeps continuously for about two minutes or until you press any button on the handset You may also press page to cancel NOTE The ringer does not have to be ON for this feature to work RINGER The ringer must be ON for the handset to ring during incoming calls Refer to the Ringer Setup section for instructions on turning on t...

Page 27: ... you are talking Press the speaker button to turn on the speakerphone Press the CID VOL or CID VOL arrow button on the Spacemaker Unit to adjust the speakerphone listening level You will hear a tone when you reach the minimum or maximum volume level REGISTRATION The Spacemaker Unit is pre registered to the wall base unit If your Spacemaker Unit is not registered follow these steps 1 Make sure the ...

Page 28: ...ress theTALK call back button on the handset to start the 3 way conference NOTE If handset is ON press speaker button on Spacemaker speakerphone will join the call too CALL TRANSFER 1 While the Spacemaker speakerphone is ON inTALK mode press theTALK CALLBACK button on the handset to join the call 2 Press the speaker button to hang up the Spacemaker speakerphone FLASH Use the flash program button t...

Page 29: ...play SPEAKERPHONE VOLUME While talking press the CID VOL or CID VOL buttons up and down arrows to adjust the speaker volume There are eight volume levels Press the up arrow button to increase the volume level while press the down arrow button to decrease The current volume level appears on the right side of the display VOL 1 is the lowest level whileVOL 8 is the loudest MIC MUTE Use the mute featu...

Page 30: ...until you finish the announcement 3 Begin talking after you hear the beep 4 Release the button after you finish your announcement 5 If you choose not to record an outgoing announcement a default announcement will play To return to the default announcement after you have recorded your own outgoing announcement press the announce button to play your personal outgoing announcement press the erase but...

Page 31: ...d release the review button to restart the current message continue to press and press again the review button to go to previous messages Press and release the skip button to go to the next message ANSWERING SYSTEM MEMORY FULL When the memory is full the system answers after 10 rings and an F displays after the number of messages e g MSG 59F on the right side of the Spacemaker display You should e...

Page 32: ... system answers press any numbered key on the touch tone pad to bypass the outgoing announcement or wait until the announcement finishes 3 Enter the security code after you hear the tone 4 Follow the voice menu to use the answering machine s remote functions The remote feature enables you to perform the following functions To Press this button Review message 1 Play back messages 2 Stop message pla...

Page 33: ...can answer the incoming call IMPORTANT In order to use the Caller ID functions with this unit you must subscribe to either the standard Name Number Caller ID Service or Call Waiting Caller ID Service To know who is calling while you are on the phone you must subscribe to Call Waiting Caller ID Service RECEIVING AND STORING CALLS When you receive a call the information is transmitted by the phone c...

Page 34: ...t possible to re format CID records stored in memory 1 Use the CID VOL CID VOL button to scroll to the desired record 2 Press the memory button 3 Press the desired memory location Example press the number 1 button to store the record in memory location 1 To replace a CID record stored in a memory location with a new CID record 1 Repeat steps 1 through 3 2 Press the mem button and REPLACE MEMO show...

Page 35: ...mode 2 Use the CID VOL CID VOL button to display the desired Caller ID record 3 PressTALK CALLBACK button The number dials automatically CHANGING THE CID NUMBER FORMAT The format button lets you change the format of the displayed CID number The available formats are as follows 7 digit 7 digit telephone number 10 digit 3 digit area code 7 digit telephone number 11 digit long distance code 1 3 digit...

Page 36: ...io automatically scans for radio stations STORING PRESET STATIONS When a radio station is tuned in press and hold the preset button for three seconds then select the preset number using the skip and rev buttons Up to five AM and FM radio stations may be stored Finally press the preset button to save the radio station USING PRESET STATIONS To listen to a preset radio station on the current band pre...

Page 37: ...e seven key four times for the letter S press the six key once for the letter M press the four key three times for the letter I press the eight key once for the letterT and press the four key twice for the letter H NOTE If you enter a wrong letter press channel delete button to backspace 6 Press the mem button to save the name The display shows ENTER TEL NUMBR 7 Use the touch tone pad to enter the...

Page 38: ...e 2 Press mem button 3 Use the CID VOL arrow or CID VOL arrow button to scroll through the numbers stored in memory until the desired number is shown 4 PressTALK CALLBACK The numbers dial automatically IMPORTANT If you make test calls to emergency numbers stored in memory remain on the line and briefly explain the reason for the call to the dispatcher Also it s a good idea to make these calls in o...

Page 39: ...y The following example shows how you can use chain dialing to make a call through a long distance service The Number For Memory Location Long distance access number 7 Authorization code 8 Frequently called long distance number 9 1 Make sure the phone is ON 2 Press mem and then press 7 3 When you hear the access tone press mem again and then press 8 4 At the next access tone press mem and then 9 T...

Page 40: ...he display 4 Press CID VOL arrow key to change the value of the blinking digit 5 Press CID VOL arrow key to blink the next digit 6 Continue entering digits for the number of seconds you want to set NOTE Maximum timing period is 99 minutes 99 seconds while one minute equals 60 seconds STARTING THE TIMER When the countdown time is set 1 Press the timer button to start counting down You will hear a c...

Page 41: ... time and press timer again to display the channel number call counter and volume level When the countdown is complete TIMER STOP shows in the display and an alarm sounds for two minutes 2 Press the timer button to stop the alarm and display the channel number call counter and volume level NOTE To maximize the countdown timer s functionality ensure the battery is fully charged CHANGING THE BATTERY...

Page 42: ... memory locations PRESS AND HOLD Prompt telling you to re register the handset FORMAT KEY or the Spacemaker unit to the wall base unit DELETE Prompt asking if you want to erase Caller ID records or one of the 10 numbers stored in the phone s outgoing memory DELETE ALL Prompt asking if you want to erase all Caller ID records DELETED Prompt confirming the Caller ID Memory record is erased END OF LIS...

Page 43: ... One short beep Low battery warning every seven seconds HEADSET AND BELT CLIP OPERATION CONNECTING AN OPTIONAL HEADSET TO THE HANDSET For hands free conversation connect the headset optional to the HEADSET jack as shown The handset receiver and microphone are disabled when the headset is connected TIP To order a headset please refer to the accessory order form at the end of this user s guide Adjus...

Page 44: ...ormation Caller ID Error Message The unit displays this message if it detects anything other than valid Caller ID information during the silent period after the first ring This message indicates the presence of noise on the line TELEPHONE No dial tone Check or repeat installation steps Make sure the wall base unit is correctly plugged into the electrical outlet Make sure power cords are connected ...

Page 45: ...your line Try unplugging some phones See solutions for No dial tone Handset or Spacemaker unit loses registration ID If the handset or Spacemaker unit becomes unregistered PRESS AND HOLD BASE PAGE KEY shows in the display to prompt you to re register the handset or the Spacemaker until the wall base unit restores the registration ID If registration is not successful unplug the wall base unit from ...

Page 46: ...attery Spacemaker beeps Disconnect the power supply wait for 2 minutes and re connect it to reset See solutions for No dial tone Memory Dialing Did you program the memory location keys correctly Did you follow proper dialing sequence Make sure the tone pulse setting is programmed correctly Did you reprogram numbers into memory after power outage or battery replacement ...

Page 47: ... USA Inc could void the user s authority to operate this product For instructions on how to obtain service refer to the warranty included in this guide or call customer service at 1 800 448 0329 Or refer inquiries to ATLINKS USA Inc Manager Consumer Relations P O Box 1976 Indianapolis IN 46206 Attach your sales receipt to the booklet for future reference or jot down the date this product was purch...

Page 48: ...set 42 Connecting the AC Electrical Power 9 10 Connecting the Belt Clip 43 Connecting theTelephone Line 9 D Default Settings 19 22 Deleting All CID Records 34 Deleting the CID Record Showing in the Display 33 Dialing a CID Number 34 Dialing a Stored Number 37 Digital Security System 7 Display Backlight 28 Display Contrast 18 Display Messages 41 E Equipment Approval Information 2 Erasing Messages 3...

Page 49: ...ls from the Spacemaker 30 Service 46 Setting the Rings to Answer 18 Setting the Security Code for Remote Access 19 Setting theTimer 39 Spacemaker Unit 10 19 Spacemaker Unit Layout 15 Spacemaker Unit Setup 16 Speaker Indicator Light 27 Speakerphone Guidelines 26 Speakerphone Location 26 Speakerphone Operation 26 Speakerphone Volume 28 Starting theTimer 39 Stopping theTimer 39 Storing a Name and Num...

Page 50: ..._____________________________________________ Address_____________________________________ Apt ____________ City ________________________State________ ZIP_________________ Daytime Phone Number _______________________________ ____________________________________________________________________ Authorized Signature A CCESSORY O RDER F ORM CUSTOMER CUT ALONG DOTTED LINE 5 00 My card expires Copy the ...

Page 51: ...stments Batteries Damage from misuse or neglect Products which have been modified or incorporated into other products Products purchased or serviced outside the USA Acts of nature such as but not limited to lightning damage Product Registration Please complete and mail the Product Registration Card packed with your unit It will make it easier to contact you should it ever be necessary The return o...

Page 52: ...s buenas para la vida Teléfono Inalámbrico Ahorrador de Espacio SPACEMAKER de 900 MHz con Altavoz y Sistema Contestador e Identificador de Llamada en Espera Temporizador y Radio AM FM Digital Guía del Usuario 26976 ...

Page 53: ...necte permanentemente su teléfono de la línea Si su casa tiene algún equipo de alarma especial conectado a la línea telefónica asegúrese que la instalación de este producto no desactive su equipo de alarma Si usted tiene alguna pregunta sobre qué puede desactivar su equipo de alarma consulte a su compañía telefónica o a un instalador calificado 2 Derechos de la Compañía Telefónica Si su equipo cau...

Page 54: ... no eliminan la interferencia favor de consultar a su distribuidor o a un técnico de radio televi sión experto por otras sugerencias También la Comisión Federal de Comunicaciones FCC ha preparado un folleto muy útil HowTo Identify and Resolve Radio TV Interference Problems Como Identificar y Resolver Problemas de Interferencia de Radio Televisión Este folleto se puede obtener del U S Goverment Pri...

Page 55: ... AURICULAR Y DE LA BASE DE PARED 15 FORMATO DEL APARATO AHORRADOR DE ESPACIO SPACEMAKER 15 PROGRAMACIÓN DEL APARATO AHORRADOR DE ESPACIO SPACEMAKER 16 PROGRAMACIÓN DEL DÍA HORA 16 PROGRAMACIÓN DELTIMBRE 16 PROGRAMACIÓN DEL SISTEMA 16 IDIOMA 16 CLAVE DE AREA LOCAL 17 MARCADO PORTONO PULSO 17 CONTRASTE DE LA PANTALLA 18 SISTEMA CONTESTADOR ENCENDIDO APAGADO 18 PARA PROGRAMAR LOSTIMBRES PARA CONTESTA...

Page 56: ...N LA PANTALLA 33 PARA BORRARTODOS LOS ARCHIVOS DEL IDENTIFICADOR DE LLAMADAS 33 PARA MARCAR UN NÚMERO DEL IDENTIFICADOR DE LLAMADAS 34 PARA CAMBIAR EL FORMATO DEL NÚMERO DE IDENTIFICADOR DE LLAMADAS 34 OPERACIÓN DE LA RADIO 34 ANTENA DE AM 34 ANTENA DE FM 34 PARA ENCENDER LA RADIO 35 BANDA 35 VOLUMEN DE LA RADIO 35 PARA CAMBIAR ESTACIONES 35 PARA ALMACENAR ESTACIONES PRE PROGRAMADAS 35 PARA UTILIZ...

Page 57: ...mo para leer esta guía del usuario IMPORTANTE Para poder utilizar todas las funciones del Identificador de Llamadas de este teléfono usted debe estar suscrito ya sea al servicio estándar de Identificador de Nombre Número o al servicio de Identificador de Llamada en Espera Para saber quién le llama mientras usted está en el teléfono usted debe suscribirse al servicio de Identificador de Llamada en ...

Page 58: ...para localizaciones mojadas Nunca toque cables o terminales no aislados a menos que la línea telefónica haya sido desconectada en la interfaz de la red Utilice precaución cuando instale o modifique líneas telefónicas Desconecte temporalmente cualquier equipo conectado al teléfono como faxes otros teléfonos o modems Base para pared Cable de línea telefónica Convertidor de corriente AC para el apara...

Page 59: ...tan radiadores y luz de sol directa Evite áreas con humedad excesiva o temperaturas demasiado bajas Evite áreas con mucho polvo Evite colocar cerca de otros teléfonos o computadoras personales REQUERIMIENTOS PARA ENCHUFE TELEFÓNICO Para utilizar este teléfono usted puede necesitar un enchufe modular telefónico tipo RJ11C como el ilustrado aquí instalado en su hogar Si usted no tiene este tipo de e...

Page 60: ...do Si no entra firmemente elija otro enchufe eléctrico en donde se pueda conectar AURICULAR NOTA La cubierta del paquete de baterías viene empacada junto con la batería 1 Conecte la batería en el enchufe localizado dentro del compartimiento de la batería NOTA Es importante mantener la polaridad de cable negro y rojo en el enchufe dentro del compartimiento como se muestra en la ilustración 2 Cierre...

Page 61: ...e del Ahorrador de Espacio Spacemaker 2 El indicador de carga en el Ahorrador de Espacio Spacemaker se ilumina para indicar que la batería del auricular se está cargando 3 Deje que el auricular se cargue durante 12 horas antes de utilizarlo por primera vez Si usted no carga adecuadamente el auricular el funcionamiento de la batería podría deteriorarse MONTAJE BAJO EL GABINETE HERRAMIENTAS NECESARI...

Page 62: ...rnillos deben entrar en el aparato por lo menos 3 8 de pulgada Si el largo total de la repisa de abajo del gabinete a la parte de abajo de la parte que sobresale es más de 5 8 de pulgada usted necesitará calzarlo El calce puede ser puesto entre la repisa de abajo del gabinete y los espaciadores Asegúrese que la madera sea por lo menos tan gruesa como el exceso del 5 8 de pulgada Si un calce fuera ...

Page 63: ...lantilla en su sitio con la cinta adhesiva y vaya al paso 2 Si su gabinete tiene una parte que sobresale a Mida el ancho de la parte que sobresale b Doble el frente de la plantilla hacia abajo a lo largo de la línea punteada que sea más parecida al ancho de su gabinete c Pegue la parte doblada hacia abajo con cinta adhesiva a la parte de atrás de la porcion que sobresale y pegue la plantilla a la ...

Page 64: ...a usted puede querer hacer el agujero con una broca desde DENTRO del gabinete Esto elimina el uso de arandelas y permitirá que la cabeza del tornillo esté al ras del piso de su gabinete Si usted no puede hacer los agujeros con la broca entonces utilice las arandelas provistas 3 Quite la plantilla y la viruta de madera de dentro y abajo del gabinete 4 Si su gabinete NO tiene una parte que sobresale...

Page 65: ...riete completamente los tornillos hasta que los 3 estén instalados SUGERENCIA No apriete completamente hasta que los 4 tornillos hayan sido instalados 8 Extienda el cable hacia el enchufe eléctrico y ajuste utilizando los ganchos para sujetar el cable en su sitio Para una apariencia más atractiva coloque los ganchos del cable en la orilla trasera del gabinete o junto a la pared directamente sobre ...

Page 66: ...ls radio presets format flash prog exit speaker CID VOL delete cid erase play stop memo message answerer controls channel a a n nounc e timer mute mic mic TALK CALL BACK charge MIN HOUR DAY TIMECHECK press to check hold to change RINGER HI LO OFF Botón para verificar día hora DAY TIME CHECK Botón de la hora HOUR Botón de minutos MIN Selector del timbre RINGER Botón para sintonizar buscar o saltar ...

Page 67: ...elTimbre se localiza en el cargador del Aparato Ahorrador de Espacio Spacemaker y está pre programado en volumen bajo LO NOTA Si usted apaga el timbre la pantalla muestra cuando el aparato está en modalidad de alerta PROGRAMACIÓN DEL SISTEMA Hay ocho menús programables disponibles Idioma Clave de Área Modalidad para Marcar porTono Pulso Contraste Contestador Encendido Apagado Timbres para Contesta...

Page 68: ...ice el botón la flecha CID para cambiar el valor del dígito parpadeante 4 Oprima el botón de programa flash program para almacenar si se hace algún cambio usted escuchará un tono de confirmación MARCADO POR TONO PULSO Programe su teléfono de acuerdo al tipo de servicio al que usted está suscrito 1 Cuando el altavoz está apagado OFF no en modalidad para hablar TALK oprima el botón de programa flash...

Page 69: ...PAGADO 1 Cuando el altavoz está apagado OFF no en modalidad para hablar TALK oprima el botón de programa flash program y los botones de las flechas CID CID para mover el cursor apuntar a la indicación de programación de contraste CONT ENCEN APAG oprima el botón de programa flash program para mostrar la selección PROG CONTESTADOR ENCEND APAGADO 2 Utilice los botones de las flechas CID CID para sele...

Page 70: ...e tener acceso a su sistema contestador con un teléfono de tono desde otra localización Se requiere un código de seguridad para tener acceso remoto al sistema de manera que se prevenga el acceso no autorizado a su sistema contestador El código de seguridad programado de fábrica es 123 y usted puede únicamente cambiarlo en el aparato Spacemaker APARATO AHORRADOR DE ESPACIO SPACEMAKER 1 Cuando el al...

Page 71: ...sh program para confirmar 4 If you select SI you will hear a confirmation tone and the Spacemaker Unit resets to the following default values LANGUAGE IDIOMA ENGLISH INGLES LOCAL AREA CODE CLAVE DE AREA LOCAL TONE PULSE DIALING MARCADO PORTONO PULSO TONE TONO DISPLAY CONTRAST CONTRASTE DE LA PANTALLA 1 ANSWERER ON OFF CONTESTADOR ENCENDIDO APAGADO ON ENCENDIDO RINGTO ANSWER TIMBRES PARA CONTESTAR ...

Page 72: ...ono del timbre el teléfono emite el tono del timbre correspondiente 5 Oprima nuevamente el botón del timbre HI LO OFF para almacenar Si se hace un cambio usted escuchará un tono de confirmación PROGRAMACIÓN DEL SISTEMA Hay cuatro menús programables disponibles Idioma Clave de Área Modalidad para Marcar porTono Pulso y Programaciones de Fábrica NOTA Para efectuar estas programaciones el auricular d...

Page 73: ...a seleccionar TONE o PULSE TONE es la programación de fábrica 3 Oprima el botón de programa flash program para almacenar si se hace algún cambio usted escuchará un tono de confirmación PROGRAMACIONES DE FÁBRICA Si usted prefiere utilizar las programaciones originales del sistema siga los pasos a continuación para regresar el sistema contestador a las programaciones de fábrica 1 Oprima el botón de ...

Page 74: ...oprima nuevamente el botón para hablar TALK CALLBACK para colgar PARA HACER UNA LLAMADA 1 Oprima el botón para hablar TALK CALLBACK cuando escuche el tono de marcar marque el número telefónico O Marque el número telefónico primero y después oprima el botón para hablar TALK CALLBACK 2 Cuando haya terminado oprima nuevamente el botón para hablar TALK CALLBACK para colgar LÍNEA EN USO Cuando el altav...

Page 75: ...vamente usted no tiene que colgar el auricular BOTÓN PARA SERVICIOS ESPECIALES FLASH Utilice el botón para servicios especiales flash program para activar servicios especiales como llamada en espera o transferencia de llamada que le son disponibles a través de su compañía telefónica local SUGERENCIA No utilice el botón TALK CALLBACK para activar servicios especiales como llamada en espera porque d...

Page 76: ... extraviado Oprima el botón localizador page en la base de pared El auricular emite tonos continuos durante dos minutos o hasta que usted oprima cualquier botón en el auricular Usted puede también oprimir el botón localizador page nuevamente para cancelar NOTA El timbre del auricular no necesita estar encendido ON para que esta función sirva TIMBRE El timbre debe estar encendido ON para que el aur...

Page 77: ...to Spacemaker para ajustar el nivel de volumen del altavoz Usted escuchará un tono cuando el volumen llegue al nivel mínimo o máximo de volumen REGISTRO El aparato Spacemaker está pre registrado con la base de pared Si su aparato Spacemaker no está registrado siga los siguientes pasos 1 Asegúrese que el aparato Spacemaker esté apagado OFF no en modalidad para hablar TALK 2 Oprima y sostenga el bot...

Page 78: ...iniciar una conversación de tres personas NOTA Si el auricular está encendido ON oprima el botón de altavoz en el aparato Spacemaker para unirse a la conversación TRANSFERENCIA DE LLAMADAS 1 Mientras el aparato Spacemaker está en modalidad de encendido ON en modalidad para hablar TALK oprima el botón para hablar TALK CALLBACK en el auricular para unirse a la llamada 2 Oprima el botón de altavoz pa...

Page 79: ...ndo oprima los botones de las flechas CID CID hacia arriba o hacia abajo para ajustar el nivel de volumen Hay ocho niveles de volumen Oprima el botón de la flecha hacia arriba para aumentar el nivel de volumen u oprima la flecha hacia abajo para disminuirlo El nivel de volumen actual aparece a la derecha de la pantalla El nivel más bajo de volumen es VOL 1 y VOL 8 es el más alto ENMUDECEDOR DEL MI...

Page 80: ...n cuando usted haya terminado su anuncio 5 Si usted elige no grabar un anuncio saliente el anuncio de fábrica se reproduce en su lugar Para volver al anuncio de fábrica después de que usted ha grabado su anuncio saliente oprima el botón de anuncio announce para reproducir su anuncio personal y oprima el botón de borrar erase para borrarlo Ejemplo de Anuncio Saliente Hola este es use su nombre aquí...

Page 81: ...A CONTESTADOR ESTÁ LLENA Cuando la memoria está llena el sistema contesta después de 10 timbres y una F aparece después del número de mensajes por ejemplo MSG 59F en la parte derecha de la pantalla del aparato Spacemaker Usted debe borrar algunos de los mensajes viejos para que el sistema pueda grabar nuevos mensajes PARA BORRAR MENSAJES Usted puede borrar mensajes de dos maneras un mensaje a la v...

Page 82: ...permite hacer las siguientes funciones Para Oprima este botón Revisar mensaje 1 Reproducir el mensaje 2 Detener la reproducción del mensajes 2 Borrar el mensajes 0 durante su reproducción Saltar el mensaje 3 Activar desactivar contestador 4 Revisar las opciones del menú 7 Si no hay tonos válidos para marcar durante 15 segundos se cortará la llamada IDENTIFICADOR DE LLAMADAS CID Este aparato recibe...

Page 83: ...recibe una llamada la información es transmitida por la compañía telefónica a suTeléfono con Identificador de Llamadas Caller ID entre el primero y el segundo timbre Cuando la memoria está llena una llamada nueva automáticamente reemplaza a la llamada más vieja en la memoria La indicación de llamada nueva NEW aparece en la pantalla para llamadas recibidas que no han sido revisadas La indicación de...

Page 84: ...mplazará al viejo en esa localización de memoria Usted escuchará un tono de confirmación PARA BORRAR EL ARCHIVO QUE SE MUESTRA EN LA PANTALLA 1 Asegúrese de que el teléfono esté apagado OFF no en modalidad para hablar TALK 2 Utilice el botón del Identificador de Llamadas CID VOL o CID VOL para mostrar el archivo deseado del Identificador de Llamadas 3 Oprima el botón para borrar delete channel La ...

Page 85: ...10 dígitos clave de área de 3 dígitos número telefónico de 7 dígitos 11 dígitos clave de larga distancia 1 clave de área de 3 dígitos número telefónico de 7 dígitos 1 Utilice el botón del Identificador de Llamadas CID VOL CID VOL para mostrar el archivo que usted quiera marcar Utilice el botón del Identificador de Llamadas CID VOL CID VOL para mostrar el archivo que usted quiera marcar 2 Si el núm...

Page 86: ...durante tres segundos y después seleccione el número a preprogramar utilizando los botones skip y rev Hasta cinco estaciones de radio AM y FM pueden ser almacenadas Finalmente oprima el botón para preprogramar para salvar la estación de radio PARA UTILIZAR ESTACIONES PRE PROGRAMADAS Para escuchar una estación pre programada en la banda actual oprima el botón para pre programar para entra en la mod...

Page 87: ...la del 6 una vez para la letra M oprima el 4 tres veces para la letra I oprima el 8 para la letraT y el 4 dos veces para la letra H NOTA Si usted inscribe una letra equivocada oprima el botón para borrar channel delete para retroceder 6 Oprima el botón de memoria memo para salvar el nombre La pantalla le indica que inscriba el número telefónico ENTER TEL NUMBR 7 Utilice el teclado de tono para ins...

Page 88: ...rima el botón de memoria 3 Utilice el botón de la flecha CID VOL o CID VOL para recorrer los números de los archivos hasta que el número que usted quiera aparezca en la pantalla 4 Oprima el botón TALK callback El número se marca automáticamente IMPORTANTE Si usted hace llamadas de prueba a números de emergencia almacenados en la memoria permanezca en la línea y explique brevemente al operador la r...

Page 89: ...hacer una llamada a través de un servicio de larga distancia El Número para Localización en la Memoria Número de Acceso de Larga Distancia 7 Código de Autorización 8 Número de larga distancia 9 llamado frecuentemente 1 Asegúrese de que el teléfono esté activado ON 2 Oprima el botón de memoria y después el 7 3 Cuando usted escuche un tono de acceso oprima nuevamente el botón de memoria y después op...

Page 90: ... el número de segundos que usted quiera programar NOTA El máximo periodo de tiempo que usted puede programar es 99 minutos y 99 segundos mientras que un minuto es igual a 60 segundos PARA EMPEZAR EL TEMPORIZADOR Cuando el tiempo de conteo ha sido programado 1 Oprima el botón del temporizador para empezar el conteo Usted escuchará un tono de confirmación 2 Cuando el tiempo de conteo expira la indic...

Page 91: ...del temporizador para detener la alarma y la pantalla muestra el número de canal el contador de llamadas y el nivel de volumen NOTA Para aprovechar al máximo la funcionalidad del contador asegúrese de que la batería esté completamente cargada CAMBIO DE LA BATERÍA Asegúrese de que el teléfono esté apagado OFF antes de cambiar la batería 1 Quite la puerta del compartimento de batería 2 Desconecte el...

Page 92: ...s o uno de los 10 números almacenados en la memoria saliente del teléfono DELETE ALL Indicación que le pregunta si quiere borrar BORRARTODOS archivos del Indicador de Llamadas DELETED BORRADO Indicación confirmando que el archivo del Identificador de Llamadas Memoria ha sido borrado END OF LIST Indicación de que no hay información adicional en la memoria FIN DE LISTA del Identificador de Llamadas ...

Page 93: ...ida NO ENVIADO EMPTY VACIO Indica que una localización de memoria está disponible NO CALLS Indica que no se han recibido llamadas nuevas NO LLAMADA SEÑALES SONORAS DEL AURICULAR Señal Significado Un tono de gorgeo largo Indica que hay una llamada entrante con el timbre activo Dos tonos largos Tono de confirmación Un tono corto y uno largo Señal del Localizador Un tono corto cada siete segundos Adv...

Page 94: ... Usted debe estar suscrito al servicio de Identificador de Llamadas a través de su compañía telefónica para recibir archivos del Identificador de Llamadas Error en el Mensaje del Identificador de Llamadas El aparato muestra este mensaje si detecta cualquier cosa que no sea información válida del Identificador de Llamadas durante el periodo de silencio después del primer timbre Este mensaje indica ...

Page 95: ...demasiadas extensiones de teléfono en su línea Intente desconectar algunos teléfonos Vea las soluciones para No hay tono de marcar El auricular o el aparato Spacemaker pueden su número de Identificación de registro Si el auricular o el aparato Spacemaker pierden su registro la indicación PRESS AND HOLD BASE PAGE KEY aparece en la pantalla para indicarle que necesita registrar el auricular o el apa...

Page 96: ...r emite tonos constantes Desconecte el cable de corriente espere 2 minutos y vuelva a conectarlo para re programar el aparato Vea las soluciones para No hay tono de marcar Discado de Memoria Programó usted las teclas de las localizaciones de memoria correctamente Siguió la secuencia de discado adecuada Asegúrese de que el selector de tono pulso está programado correctamente Reprogramó usted número...

Page 97: ... llegase a requerir durante el período de garantía Fecha de compra______________________________________________________ Nombre de la tienda___________________________________________________ GARANTÍA LIMITADA Lo que cubre su garantía Defectos de materiales o de trabajo Por cuánto tiempo después de la compra Un año a partir de la fecha de compra El periodo de garantía para unidades arrendadas se i...

Page 98: ...Espacio Spacemaker 15 Formato del Auricular y de la Base de Pared 15 Funcionamiento del Altavoz 26 G Garantía Limitada 46 H Herramientas Necesarias 10 I Identificador de Llamadas 43 Identificador de Llamadas CID 31 Idioma 16 21 Indicador de Mensajes 29 Indicador Luminoso de Carga 28 Indicador Luminoso de En Uso 24 Indicador Luminoso del Altavoz 27 Información de Interferencias 3 Información sobre ...

Page 99: ...emporizador 38 Para Programar losTimbres para Contestar 19 20 Para Recibir una Llamada 23 27 Para Recibir y Almacenar Llamadas 32 Para Revisar Archivos del Identificador de Llamada 32 Para Revisar el Anuncio 29 Para Revisar y Borrar Números Almacenados 38 ParaTransferir Archivos del Identificador de Llamadas a la Memoria 32 Para Utilizar elTemporizador con Otras Modalidades 40 Para Utilizar estaci...

Page 100: ...Monto total incluido _______________ Envíe el formulario de pedido y giro postal o cheque en moneda estadounidense a nombre de Thomson a Thomson Mail Order Department P O Box 8419 Ronks PA 17573 8419 Nombre_______________________________________________________ Dirección_____________________________________Depto ____________ Ciudad________________Estado________ Código Postal_________ Número Telefó...

Page 101: ...LICABLE A ESTE PRODUCTO CUALQUIER OTRA GARANTÍA EXPRESA O IMPLÍCITA INCLUYENDO TODAS LAS GARANTÍAS IMPLÍCITAS DE MERCADO O DE SALUD PARA CUALQUIER PROPÓSITO SON CONSIDERADAS NO VÁLIDAS NINGUNA INFORMACIÓN VERBAL O ESCRITA OTORGADA POR ATLINKS USA INC SUS AGENTES O EMPLEADOS SERÁ CONSIDERADA PARA CREAR UNA GARANTÍA NI PARA AUMENTAR BAJO NINGUNA CIRCUNSTANCIA LA COBERTURA DE ESTA GARANTÍA LA REPARAC...

Reviews: