background image

29

Canned Vegetables, Frozen Vegetables,
Fresh Vegetables, Potatoes, Fish
Fillets, Chicken Pieces, Ground Meats

The Sensor Cooking pads give you
easy, automatic results with a vari-
ety of foods. (See the Cooking
Guide below.)

1

Place covered food in the oven.
Press the food pad. The oven
starts immediately.

2

The oven signals when steam is
sensed and time remaining is
counting down. Turn or stir the
food if necessary. 

Do not open the oven door until
time is counting down. If the door
is opened, close it and press
START immediately.

NOTE:

If the food is not done

enough, use Micro Cook to cook
for more time.

NOTE: Do not use the 
metal shelf with Sensor
Cooking.

Sensor Cooking

POTATOES

CANNED

VEG

FROZEN

VEG

FRESH

VEG

GROUND

MEATS

FISH

FILLETS

CHICKEN

PIECES

Canned Vegetables

4–16 oz.

Cover with lid or vented plastic wrap.

Frozen Vegetables

4–16 oz.

Follow package instructions for 
adding water. Cover with lid or 
vented plastic wrap.

Fresh Vegetables

4–16 oz.

Add 1/4 cup water per serving. 
Cover with lid or vented plastic wrap.

Potatoes

1/2–2 lbs.

Pierce skin with fork. Arrange in a 
star pattern in the center of the 
microwave.

Fish Fillets

4–16 oz.

Cover with vented plastic wrap.

Chicken Pieces

1–8 

Cover with vented plastic wrap.

pieces

Ground Meats

1/2–3 lbs.

Use round casserole dish. Crumble 

(Beef, Pork, Turkey)

meat into dish. Do not cover the 
dish. Drain and stir at signal.

Food

Amount

Comments

Cooking Guide

How to Change the Automatic
Settings

You can adjust the cooking time
for all foods, except for CANNED
VEG, to suit your personal taste.

Reduce time by 10%: Press 
after the food pad.

Add 10% to cooking time: Press

after the food pad.

9

1

EXPRESS COOK

Summary of Contents for SpacemakerXL 164D2966P212

Page 1: ...ntrols on Your Microwave 12 Time Cooking 15 Temperature Cooking 21 Automatic Cooking 25 Other Features 30 34 Helpful Information Oven Shelf 34 Care and Cleaning 37 42 If Something Goes Wrong Before Yo...

Page 2: ...is important not to defeat or tamper with the safety interlocks Do Not Place any object between the oven front face and the door or allow soil or cleaner residue to accumulate on sealing surfaces Do N...

Page 3: ...ease call us with your change of address or ownership stating model and seri al numbers Call 800 626 2000 This appliance must be registered Please be certain that it is Write down the model and serial...

Page 4: ...not operate this appliance if it has a damaged power cord or plug if it is not working properly or if it has been damaged or dropped Use this appliance only for its intended use as described in this...

Page 5: ...d in the oven when not in use If materials inside oven should ignite keep the oven door closed turn the oven off and dis connect the power cord or shut off power at the fuse or circuit breaker panel I...

Page 6: ...ven could result in injury Do not boil eggs in a microwave oven Pressure will build up inside egg yolk and will cause it to burst possibly resulting in injury Operating the microwave with no food insi...

Page 7: ...zen beverages in narrow necked bottles especially carbonated beverages Even if the container is opened pressure can build up This can cause the container to burst possibly result ing in injury Hot foo...

Page 8: ...rowave to dry newspapers Not all plastic wrap is suitable for use in microwave ovens Check the package for proper use Paper towels waxed paper and plastic wrap can be used to cover dishes in order to...

Page 9: ...nt the starting and spread ing of accidental cooking fires while the vent fan is in use Clean the underside of the microwave often Do not allow grease to build up on the microwave or the fan filters I...

Page 10: ...ectri cian or service technician install an outlet near the appliance For best operation plug this appli ance into its own electrical outlet to prevent flickering of lights blowing of fuse or tripping...

Page 11: ...ned in the oven 6 Receptacle for Temperature Probe Probe must be securely inserted into the receptacle before the oven will Temp Cook or Roast 7 Touch Control Panel Display 8 Cooktop Lights 9 Grease F...

Page 12: ...ng Time EXPRESS COOK Starts immediately ADD 30 SEC Starts immediately POWER LEVEL Power Level 1 10 DEFROST AUTO TIME MICRO COOK I II POWER LEVEL 1 10 ADD 30 SEC 1 Time and Auto Features Allows you to...

Page 13: ...OAST Desired food Press once temperature TEMP COOK ROAST Medium automatically Press twice selected TEMP COOK ROAST Well automatically Press three times selected TEMP COOK ROAST Simmer automatically Pr...

Page 14: ...mple of this is shown with Power Level 3 the defrost cycle If microwave ener gy did not cycle off the outside of the food would cook before the inside was defrosted Here are some examples of uses for...

Page 15: ...ower level if you don t want full power Press POWER LEVEL Select a desired power level 1 10 4 Press MICRO COOK I II again 5 Enter the second cook time 6 Change the power level if you don t want full p...

Page 16: ...e dish after half of time Turntable should be turned off frozen chopped 10 oz package 5 to 7 min In 1 qt casserole frozen spears 10 oz package 5 to 7 min In 1 qt casserole place 3 tablespoons water Ca...

Page 17: ...en 10 oz package 5 to 7 min In 1 qt casserole place 2 tablespoons water Potatoes fresh cubed 4 potatoes 10 to 12 min Peel and cut into 1 inch cubes Place in white 6 to 8 oz each 2 qt casserole with 1...

Page 18: ...ed or vented AFTER food has partially defrosted Plastic storage containers should be at least partially uncovered Family size prepackaged frozen dinners can be defrosted and microwaved If the food is...

Page 19: ...s with foil When finished separate pieces and let stand to complete defrosting Poultry Chicken broiler fryer 16 to 20 min Place wrapped chicken in dish Unwrap and turn over cut up 21 2 to 3 lbs after...

Page 20: ...level can be changed as time is counting down Press POWER LEVEL and enter 1 10 Express Cook 1 EXPRESS COOK 4 EXPRESS COOK 5 EXPRESS COOK 6 EXPRESS COOK 3 EXPRESS COOK 2 EXPRESS COOK You can use this...

Page 21: ...or shield warm areas with small pieces of foil After defrosting most meats need to stand 5 minutes to com plete defrosting Large roasts should stand for about 30 minutes If the weight of food is stat...

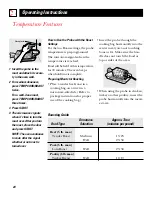
Page 22: ...t turn when the probe is in use The temperature probe is a food thermometer that gauges the inter nal temperature of food The probe must be used when using Temp Cook or Roast The probe is not recommen...

Page 23: ...s Do not twist drop or bend the probe Use a lower power level with the probe foods will take longer to cook but they will heat more evenly Be sure frozen food has been completely defrosted before inse...

Page 24: ...sure the han dle does not touch the food or top or sides of the oven When using the probe in chicken turkey or other poultry insert the probe horizontally into the meati est area Receptacle Beef 5 lb...

Page 25: ...is pressed Beef Pot Roast 5 7 Add enough liquid to just cover meat If adding vegetables make sure they are completely covered by liquid Chili 5 8 Precook meat Stir after 3 hours if possible Chicken S...

Page 26: ...covering are essential for best Auto Sensor cooking Always use microwave safe con tainers and cover them with lids or vented plastic wrap Never use tight sealing plastic containers they can prevent s...

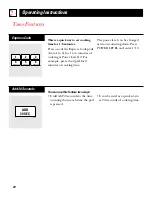
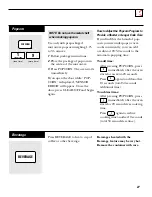
Page 27: ...20 30 seconds to the automatic popping time To add time After pressing POPCORN press immediately after the oven starts for an extra 20 seconds Press again to add another 10 seconds total 30 seconds a...

Page 28: ...or is opened close it and press START immediately After removing food from the oven stir if possible to even out the tem perature If food is not hot enough use Micro Cook to reheat for more time Rehea...

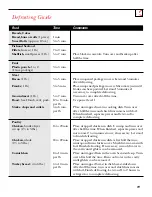
Page 29: ...FISH FILLETS CHICKEN PIECES Canned Vegetables 4 16 oz Cover with lid or vented plastic wrap Frozen Vegetables 4 16 oz Follow package instructions for adding water Cover with lid or vented plastic wra...

Page 30: ...have food in the oven the oven will display FOOD IS READY and beep once a minute until you either open the oven door or press CLEAR OFF Cooking Complete Reminder The HELP pad displays feature informat...

Page 31: ...On Off is operating Timer On Off TIMER ON OFF 1 EXPRESS COOK 4 EXPRESS COOK 7 5 EXPRESS COOK 6 EXPRESS COOK 8 9 3 EXPRESS COOK 2 EXPRESS COOK 0 DISPLAY ON OFF REMINDER 1 EXPRESS COOK 4 EXPRESS COOK 7...

Page 32: ...s When the control panel is locked an L will be displayed to the extreme right Child Lock Out CLEAR OFF For best cooking results leave the turntable on It can be turned off for large dishes Press TURN...

Page 33: ...n or off Press SOUND LEVEL Choose 0 3 for mute to loud Sound Level SOUND LEVEL 0 1 2 3 You can set the night light to turn on and off automatically at any time you want 1 Press AUTO NITE LIGHT 2 Enter...

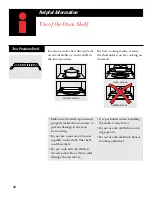
Page 34: ...damage to the oven from arcing Do not use a microwave brown ing dish on the shelf The shelf could overheat Do not cook with the shelf on the microwave floor This could damage the microwave Use pot hol...

Page 35: ...or cook more than one dish of food at the same time Ideas for Using the Shelf To cook on 2 levels or To cook 2 dishes on the lower level 1 Double the cooking time 2 Switch places after 1 2 the time a...

Page 36: ...ap or covering with wax paper allows excess steam to escape Shielding In a regular oven you shield chicken breasts or baked foods to prevent over browning When microwaving you use small strips of foil...

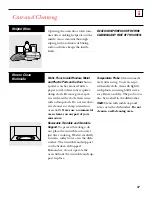
Page 37: ...n walls Never use a commercial oven cleaner on any part of your microwave Removable Turntable and Turntable Support To prevent breakage do not place the turntable into water just after cooking Wash it...

Page 38: ...can also scratch the control panel Door Surface It s important to keep the area clean where the door seals against the microwave Use only mild non abrasive detergents applied with a clean sponge or so...

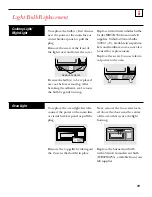
Page 39: ...2 available in supermar kets and hardware stores may also be used for replacements Replace the screw Connect electri cal power to the oven Cooktop Light Night Light REMOVE SCREWS To replace the oven l...

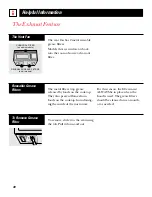
Page 40: ...o the rear using the tab Pull it down and out To Remove Grease Filter The metal filters trap grease released by foods on the cooktop They also prevent flames from foods on the cooktop from damag ing t...

Page 41: ...the front of the oven and remove it To Remove Charcoal Filter l l 023 To install a new filter remove plas tic and other outer wrapping from the new filter Insert the filter into the top open ing of th...

Page 42: ...circuit breaker tripped Power surge Unplug the microwave oven then plug it back in Plug not fully inserted into Make sure the 3 prong plug on the oven is wall outlet fully inserted into wall outlet Du...

Page 43: ...ol has been locked Press and hold CLEAR OFF for about When the control panel is 3 seconds to unlock the control locked an L will be displayed LOCKED Appears on Display Sensor Reheat is for single Use...

Page 44: ...44 Notes...

Page 45: ...Notes 45...

Page 46: ...ed loca tions offer you service today or tomorrow or at your convenience 7 00 a m to 7 00 p m weekdays 9 00 a m to 2 00 p m Saturdays Our factory trained technicians know your appliance inside and out...

Page 47: ...los clientes de habla espa ola 800 626 2224 You can have the secure feeling that GE Consumer Service will still be there after your warranty expires Purchase a GE contract while your warranty is stil...

Page 48: ...exclusion may not apply to you This warranty gives you specific legal rights and you may also have other rights which vary from state to state To know what your legal rights are in your state consult...

Reviews: