CONNECTING TO PLUMBING FACILITIES
(CONT.)
Turn the water on and check for leaks at both connections.
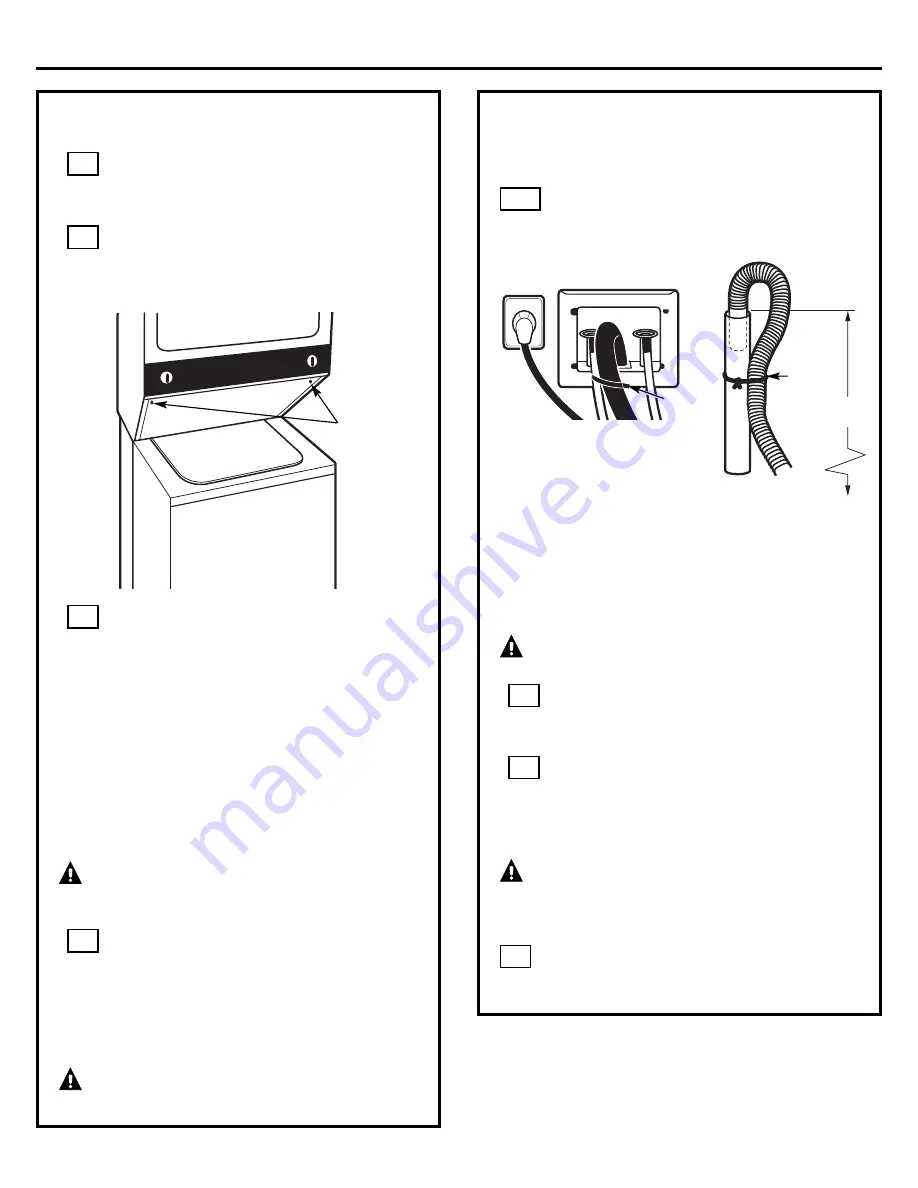
Place formed end of drain hose in drain facility
and secure with cable tie (provided in literature
package).
NOTE:
Drain hose MUST be secured to drain facility
in all cases.
CONNECTING TO POWER SUPPLY
NOTE:
For special electrical installations, see
ELECTRICAL
INFORMATION
section, pages 5 and 6.
CAUTION:
Be sure electricity is OFF at
power supply source (circuit breaker/fuse box).
Plug power cord into electrical outlet.
CONNECTING TO EXHAUST
Connect the exhaust duct to outside ductwork.
Use duct tape to seal all joints. See
EXHAUST
INFORMATION
.
FINAL APPLIANCE LEVELING
CAUTION:
ALL WEIGHT MUST BE
REMOVED FROM APPLIANCE LEVELING LEG WHILE
ADJUSTING. THREADS ON LEG WILL BE DAMAGED
OTHERWISE.
Again, make sure the appliance rests firmly on
all four legs. No rocking of the appliance should
occur.
16
15
14
13A
MOVING SPACEMAKER
™
TO OPERATING
LOCATION
Remove the 2 screws securing the access panel
to the dryer cabinet. Lift the front access panel
until the tabs can be disengaged from the dryer
cabinet and remove the panel.
Route the inlet hoses, drain hose and power cord
through the rear access area for temporary
holding when moving the appliance to the
operating location.
To ensure the Spacemaker
™
is level and solid on
all four legs, tilt the Spacemaker
™
forward so the
rear legs are off the floor. Gently set the
Spacemaker
™
back down to allow the rear legs
to self-adjust. Place a level on top of the washer.
Check it side to side, then front to back. Screw
the front leveling legs up or down to ensure the
Spacemaker
™
is resting solidly on all four legs
(no rocking of the Spacemaker
™
should occur).
NOTE:
Keep the leg extension at a minimum to prevent
excessive vibration.
CONNECTING TO PLUMBING FACILITIES
CAUTION:
Be sure water supply lines have
been thoroughly flushed to remove particles that
might clog the washer filter screens.
Determine which water faucet is the
HOT
water
faucet, carefully connect the bottom inlet hose
to the
HOT
water faucet, tighten by hand,
and then tighten another 2/3 turn with pliers.
Carefully connect the top inlet hose to the
COLD
water faucet, tighten by hand, and then
tighten another 2/3 turn with pliers.
CAUTION:
DO NOT CROSS-THREAD
OR OVERTIGHTEN THESE CONNECTIONS.
13
11
10
12
3
Access panel
screws
Installation Instructions
Cable tie
Cable tie
33
″
Min./
96
″
Max.


