Warning!
Long switch-on time and high ambient temperature.
Risk of burns from the solenoid valve
► Allow to cool before dismantling.
Carry out the following steps:
1.
Disconnect the electrical connection from the solenoid valve to the Pico Blade
on the circuit board (43).
2.
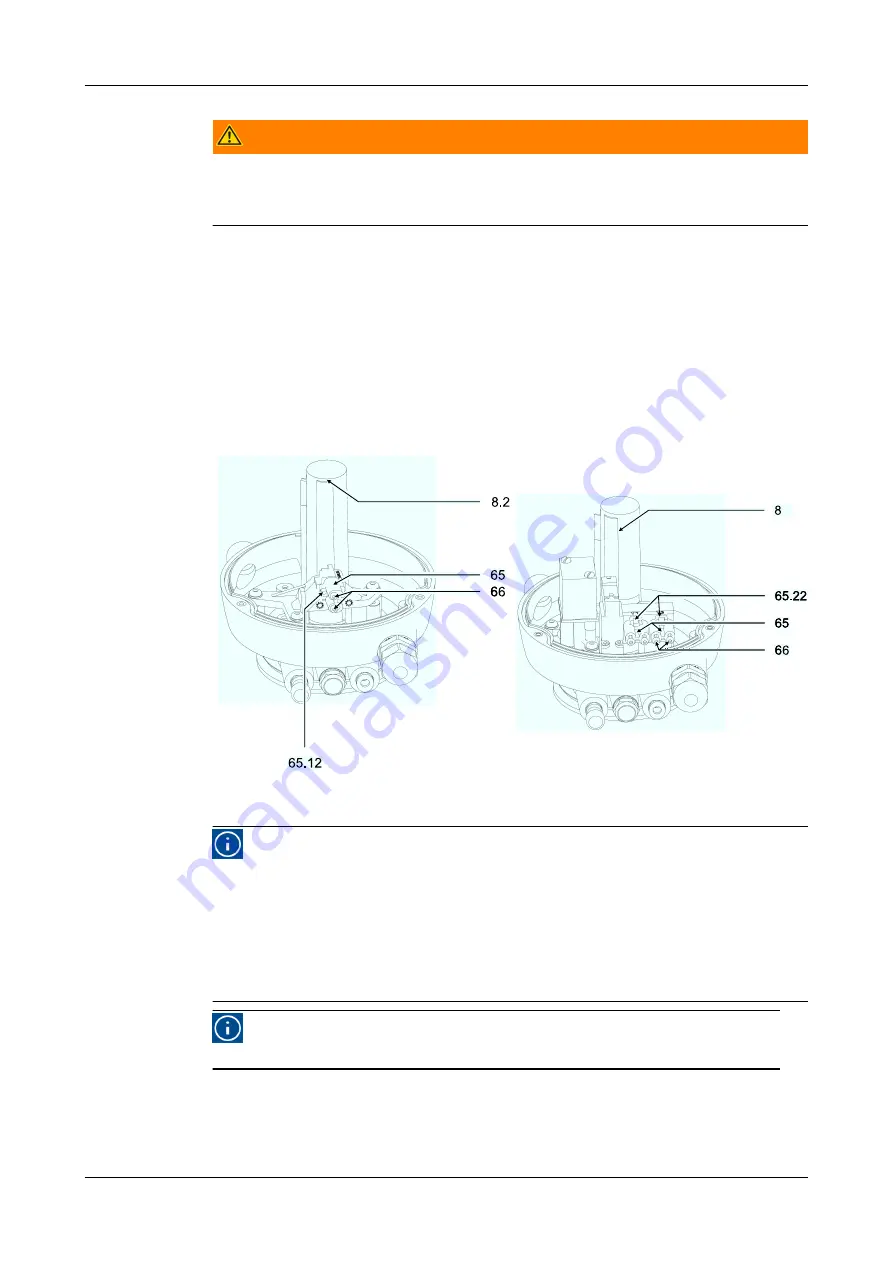
Loosen the screws (66) and remove the solenoid valve (63) from the
pneumatic block (8).
3.
Loosen the screws (66) and remove the control plates (65) from the
pneumatic block (8).
®
Done
Fig.68
Fig.69
Hint!
When using the pneumatic block (8.2) with 1 valve plate (65), the
groove (65.12) must be fitted on the left side.
The two screws (66) are located in the left mounting holes.
When using the pneumatic block (8) with 1 or 2 control plates (65), the
groove (65.22) must be mounted upward.
The screws (66) are located in the lower mounting holes.
Hint!
For ASEPTOMAG valves, use special types of the pneumatic block!
Tighten the screws (66) at a tightening torque of 1 Nm.
10.5.9 Removing the pneumatic block
Maintenance
Dismantling the Control Top into its Components
430BAL010699EN_6
17.03.2022
91
Summary of Contents for T.VIS A-15
Page 6: ...430BAL010699EN_6 6 17 03 2022...
Page 116: ......


