6.6.2
Mounting to a Butterfly Valve T-smart 8000
Requirement:
•
Pay attention not to kink the air hoses when mounting the control top.
Notice
The permanent magnet on the switch bar is fragile.
Damage to the permanent magnet.
► Protect the permanent magnet against impact stress.
Notice
Magnetic fields resulting from the permanent magnet on the
switch bar.
Magnetic fields can delete data carriers and affect or destroy electronic or
mechanical components.
► Protect the components against the magnetic fields from the switch bar.
Carry out the following steps:
1.
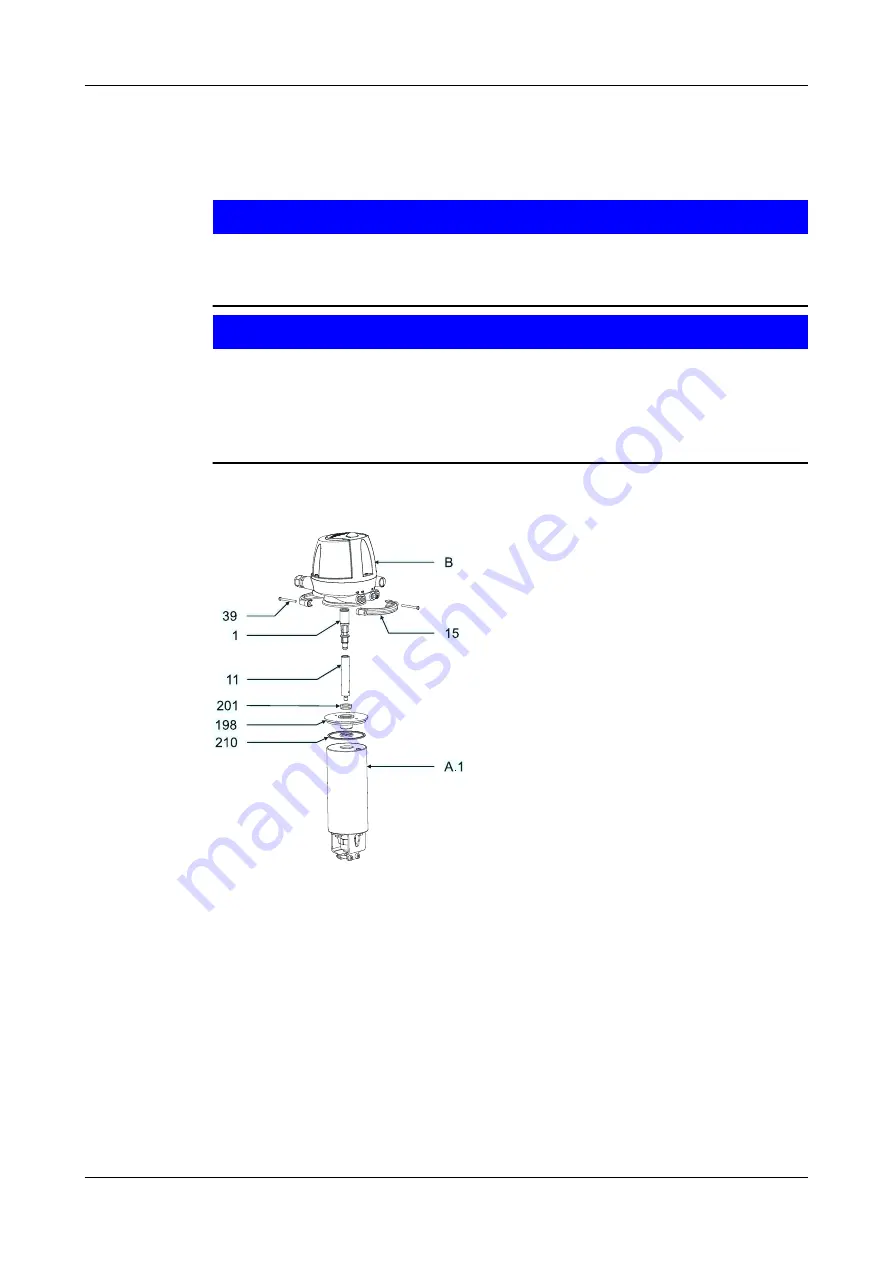
Fit the bearing (201) into the locking screw (198).
Fig.31
2.
Fit the O-ring (210).
3.
Use a face spanner to screw the locking screw (198) into the actuator (A.1).
4.
Screw the switch bar (1) together with switch bar (11) into the actuator, torque
2 Nm.
5.
Fit the control top (B) over the switch bar (1) and on the actuator.
6.
Tighten the clamps (15) and screws (39) to a torque of 1 Nm (0.7 lbft).
7.
Align the pneumatic and electrical connections in accordance with the valve
block configuration.
Assembly and installation
Mounting the Control Top to Different Valves
430BAL010697EN_2
15.04.2020
59
Summary of Contents for T.VIS M-15
Page 6: ...430BAL010697EN_2 6 15 04 2020...
Page 53: ...Fig 27 Assembly and installation Electrical connections 430BAL010697EN_2 15 04 2020 53...
Page 55: ...Fig 28 Assembly and installation Electrical connections 430BAL010697EN_2 15 04 2020 55...
Page 119: ...Appendix 430BAL010697EN_2 15 04 2020 119...
Page 120: ......


