background image

2

A

A N

NO

OTE

TE TTO

O CONSUMERS

CONSUMERS

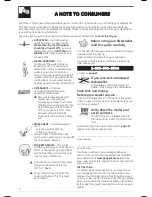
We’d like to thank you and congratulate you for making the right decision in purchasing your dishwasher.
This User Guide is designed to be kept near your dishwasher at all times for quick and easy reference.

Features may vary on some dishwasher models. Please read the following tips to insure your dishwasher

is operating at its best performance.
We care about you and your appliance and we want your dishwasher 

to do its job for you.


HOT WATER –

Your dishwasher

needs hot water for best results.

Water entering the dishwasher

should be at least 120°F

, but your

dishwasher performs 

BETTER

with

HIGHER

water temperatures not to

exceed 150°F. 

WATER HARDNESS – 

The

hardness of the water plays an

important part in how well your

dishwasher cleans. In areas where

water is very hard (12 grains or

more), it may be necessary to install

a water softener. If you do not know

the hardness of your water supply,

contact your local water department.


• DETERGENTS –

Only use

  detergents labeled for use in

  automatic dishwashers.


Never use laundry detergents or

liquid soaps… that will cause

oversudsing and leaks. The amount

of detergent you use depends on the

water hardness and the amount of

soil on your dishes. In most cases,

detergent amounts should be

increased for hard water and heavy

soil.

RINSE AGENT –

should always be

used :


– to reduce water spotting.

– to improve drying.

Always check and refill the rinse

agent when necessary. Do not overfill

the rinse agent reservoir. 

FOR BEST RESULTS – 

The cycles

and the options you choose have an

effect on the results you get. Please,

see the Operating Instructions and

Tips for  more information.


Before using your dishwasher,

read this guide carefully.

It is intended to help you operate and maintain your

new dishwasher properly.
Keep it handy for answers to your questions.
If you don’t understand something or need more

help, please call : 

1-800-561-3344

1-800-561-3344

If you received a damaged

dishwasher…

Immediately contact the dealer (or

builder) that sold you the dishwasher.

Save time and money.

Before you request service…

Check the Problem Solver in the back of this guide.

It lists causes of minor operating problems that you

can correct yourself.

Write down the model and

serial numbers.

You’ll find them on a label sticked to

the tub wall just inside the dishwasher

door.

Before sending in the ownership card on 

page 25

,

please write these numbers here :

_____________________________________________

Model Number

_____________________________________________

Serial Number

Use these numbers in any correspondence or

service calls concerning your dishwasher. Register

your appliance at 

www.geappliances.ca

 and be

sure never to lose this important information. Staple

sales slip here.

We’ll be there…

No matter what major appliance you buy from us,

you always get more than a quality product. You

receive the added assurance that, should you ever

need our help, we’ll be there. We ask that you please

be sure to read all the Important Safety Instructions

before operating your new appliance to insure your

safety. 

or refer to 

page 24

.

.

It is possible and normal that water

stays at the bottom of the tub

(0.5" to 1" deep). 

Some models have a plastic film

covering the door. This film must

be removed. 

Summary of Contents for Dishwasher

Page 1: ...RT NOTE This product was verified to be in excellent condition when it left our manufacturing facility If it has been damaged during transit or in installation please report that damage immediately to the Retail Outlet where it was purchased Although your warranty covers manufacturing defects in material or workmanship it does not include coverage for delivery damage Please refer to your warranty ...

Page 2: ... the options you choose have an effect on the results you get Please see the Operating Instructions and Tips for more information Before using your dishwasher read this guide carefully It is intended to help you operate and maintain your new dishwasher properly Keep it handy for answers to your questions If you don t understand something or need more help please call 1 800 561 3344 1 800 561 3344 ...

Page 3: ...washer unless all enclosure panels are properly in place Do not abuse sit on or stand on the door or dish rack of the dishwasher Close supervision is necessary if this appliance is used by or near children Do not allow children to play inside on or with this appliance or any discarded appliance Dispose of discarded appliances and shipping or packing material properly Before discarding a dishwasher...

Page 4: ... if it will not fit the outlet have a proper outlet installed by a qualified electrician Caution for personal safety DO NOT USE AN EXTENSION CORD OR AN ADAPTER PLUG WITH THIS APPLIANCE DO NOT UNDER ANY CIRCUMSTANCES CUT OR REMOVE THE THIRD GROUNDING PRONG FROM THE POWER CORD Dishwasher must be electrically grounded in accordance with local codes and ordinances Electrical requirements This applianc...

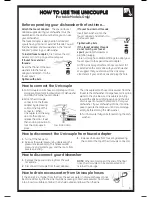
Page 5: ... adapter 2 Attach the Unicouple connector to the faucet adapter by depressing collar at the top of the connector When Unicoupler is all the way up onto the adapter release the collar It will then snap into position to lock the Unicouple in place The Unicouple s small hose carries water from the faucet to the dishwasher Its large hose carries drain water to the sink Be sure Unicouple is pointing to...

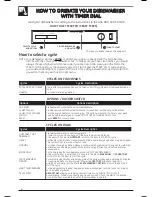
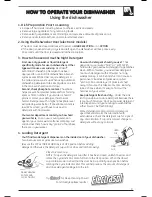
Page 6: ...yield high performance on average soils and maximum energy efficiency and minimum water consumption For rinsing loads that will be washed later DO NOT USE DETERGENT 1 Be sure the door is unlatched 2 Sowly turn the dial to RINSE ONLY 3 HI HEAT DRY is OFF 4 Latch the door to start the cycle For warming clean dishes and serving plates This cycle will take approximately 30 minutes 1 Load clean dishes ...

Page 7: ...n 3 seconds The light above the LOCK pad will turn off DELAY HOURS You can delay the start of a wash cycle for up to 8 hours Start Reset Close and latch the door Touch the START RESET pad to begin the cycle Water fill begins and approximately 60 seconds later the wash action begins Touch START RESET a second time to pump out and then turn off the dishwasher Do not touch START RESET more than one t...

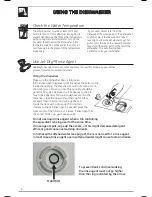
Page 8: ...t go higher than the ring indicated by the arrow If your water heater is far from the dishwasher the water going to the dishwasher might be cold if the line was not drained recently To allow the dishwasher to get hot water drain the line at the nearest hot water faucet until the water gets hot then start the dishwasher This will allow the best performance for your dishwasher Do not use liquid rins...

Page 9: ...gent into dispenser until you re ready to wash dishes either It won t be fresh OR dry Some detergents contain colorant pigment or dyes that will discolor the tub interior with extended use Check the detergent cup for signs of any discoloration If cup is discolored change to detergent without any colorant 4 Loading Detergent You ll find two detergent dispensers on the inside door of your dishwasher...

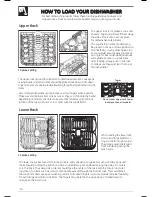
Page 10: ... face the center of the rack Also be careful not to let a portion of an item such as a pot or dish handle extend through the bottom rack This could block the wash arm and cause poor washing results Fold down fingers on some models provide flexibility for extra large and hard to fit items The fingers may be left in the up position or folded down to customize the lower rack 10 place setting 10 place...

Page 11: ...tainers should go in the bottom of the silverware basket with silverware on top On some models the lids of both end baskets can be closed to contain small items Long items can be placed on the cupshelf in the upper rack You can add a dish anytime BEFORE the main wash before the opening of the detergent cup 1 Push the door latch to the left Washing will stop 2 Wait a few seconds until the water cal...

Page 12: ...urn off the water supply Disconnect the water inlet line from the water valve Drain water from the inlet line and water valve Use a pan to catch the water Reconnect the water inlet line to the water valve Drain collection chamber under the unit by disconnecting hose to pump Reconnect after draining Remove the plastic pump cover in the tub bottom and use a sponge to soak up water in the rubber boot...

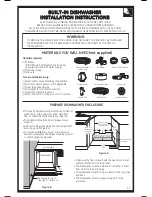
Page 13: ...pplied Electrical Cable or Power Cord 90 Elbow Screw Type Clamps Strain Relief Thread Seal Tape Wire Nuts Waste Tee Hot Water LineWire Nuts PREPARE DISHWASHER ENCLOSURE The touch cabinet opening must have a minimum width of 24 and a minimum of 34 high from floor to underside of the countertop Figure A The back wall should be free of pipes or wires Figure A Adjacent cabinets should be square and pl...

Page 14: ...gure E DRAIN PREPARATION A drain hose already connected to the pump outlet is supplied with the dishwasher If the drain hose is not long enough and has to be extended use a 1 2 O D copper tubing with clamp THE RUBBER END OF THE DRAIN HOSE MAY BE CUT OFF TO ACCOMMODATE THE FOLLOWING SIZES OF TAIL PIECE OR WASTE TEE 5 8 3 4 OR 1 1 A suggested method of connecting the drain hose to a WASTE TEE or a Y...

Page 15: ...INANCES CAUTION ELECTRICAL REQUIREMENTS This appliance must be supplied with 120V 60 Hz and connected to an individual properly grounded branch circuit protected by a 15 amperes circuit breaker or fuse Wiring must be 2 insulated wires with ground Minimum size No 14 gauge If the electrical supply provided does not meet the above requirements call a licensed electrician before proceeding CABINET PRE...

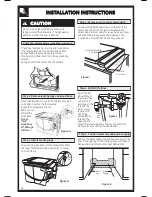
Page 16: ...kick Unscrew partially the two screws on the top of the access panel Remove the two screws below the access panel and set aside for reuse Remove access panel by sliding the access panel sideways The junction box is located behind the access panel Step 4 Install 90 elbow Install the 90 elbow fitting to the water valve using thread seal tape on the threads The water valve requires 3 8 NPT fitting wi...

Page 17: ...orrect alignment See Figure O Dishwasher should be level left to right and front to back for proper dish rack operation and dishwasher performance Dishwasher door should be in alignment with adjacent cabinets See Figure P Figure O Step 11 Position dishwasher and fasten to cabinet Open the door and position the dishwasher tub flange 3 4 from the cabinet opening Fasten the dishwasher to the undersid...

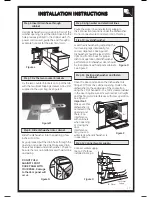
Page 18: ...T BE ROUTED AS FOLLOWS MIN 30 ABOVE THE FLOOR FOR UNDER THE SINK CONNECTION MIN 20 ABOVE THE FLOOR FOR INSTALLATION DIRECTLY THROUGH THE FLOOR Fig S Step 14 Connect power supply 5 8 1 Cut Line Do not cut corrugated portion of hose If dishwasher is to be directly wired to house wiring continue with this step Verify that power is turned off at source We highly recommend that the PowerCord Kit WX09X7...

Page 19: ...n off power supply tighten connections and restore power Check for leaks around the door A leak around the door could be caused by dishwasher door rubbing or hitting against adjacent cabinetry Reposition the dishwasher if necessary The dishwasher will drain about 5 minutes after the first fill Check drain lines If leaks are found turn off power correct as necessary and restore power Step 17 Replac...

Page 20: ...S ABOUT OPTIONAL ACCESSORIES You can change the appearance of your dishwasher by adding a custom panel trim kit GPF25B Black GPF325B GPF425B GPF25W White GPF325W GPF425W GPF25C Bisque GPF325C GPF425C 3 4 Trimless wood panel kit This accessory contains parts and instructions for you to supply and install a 3 4 thick decorative wood door 1 4 Wood panel trim kit This accessory contains trim and instr...

Page 21: ... DETERGENT LEFT IN DISPENSER CUPS Water may not be reaching the detergent cups Move dishes that may be blocking detergent cup The dispenser cover may not be opening or may be blocked by improperly loaded items If you used a powder detergent open the cup and remove any caked on detergent If the cup still doesn t open automatically call for service Detergent may be old If the powder detergent is har...

Page 22: ...r into the bottom of the dishwasher 6 Close the door and allow to complete the cycle If vinegar rinse doesn t work Repeat as above except use 1 4 cup 60 ml of citric acid crystals instead of vinegar Most drugstores carry citric acid crystals If yours doesn t call Service Parts Using a vinegar or citric acid crystal rinse more than twice a month Consider a home water softener CLOUDINESS ON GLASSWAR...

Page 23: ... out water by slowly turning the control dial until a drain period is reached On models with Electronic Control Pump out water by pressing the START RESET pad then 10 seconds later press START RESET pad again Repeat if necessary STAINING OF TUB INTERIOR Some detergents contain colorant pigment or dyes that will discolor the tub interior with extended use Check the detergent cup for signs of any di...

Page 24: ... Mabe CanadaInc 1 Factory Lane Suite 310 Moncton N B E1C 9M3 WARRANTY SERVICE 1 800 561 3344 PARTS ACCESSORIES Individuals qualified to service their own appliances can have parts or accessories sent directly to their homes VISA MasterCard cards are accepted Instructions contained in this manual cover procedures to be performed by any user Other servicing generally should be referred to a qualifie...

Page 25: ...TIFICATE FICHE D INSCRIPTION DU PROPRIÉTAIRE Please register your product to enable us to contact you in the remote event a safety notice is issued for this product and to allow for efficient communication under the terms of your warranty should the need arise Veuillez enregistrer votre produit afin de nous permettre de communiquer avec vous si jamais un avis de sécurité concernant ce produit étai...

Page 26: ... possible defects with this appliance Damage caused after delivery This warranty is extended to the original purchaser and any succeeding owner for the products purchased for home use within Canada In home warranty service will be provided in areas where it is available and deemed reasonable by Mabe to provide EXCLUSION ON IMPLIED WARRANTIES Your sole and exclusive remedy is product repair as prov...

Page 27: ...00A430P006 F AJOUTER UN LITRE D EAU DANS L APPAREIL AVANT LE PREMIER DÉMARRAGE NOTE Ce produit était en excellent état à sa sortie de l usine S il a été endommagé pendant son transport ou son installation veuillez signaler ces dommages immédiatement au magasin où vous l avez acheté Votre garantie couvre les vices de matières et de fabrication mais ne couvre pas les dommages causés lors de la livra...

Page 28: ...rvoir de produit de rinçage POUR OBTENIR DE BONS RÉSULTATS Les résultats que vous obtenez dépendent des programmes et options que vous choisissez Pour de plus amples renseignements voir la section Directives de fonctionnement Avant d utiliser votre lave vaisselle lisez attentivement le présent guide Il a été conçu pour vous aider à faire fonctionner et entretenir convenablement votre nouveau lave ...

Page 29: ...aut pour éviter de vous couper Ne modifiez pas les commandes Ne touchez pas à l élément chauffant pendant ou immédiatement après le lavage Ne faites pas fonctionner votre lave vaisselle à moins que toutes les parois du lave vaisselle soient fermées Ne vous assoyez pas et ne montez pas sur la porte ou les paniers du lave vaisselle et ne les utilisez pas de façon abusive Il faut exercer une étroite ...

Page 30: ...quate par un électricien qualifié Attention Pour votre sécurité N UTILISEZ PAS DE CORDON PROLONGATEUR OU D ADAPTATEUR DE FICHE AVEC CET ÉLECTROMÉNAGER NE COUPEZ OU N ENLEVEZ JAMAIS LA TROISIÈME BROCHE MISE À LA TERRE DE LA FICHE DU CORDON D ALIMENTATION Le lave vaisselle doit être mis à la terre conformément aux codes et règlements en vigueur dans votre région Exigences électriques Cet appareil do...

Page 31: ...z le raccord à l adaptateur de robinet 2 Installez le raccord au robinet en abaissant la bague située à la partie supérieure du raccord Lorsque l adaptateur de robinet est complètement inséré à l intérieur du raccord relâchez la bague Celle ci revient à sa position initiale pour verrouiller le raccord en place Le petit boyau du raccord avec dérivation amène l eau du robinet au lave vaisselle tandi...

Page 32: ...a minuterie à HOTSTART 4 Verrouillez la porte pour démarrer le cycle Conçu pour de la vaisselle très sale ou couverte d aliments séchés Convient également pour les charges de tous les jours Ce programme n enlèvera toutefois pas les aliments brûlés Conçu pour très bien nettoyer les charges de tous les jours verres et plats moyennement sales Offre le meilleur rendement énergétique et la consommation...

Page 33: ...l Cette lumière s allume lorsque qu un cycle est complet La lumière restera ALLUMÉE jusqu à ce que la porte soit ouverte Appuyez sur la touche une fois pour démarrer le lave vaisselle Appuyez sur la touche une deuxième fois pour arrêter Propre Départ Reset Fermez et verrouillez la porte du lave vaisselle et appuyez sur la touche DÉPART pour commencer le programme Vous remarquerez un court délai en...

Page 34: ...parente Versez le produit de rinçage dans le réservoir jusqu à ce que le liquide atteigne la lèvre inférieure du distributeur voir photos Revissez le capuchon Le distributeur verse automatiquement le produit de rinçage au cours du rinçage final Le distributeur ne doit pas contenir plus de 120 ml ou 4 23 oz à la fois Cette quantité est bonne pour approximativement 50 lavages Dans le cas ou un surpl...

Page 35: ...d une pellicule blanchâtre sur les verres Une fine couche est en quelque sorte arrachée de la surface des verres Bien sûr cela ne se produit pas du jour au lendemain Mais pourquoi courir ce risque lorsqu il est si facile de se renseigner sur la dureté de l eau Assurez vous que votre détergent est frais et sec Il n est pas recommandé de ranger le détergent en poudre sous l évier car cet endroit est...

Page 36: ...sseroles à frire et les grilles devraient être placées contre le côté droit du panier Placez les plats les marmites et les bols contre les côtés dans les coins ou derrière le panier Les articles doivent être placés à l envers faisant face au centre du panier Service de 10 assiettes Vous pouvez ranger dans le panier supérieur toutes sortes d ustensiles de cuisson de forme irrégulière Placez les poê...

Page 37: ... uniformément Les petits articles en plastique comme les cuillères à mesurer et les couvercles de petits contenants devraient être placés dans le fond du panier avec la coutellerie par dessus Sur certains modèles vous pouvez refermer les couvercles des paniers d extrémité pour retenir les petits articles Les articles plus longs peuvent être placés sur le support à tasses dans le panier supérieur V...

Page 38: ... alimentation en eau Débrancher le boyau d arrivée d eau de l électrovanne Vider l eau de la conduite d alimentation et de l électrovanne pour récupérer l eau utiliser une casserole Réinstaller le boyau de l électrovanne Vidanger le collecteur sous le lave vaisselle en débranchant le boyau qui va vers la pompe Rebrancher après la vidange Enlever le capot de plastique de la pompe situé dans le fond...

Page 39: ...s vissables Raccord en T Conduite d eau chaude Robinet d arrêt PRÉPARATION DE L OUVERTURE POUR LE LAVE VAISSELLE L ouverture dans les armoires doit avoir une largeur minimale de 24 po et une hauteur minimale de 34 po entre le sol et le dessous du comptoir figure A Le mur arrière doit être exempt de tuyaux ou de fils figure A Les armoires adjacentes doivent être à l équerre et bien verticales pour ...

Page 40: ...e l évier est illustrée ci contre figure C Plusieurs fabricants vendent des raccords spécialement conçus pour les lave vaisselle 2 Lorsque vous raccordez le boyau de vidange à un BROYEUR À DÉCHETS enlevez le bouchon de la trémie avant d effectuer le raccordement Installez le raccord en T ou le broyeur à déchets conformément aux directives fournies par le fabricant Remarque ASSUREZ VOUS D ENLEVER L...

Page 41: ...ble électrique ou du cordon d alimentation Les rebords du trou ne doivent pas être tranchants Si la cloison de l armoire est en métal les rebords du trou doivent être recouverts au moyen d un protège fils en caoutchouc RACCORDEMENT ÉLECTRIQUE DU LAVE VAISSELLE A Lave vaisselle vendu sans cordon d alimentation Le raccordement électrique s effectue du côté droit du lave vaisselle Pour effectuer un r...

Page 42: ...eur Dévisser partiellement les deux vis au dessus du panneau d accès Enlevez les deux vis sous le panneau d accès et mettez les de côté afin de les réutiliser plus tard Ensuite glissez et enlevez le panneau d accès La boîte de raccordement se trouve derrière le panneau d accès 4e étape Installez un coude de 90 Installez le coude de 90 sur l électrovanne en appliquant du ruban pour joints filetés s...

Page 43: ...ports de comptoir sur le dessus de la cuve avec les deux vis à taraudeuses noires 10 16 x 3 8 po fournies dans le sac de documentation voir figure M réglant individuellement les quatre pieds de nivellement afin d obtenir un alignement approprié figure O Pour le bon fonctionnement des paniers dans la cuve et du lave vaisselle l appareil doit être de niveau de la gauche vers la droite et de l avant ...

Page 44: ...rs appropriés Assurez vous que le boyau de vidange n est pas plié Figure R Figure S 30 po min 18 po min 20 po min 5 8 po 1 po Ligne de coupe Ne coupez pas la portion ondulée du boyau 14e étape Raccordez l alimentation électrique Si le câblage de la résidence n est pas constitué de deux fils et d un fil de mise à la terre comme illustré à la figure S l installateur doit installer un fil de mise à l...

Page 45: ...ccords puis rétablissez le courant électrique 19 Reportez vous à la figure U Placez le panneau inférieur contre les pieds du lave vaisselle Insérez et alignez le panneau d accès avec le lave vaisselle à l aide des vis déjà présentes Alignez le panneau inférieur at assurez vous que la partie inférieure du panneau repose sur le sol Insérez et serrez les deux vis de fixation du panneau inférieur en v...

Page 46: ...onnels GPF25B Noir GPF325B GPF425B GPF25W Blanc GPF325W GPF425W GPF25C Bisque GPF325C GPF425C Ensemble de moulure panneau de bois 3 4 Cet accessoire contient la moulure et les instructions pour installer un panneau décoratif en bois 3 4 Ensemble de moulure panneau de bois 1 4 Cet accessoire contient la moulure et les instructions pour installer un panneau décoratif en bois 1 4 GPF375 GPF475 NOTE L...

Page 47: ...nt Déplacez la vaisselle qui empêche l eau de les atteindre Un article a empêché l ouverture du distributeur de détergent Si vous utilisez du détergent en poudre ouvrez le couvercle du distributeur et retirez le détergent séché et durci Si après ces mesures le distributeur ne s ouvre pas automatiquement appelez un technicien Il se peut que votre détergent soit trop vieux Agitez la boîte de déterge...

Page 48: ...tes L appareil est maintenant au cycle de lavage principal 5 Ouvrez la porte et versez deux tasses 500 ml de vinaigre blanc dans le fond du lave vaisselle 6 Refermez la porte et laissez l appareil terminer le programme de lavage Si le rinçage au vinaigre se révèle inefficace répétez les étapes ci dessus mais remplacez le vinaigre par 1 4 tasse 60 ml de cristaux d acide citrique disponible dans la ...

Page 49: ...elle Laissez la mousse s évaporer Versez un gallon d eau froide dans la cuve avec une cuillerée à soupe 15 ml d huile végétale Refermez et verrouillez la porte Faites vidanger l eau en tournant lentement le cadran du programmateur jusqu à ce que vous atteigniez le cycle de vidange Sur les modèles électroniques vidanger l eau en appuyant sur DÉPART RESET puis 10 secondes plus tard appuyez de nouvea...

Page 50: ...eau310 Moncton N B E1C 9M3 Directeur Relations avec les consommateurs Mabe Canada Inc 1 Factory Lane Bureau310 Moncton N B E1C 9M3 Pour faire réparer votre électroménager Mabe il suffit de nous téléphoner Le service de réparation à domicile sera fourni dans les régions où il y a des techniciens disponibles et où Mabe jugera raisonnable Ayez en main le numéro de modèle et numéro de série de votre a...

Page 51: ...u lave vaisselle OWNERSHIP REGISTRATION CERTIFICATE FICHE D INSCRIPTION DU PROPRIÉTAIRE Please register your product to enable us to contact you in the remote event a safety notice is issued for this product and to allow for efficient communication under the terms of your warranty should the need arise Veuillez enregistrer votre produit afin de nous permettre de communiquer avec vous si jamais un ...

Page 52: ...défaut possible de l appareil Dommage causé après la livraison Cette garantie est liée à l acheteur originel et au successeur si les produits achetés sont utilisés pour la maison et que son usage a été fait à l intérieur du Canada Le service de garantie dans la maison sera fourni dans les secteurs où le service est disponible et estimé raisonnable par Mabe EXCLUSION DE GARANTIES IMPLICITES Votre s...

Reviews: