49-60814
19
INST
ALLA
TION INSTRUCTIONS
Installation Instructions
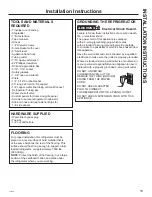
TOOLS AND MATERIALS
REQUIRED
• Tinsnips to cut banding
• Stepladder
´%LWH[WHQVLRQ
• Tape measure
• Gloves
´'U\ZDOOVFUHZV
• 5-Gal. Bucket with cover
´6SLULWOHYHO
• Appliance hand truck
• Tubing cutter
´RSHQHQGZUHQFK
• #2 Phillips screwdriver
'ULOODQGDSSURSULDWHELWV
´´VRFNHW
• Safety glasses
´RSHQHQGZUHQFK
• Pliers
´´&RPER5DFKHW
´ORQJ[IRU$QWL7LSVXSSRUW
´FRSSHUZDWHUOLQHWXELQJRU6PDUW&RQQHFW
Refrigerator Tubing kits
• Water shut-off valve
• Custom panels for doors and grille panel
• Screws to secure refrigerator to cabinetry
• Stick-on hook and loop fastener strips for
´VLGHSDQHOV
HARDWARE SUPPLIED
• Water filter bypass plug
• Toekick
´QXWDQGIHUUXOH
GROUNDING THE REFRIGERATOR
WARNING
Electrical Shock Hazard.
)DLOXUHWRIROORZWKHVHLQVWUXFWLRQVFDQUHVXOWLQGHDWK
fire, or electrical shock.
The power cord of this appliance is equipped
with a 3-prong (grounding) plug which mates
with a standard 3-prong (grounding) wall receptacle
WRPLQLPL]HWKHSRVVLELOLW\RIHOHFWULFVKRFNKD]DUGIURP
this appliance.
Have the wall outlet and circuit checked by a qualified
electrician to make sure the outlet is properly grounded.
Where a standard 2-prong wall outlet is encountered, it
is your personal responsibility and obligation to have it
replaced with a properly grounded 3-prong wall outlet.
'212781'(5$1<
&,5&8067$1&(6&8725
5(029(7+(7+,5'*5281'
3521*)5207+(32:(5
&25'
'212786($1$'$37(5
3/8*72&211(&7
7+(5()5,*(5$72572$3521*287/(7
'212786($1(;7(16,21&25':,7+7+,6
$33/,$1&(
FLOORING
)RUSURSHULQVWDOODWLRQWKLVUHIULJHUDWRUPXVWEH
placed on a level surface of hard material that is
at the same height as the rest of the flooring. This
surface should be strong enough to support a fully
loaded refrigerator, or approximately 1,500 lbs.
NJ
NOTE:
Protect the finish of the flooring. Cut a large
section of the cardboard carton and place under
the refrigerator where you are working.


