12
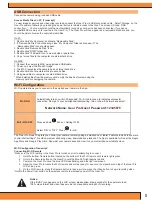
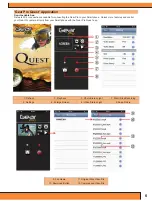
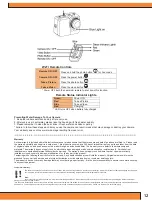
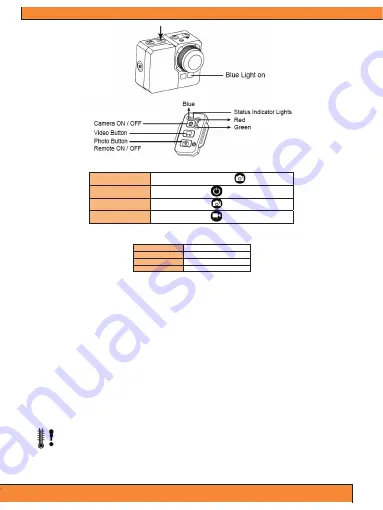
Wi-Fi Remote Controls
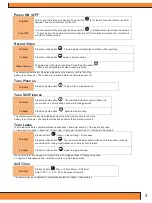
Remote ON / OFF
Press and hold the photo button
for 3 seconds
Camera ON / OFF
Press the power button
Take a Picture
Press the photo button
Take a Video
Press the video button
* Power OFF both the camera & remote to shut down this function.
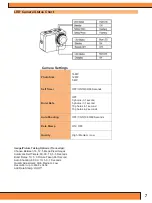
Remote Status Indicator Lights
Green
Power ON
Red
Take a Picture
Blue
Take a Video
Red
Charging*
* LED turns OFF when battery fully charged
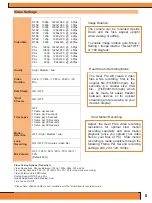
Preventing Water Damage To Your Camera
1. Keep the rubber seal clean and dry after every use.
2. After every use in salt water, please rinse the housing with fresh water and dry.
3. Please remember to clean the seal, rinse in fresh water and shake or pat dry.
* Failure to follow these steps each time you use the camera can result in leaks that may damage or destroy your camera.
Your warranty does not cover water damage resulting from user error.
-=-=-=-=-=-=-=-=-=-=-=-=-=-=-=-=-=-=-=-=-=-=-=-=-=-=-=-=-=-=-=-=-=-=-=-=-=-=-=-=-=-=-=-=-=-=-=-=-=-=-=-=-=-=-=-=-=-=-=-
Warranty
As the warranty is included within this instruction manual, please ensure that the store name and date of purchase are filled in. Please read
the warranty carefully and keep it in a safe place. This product is covered by a 365 days Limited Warranty on parts and labor from the date
of original purchase, and purchases must be made through an authorized dealer. The warranty covers defects in workmanship and
materials. The warranty does not apply to units, which have been damaged or abused intentionally or unintentionally. Purchase from
individuals or unauthorized internet sites voids the warranty. The warranty does not apply to units where the rear cap was incorrectly
installed or closed, cosmetic damage, modification of or to any part of the product.
Tampering with or altering the unit will void the warranty. Any unauthorized service will void the warranty. Original sales receipt must be
produced for any warranty service and a return authorization must be obtained from our customer service points.
The warranty does not cover any damage that may occur during a sport activity. It is the user’s responsibility to secure the camera securely
to any sport equipment.
Temperature Warning:
The camera has become too hot and needs to cool down after 2 hours of repeated use. (Continuously recording). Simply let it sit and cool before attempting to use it again.
Your camera will not allow itself to overheat, but will shut down if overheating or higher than usual temperatures are reached.
Note:
*Due to the nature of this action camera, it is preferred for taking still images. Higher image quality and clarity can be achieved through holding the Gear Pro steadily or
placing the camera in a fixed location.
*It is the user’s responsibility to mount the camera securely to any sport equipment. The screws of the mounts must be retightened from time to time for prevention of unwanted effects and
performance. The warranty does not cover any damage that may occur during a malfunction during any sport activity. Please use the Gear Pro safely and enjoy!
Summary of Contents for GDV995BK
Page 1: ......


