SHREDDER ADJUSTMENTS
Page 5
FOR VARIOUS TYPES OF MOWING
There is an adjustable rear hatch (
Fig. 3
) that can be set in one of seven
positions to control the amount of power needed to do the work.
FOR BEST MOWING OPERATION, OPEN REAR HATCH FULLY
TO ALLOW MATERIAL TO EXIT
1.
Adjustment of the rear hatch can be made by removing the
two bolts at the side (
Fig. 13, ref. 1
). Loosen the nut (
Fig.
13, ref. 2
) until the hatch can be pivoted around bolt (
Fig.
13, ref. 3
). To fix the hatch in the desired position, align the
hole in the side of the casing of the machine with the appro-
priate hole in the hatch. Insert the bolt and tighten the self-
locking nut (
Fig. 13, ref. 1
). Tighten the pivot bolt (
Fig. 13,
ref. 3
) with the self-locking nut (
Fig. 13, ref. 2
).
2.
The rear hatch should be in a completely closed position
(
Fig. 4
) when used for mulching of prunings, or pulverizing debris.
3.
The hatch is used in position (
Fig. 5
) to allow the grass clippings to escape above
the roller.
4.
The hatch should be in a completely open position when the shredder is used for cutting
grass, vegetables, corn stalk and cotton cutting operations (
Fig. 6
). An open hatch enables
the clippings to be discharged quickly, thus allowing a faster mowing speed and lower H.P.
requirements.
DANGER:
When the hatch is in the fully open position, objects may be thrown
out of the machine. Make sure that
NO ONE
is in the operation area.
Summary of Contents for GHF100
Page 12: ...GHF DECK ASSEMBLY Page 10...
Page 14: ...GHF A FRAME ASSEMBLY Page 12...
Page 16: ...GHF ROTOR SHAFT ASSEMBLY Page 14...
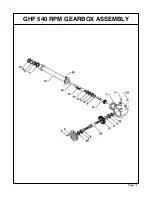
Page 20: ...GHF 540 RPM GEARBOX ASSEMBLY Page 18...
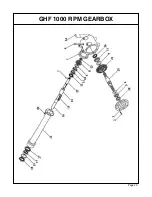
Page 22: ...Page 20 GHF 1000 RPM GEARBOX...


