Printed in USA © 0504
T-310
11
Geberit In-Wall Pressure Assist Toilet System
Installation & Maintenance Instructions
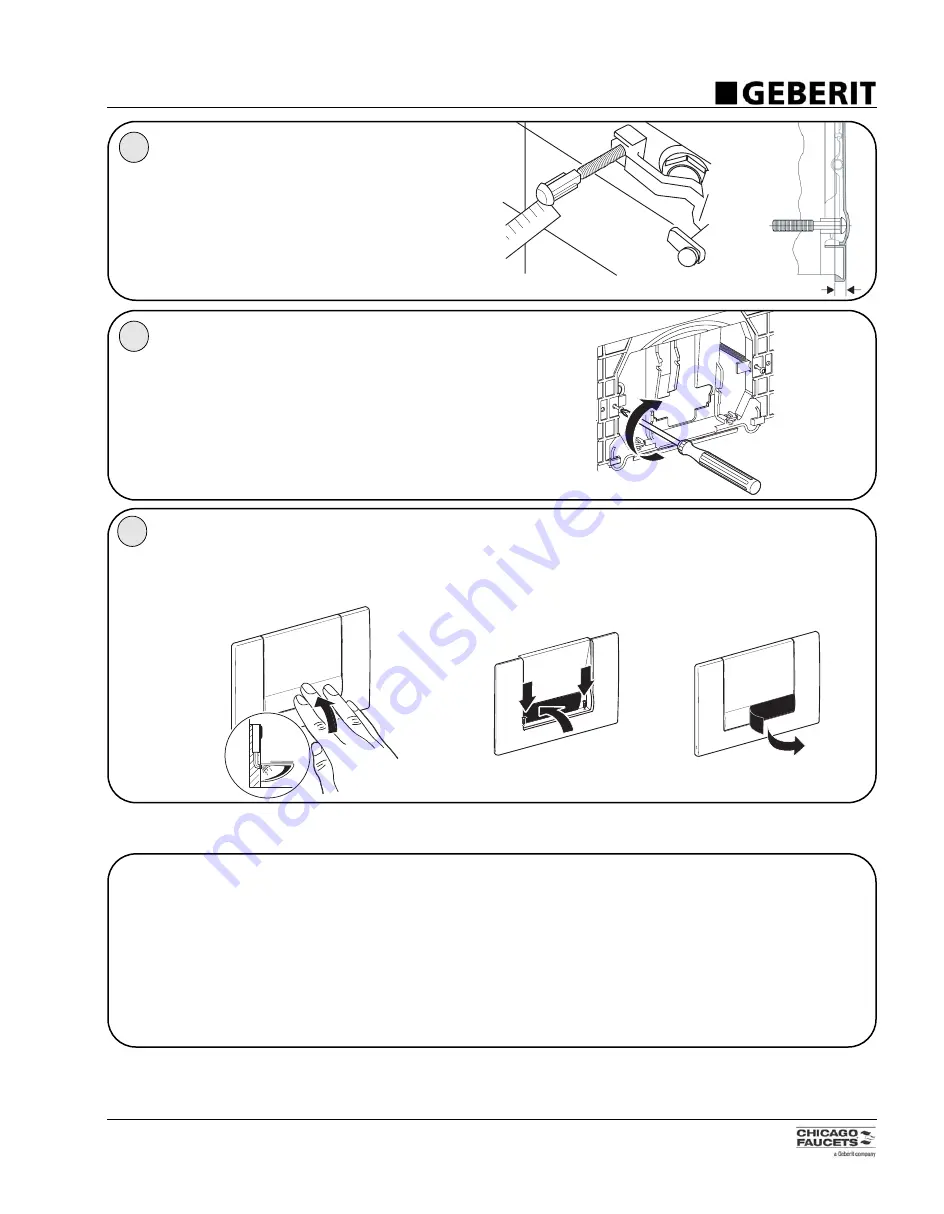
3/8"
7
1, Install the actuator push rod into the bushing so
it extends only 3/8" (9.5mm) in front of actuator
frame surface as shown.
2. Install rod and turn clockwise to lock it into the
bushing.
8
1. Place actuator frame onto front of box with
spring at the bottom facing outward.
2. Secure frame to lock pins with two self-tapping
screws provided.
9
1. Attach the actuator panel to the lower spring, then push up and snap it over the upper edge.
Test actuator for functionality.
2. Install vandal resistant screws into cement board and tiling.
3. Remove protective film.
Step 2
Step 3
Push
Step 1
HOW THE IN-WALL PRESSURE ASSIST TANK WORKS
3 Stages of the Flush Cycle
Flush Stage:
The flush begins when the actuator valve is depressed, and ends when the tank has discharged all of its water
through the bowl.
Air Intake/Bowl Refill Stage:
As water rushes through the empty tank past the fill tube to refill the bowl,it causes a Venturi
effect, which draws air into the tank. The small amount of water in the air inducer cap disappears, and a suction sound occurs
for 10-12 seconds.
Pressurization Stage:
After the flush valve seats the tank begins to fill with water. The ball in the air inducer floats against the
seat in the cap and air intake stops. A small amount of water fills the cap. Water continues to fill the tank, compressing the a
ir
inside, until the force of the regulator spring is overcome and the supply is shut off.
ww
w.TheA
nwserLine.com


