Quick Start Card
in.xe
™
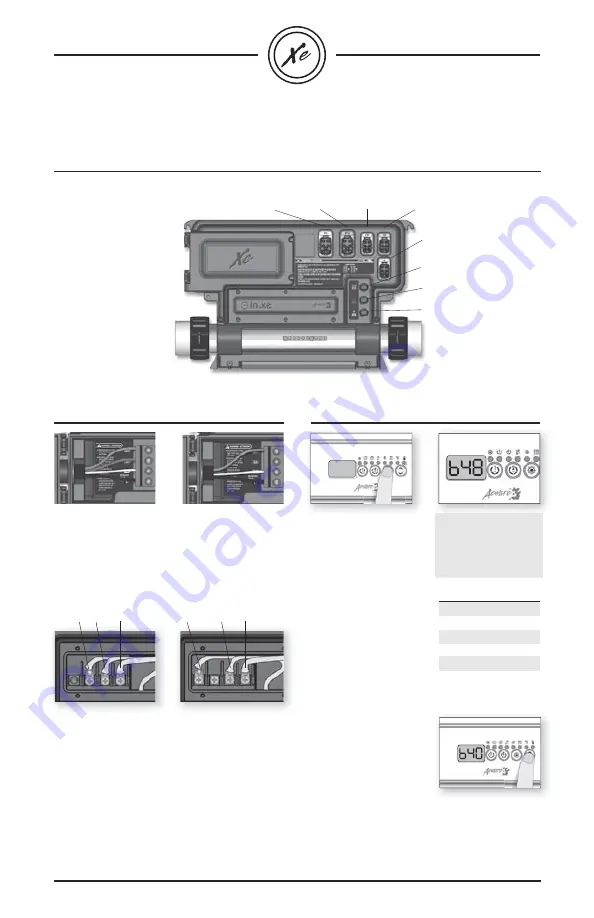
For 120 VAC (*3 wires)
*If connected to a
3 wire system, no
240 VAC component
will work.
For 240 VAC (4 wires)
Correct wiring of the
electrical service box,
GFCI, and pack ter-
minal block is essen-
tial. Call an electrician
if necessary.
2- Connect the spa pack
The heat.wav heater is factory confi gured 240v /
4 KW (or 2KW), but it can be converted to a
dedicated 120v / 1KW by a simply switching the
cable connection port. (Option available on
North American models only).
Heat.wav specifi cation summary:
• Supports 120v or 240v
• Protected by external breaker (not fused)
• Incoloy® or Titanium (optional) heater element
for greater protection against corrosion.
Connections for 120v
heater (1KW)
L2
Ground
L1
Connections for 230/
240 VAC heater (4KW)
Ground
N
L1
It's important to
specify the current
rating of the GFCI
used to insure safe
and effi cient current
management (and no
GFCI trippings).
Press and hold
Light
button for 30 seconds
until you access the
breaker setting menu.
The values displayed
by the system corres-
pond to 80% of the
maximum amperage
capacity of the GFCI.
��
Use
Up or Down
button to select the
desired value. Then
press
Light
button to
set breaker rating.
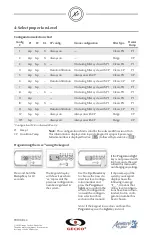
GFCI
Br
60 Amp 48 Amp
50 Amp
40 Amp
40 Amp
32 Amp
30 Amp
24 Amp
20 Amp
16 Amp
1- Connect all outputs & keypads
3- Select breaker
Pump 2
connector
Pump 1
connector
Blower
connector
Ozonator
connector
Direct
connector
Keypad
connector
Comm
connector
Light
connector
Don't forget that the voltage is determined by the cable used (120 or 240V cable)!
(10-20 AMP
dedicated 120 VAC)
For complete Techbook or more information, see on our website: www.geckoalliance.com


