background image

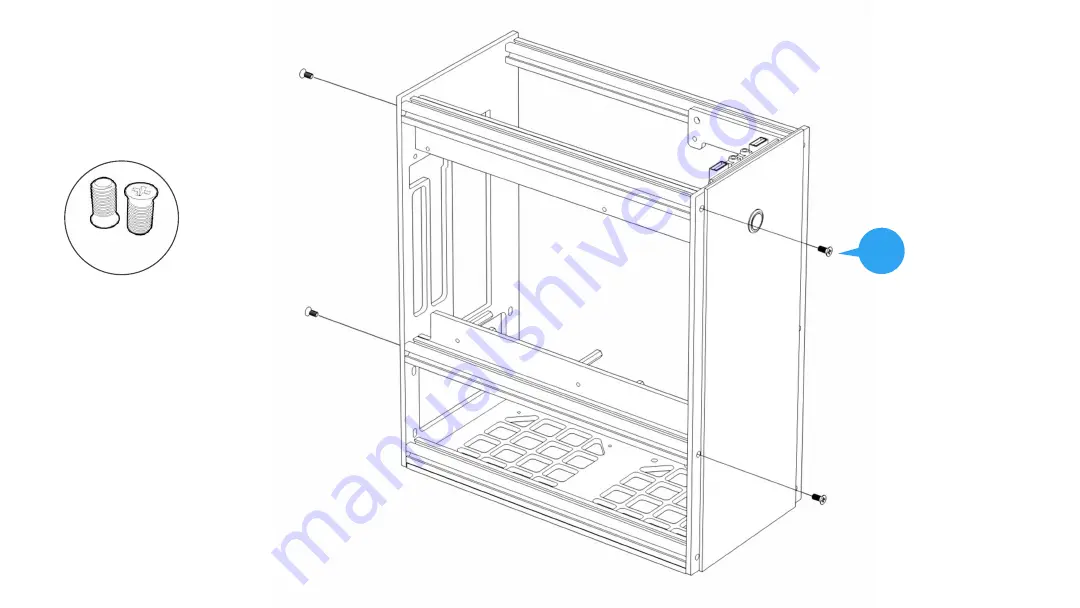
 4X

STEP 08

Left Upper and Lower Side Brackets Installation

F

Summary of Contents for A40 V2

Page 1: ...A40 V2 INSTALLATION GUIDE Version 2 0 201912D...

Page 2: ...B F E A SCREWS LIST M4x16mm X2 D G H M3 Nut X25 M4x8mm X16 M3x8mm X30 M3x5mm X8 25mm Standoff X2 40mm Standoff X4 Screws for Radiator X4 6 32x10mm X4 Screws for Fan X12 I M3x10mm X8 Black Plastic pad...

Page 3: ...Aluminum Frame Installation Please read the Aluminum Frame installation before assembling this case Screw Nut Acrylic Panel...

Page 4: ...STEP 01 Aluminum Frame Installation E 2X 260mm Aluminum Frame 250mm Aluminum Frame 250mm Aluminum Frame E E...

Page 5: ...D 4X G 4X STEP 02 G D Install the HDD Bracket on the Right Aluminum Frame...

Page 6: ...F 2X F F STEP 03 Rear Panel Installation...

Page 7: ...G 4X D 4X STEP 04 Bottom Panel Installation D G F F 1X...

Page 8: ...dule Black Plastic pad I 2X i i Tip Try to move the USB module to the right as much as possible it will be easier to install the USB module on the top panel Black plastic pad and i screws were placed...

Page 9: ...F 3X STEP 05 2 Power Switch and Front Panel Installation F F F Power Switch...

Page 10: ...Install the Standoffs on the Left Upper and Lower Side Brackets I 4X 40mm 4X 25mm 2X G 2X i i i i G G 25mm 25mm STEP 06...

Page 11: ...G STEP 07 Install Left Upper and Lower Side Brackets on the Aluminum Frame D 5X G 5X D...

Page 12: ...F 4X STEP 08 Left Upper and Lower Side Brackets Installation F...

Page 13: ...PCI e Riser Cable Optional Purchase STEP 09 PCIe Riser Cable Installation Optional Purchase i i I 2X...

Page 14: ...F 2X STEP 10 Install and Secure the Graphic Card F 1 2...

Page 15: ...H 4X Please install the RAM and CPU Cooler on the motherboard first H STEP 11 Motherboard Installation...

Page 16: ...C 4X STEP 12 Power Supply Installation C...

Page 17: ...B 8X STEP 13 Case Fan Installation B...

Page 18: ...G 4X D 4X STEP 14 Top Panel Installation D G...

Page 19: ...F 4X STEP 15 2 5 SSD HDD Installation F 1 2 G G 4 8X...

Page 20: ...STEP 16 Foot Pad Installation H H 4X...

Page 21: ...STEP 17 Side Panels Installation D 8X G 8X G D...

Reviews: