background image

Renaming Sources

By default, each Sender unit is assigned the name “Sender”.  This can be 

confusing when multiple Sender unit are used.  However, this identifier can 

be changed to reflect, for example, the source to which each Sender unit is 

connected. 

1. 

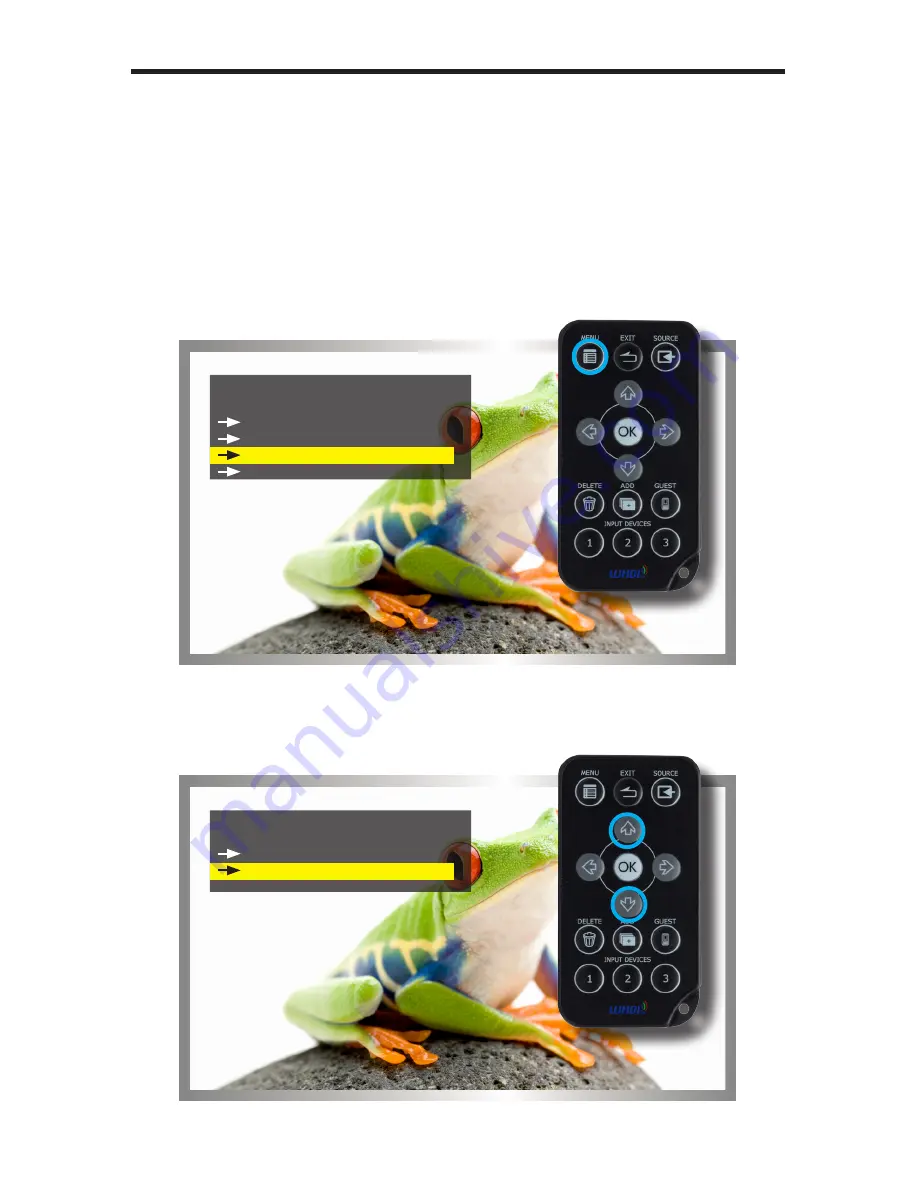
Point the IR Remote Control at the Receiver unit, press the 

MENU 

button, 

select 

Modify Video Source Name

, then press the OK button.


2. 

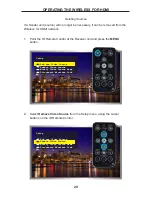
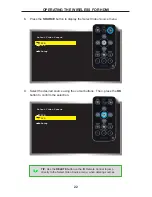
Select the source to rename from the menu by using the cursor keys:


15

Setup


Add new Video Source

   Remove Video Source 


Modify Video Source Name

   Disconnect Wireless Link

Choose Source to Rename


Sender


Sender

OPERATING THE WIRELESS FOR HDMI

Summary of Contents for GTV-WHD-1080P-LR

Page 1: ...gefentv com 1080P Wireless for HDMI Multi Room Solution GTV WHD 1080P LR GTV WHD 1080P LR BLK User Manual...

Page 2: ......

Page 3: ...c o Customer Service 20600 Nordhoff St Chatsworth CA 91311 www gefentv com support gefentv com Notice Gefen LLC reserves the right to make changes in the hardware packaging and any accompanying docume...

Page 4: ...escriptions 10 Connecting the Wireless for HDMI 10 Wiring Diagram 10 Operating the Wireless for HDMI 11 The Linking Process 12 Using Multiple Sender units 12 Adding a New Video Source 15 Renaming Sour...

Page 5: ...ire line of sight for good reception Additional features allow multiple units using the included handheld remote control How It Works Connect one of the included HDMI cables from the Hi Def source to...

Page 6: ...t interference will not occur in a particular installation If this equipment does cause harmful interference to radio or television reception which can be determined by turning the equipment off and o...

Page 7: ...erformance and reception distance Use with multiple Sender units Can be used with a single Receiver unit to provide source switching capability Up to 8 Senders are supported Local RF interference can...

Page 8: ...rs IR codes not all 38kHz IR devices may be compatible with the IR Back Channel of the Wireless for HDMI The following brands have been tested by Gefen Panasonic Sony and Samsung Operational Limitatio...

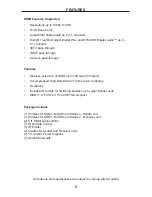
Page 9: ...meters Uncompressed High Definition A V from source to display No latency Included IR remote for switching between up to eight Sender units WHDI 1 0 FCC Part 15 and ETSI compliant Package Includes 1...

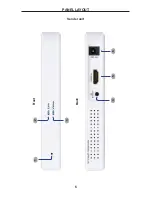
Page 10: ...PANEL LAYOUT 6 Sender unit Front Back 2 1 3 4 5 6...

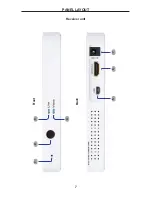
Page 11: ...PANEL LAYOUT 7 Front Back 3 2 1 4 5 6 7 Receiver unit...

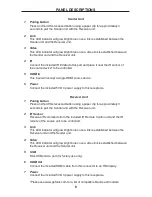
Page 12: ...this receptacle Receiver Unit 1 Pairing button Press and hold this recessed button using a paper clip for approximately 3 seconds to pair the Sender unit with the Receiver unit 2 IR Sensor Receives IR...

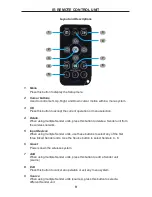
Page 13: ...delete a Sender unit from the wireless network 5 Input Devices When using multiple Sender units use these buttons to select any of the first three linked Sender units Use the Source button to select S...

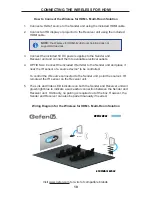
Page 14: ...f a source device to be controlled To control the IR source connected to the Sender unit point the source s IR remote at the IR sensor on the Receiver unit 5 The Link and Video LED indicators on both...

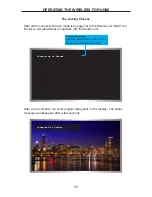
Page 15: ...attempt to negotiate with the Sender unit After a few moments the source signal will appear on the display The status message will disappear after a few seconds Connected to Sender Connecting to Send...

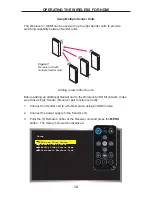
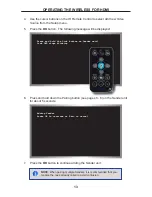
Page 16: ...the Sender unit to a Hi Def source using an HDMI cable 2 Connect the power supply to the Sender unit 3 Point the IR Remote Control at the Receiver unit and press the MENU button The Setup menu will b...

Page 17: ...ring button see pages 6 8 on the Sender unit for about 5 seconds 7 Press the OK button to continue adding the Sender unit 13 Adding Sender Press OK to continue or Exit to cancel Press and hold the Lin...

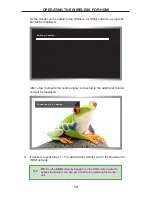
Page 18: ...ted to the additional Sender unit will be displayed 8 If desired repeat steps 1 7 to add another Sender unit to the Wireless for HDMI network Adding Sender Connected to Sender TIP Use the ADD button s...

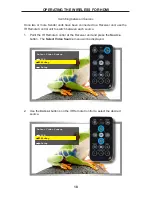
Page 19: ...which each Sender unit is connected 1 Point the IR Remote Control at the Receiver unit press the MENU button select Modify Video Source Name then press the OK button 2 Select the source to rename fro...

Page 20: ...table below The first character first row first column is a space and can be used anywhere in the name The maximum length of the Source name cannot exceed nine characters including any spaces 0 1 2 3...

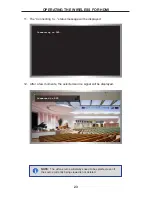
Page 21: ...17 4 After the video source has been renamed press the OK button to save the changes Select Video Source Sender BluRay Setup OPERATING THE WIRELESS FOR HDMI...

Page 22: ...tch between each source 1 Point the IR Remote Control at the Receiver unit and press the Source button The Select Video Source menu will be displayed 2 Use the Cursor buttons on the IR Remote Control...

Page 23: ...t the Receiver unit is switching to the selected Sender unit source 5 After a few moments the selected source signal will be displayed Select Video Source STB BluRay Setup Connected to Sender TIP Use...

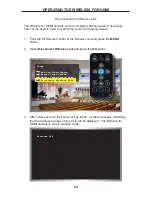
Page 24: ...iver unit and press the MENU button 2 Select Remove Video Source from the Setup menu using the cursor buttons on the IR Remote Control 20 Setup Add new Video Source Remove Video Source Modify Video So...

Page 25: ...d 5 Select the source to be removed and press the OK button 6 Press the OK button to confirm the removal of the selected device 7 After a few seconds the screen will go blank Choose Source to Remove S...

Page 26: ...using the cursor buttons Then press the OK button to confirm the selection Select Video Source STB DVR Setup Select Video Source STB DVR Setup TIP Use the DELETE button on the IR Remote Control to jum...

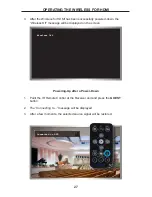
Page 27: ...layed 12 After a few moments the selected source signal will be displayed Connecting to DVR Connected to DVR NOTE The video source will always need to be selected even if the source currently being vi...

Page 28: ...ver unit and press the MENU button 2 Select Disconnect Wireless Link and press the OK button 3 After a few seconds the screen will go blank A status message indicating that the wireless has been turne...

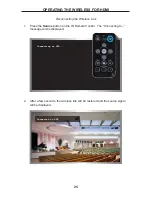
Page 29: ...Source button on the IR Remote Control The Connecting to message will be displayed 2 After a few seconds the wireless link will be restored and the source signal will be displayed Connecting to DVR Co...

Page 30: ...he IR Remote Control at the Receiver unit and press the GUEST button 2 After a few seconds the screen Receiver and Sender unit s will power down A status message indicating that the Wireless for HDMI...

Page 31: ...yed on the screen Powering Up after a Power Down 1 Point the IR Remote Control at the Receiver unit and press the GUEST button 2 The Connecting to message will be displayed 3 After a few moments the s...

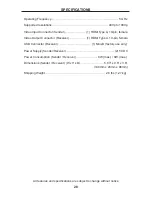
Page 32: ...HDMI Type A 19 pin female USB Connector Receiver 1 Mini B factory use only Power Supply Sender Receiver 2 5V DC Power Consumption Sender Receiver 8W max 8W max Dimensions Sender Receiver W x H x D 5 8...

Page 33: ...oof of sale may be required in order to claim warranty 2 Customers outside the US are responsible for shipping charges to and from Gefen 3 Copper cables are limited to a 30 day warranty and cables mus...

Page 34: ......

Page 35: ......

Page 36: ......

Page 37: ...Rev A5 20600 Nordhoff St Chatsworth CA 91311 1 800 545 6900 818 772 9100 fax 818 772 9120 www gefentv com support gefentv com Pb This product uses UL or CE listed power supplies...

Reviews: