11
CONNECTIONS AND SYSTEM CONTROL
CONEXIONES Y CONTROL DE SISTEMA • CONNEXIONS & UTILISATION • ANSCHLÜSSE UND SYSTEMEINSTELLUNGEN
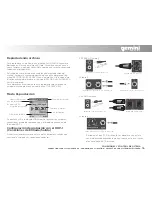
Mac: When an icon appears on your computer, click on it to view
thcontents of the card.
PC: Click on the USB device that appears in the My Computer folder.
To copy audio files from the computer to the Gemini DRP-1, select the
files to be copied and drag them to the icon that appears when the
DRP-1 is connected.
The files associated with the last recording session will be stored as
a playlist entitled lastrec.m3u. They can be opened on the computer
simply by clicking on the playlist icon, or transferred by dragging the
playlist icon to the computer.
To copy audio files from the computer to the Gemini DRP-1, select the
files to be copied and drag them to the icon that appears when the
DRP-1 is connected.
Always be sure to properly disconnect your device from your
computer by following the steps below for your operating system.
Mac: Select the Gemini DRP-1 icon. Drag-and-drop it into the trash.
Windows: Click the ‘safely remove hardware’ icon in the task bar.
Choose the Gemini DRP-1 as the device to remove.
(TIME Display) The TIME (17) button lets you select what mode the
track time is displayed as in both play mode and record mode. In either
mode, pressing the TIME button will alternate the track time function
between Elapsed and time Remaining.
*Note: When playing or recording a track over one hour, the time
indicator switches from m:s (minutes seconds) to h:m (hours minutes).
Elapsed represents how much time has gone by in a track, and
Remaining represents the amount of time remaining.
*Note: In record mode, Remaining represents how much
recording time is left on the memory device.
(VOLUME) Use the VOLUME (11) along with the controls on your
instrument to adjust Output level.
(HOLD Mode) The unit is equipped with a HOLD function which
freezes all buttons and the jog wheel from taking action when
depressed. To enter this mode, press and hold the TIME (17) and
FORMAT/STEREO-MONO (18) buttons simultaneously. The top right
of the screen will indicate when the unit is in hold mode.
To exit HOLD mode, press the TIME and FORMAT buttons
simultaneously again.
Improvements are always being made to our products to increase
usability and functionality. Occasionally, software updates come out
for our Gemini Series units. Be sure to check the Gemini Web site
(http://www.Gemini .com) regularly for updates.
To find out what software version you have on your unit, turn it on and
as it powers up there will be a number that appears at the top of the
LCD screen (10). This refers to the software version. If the Web site
has a software update listed whose number is higher than the one on
your unit, than this means the software on the site is more current and
should be loaded onto your unit.
Safe Removal of Device
Extra Features
Software Updates
P R O A U D I O


