SAMPLE RECORDING:
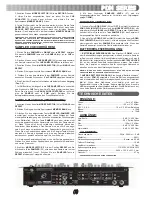
1. Select the sample source by switching to the appropriate channel with
the rotary
SAMPLER ASSIGN
(55) control.
2. The
PDM-03
comes equipped with a rotary sampler
PITCH CON-
TROL
(56). To get a "perfect" sample, set the control to its
CENTER
position & record the sample. Raising or lowering the control during play-
back raises or lowers the pitch of the sample. The
CENTER
position
retains the "normal" pitch.
HINT: YOU CAN RECORD A SAMPLE WITH THE PITCH CONTROL IN ANY POSITION.
THAT POSITION SETTING WILL BECOME THE NORMAL PITCH. IF YOU START TO
RECORD A SAMPLE WITH THE PITCH CONTROL SET AT "MINIMUM" THAT WILL
BECOME YOUR NORMAL PITCH. BY INCREASING THE PITCH TO "MAXIMUM" DURING
PLAYBACK, THE PITCH EFFECT WILL DOUBLE IN SPEED. RECORDING AT "MAXIMUM"
AND LOWERING TO "MINIMUM" DURING PLAYBACK WILL DO EXACTLY THE OPPOSITE.
3. Put the
MODE SELECTOR
(58) switch into the
RECORD
position.
4. Listen to the channel to be recorded in
CUE
, by selecting the appro-
priate
CUE
button for this channel. When the track approaches the sec-
tion to be sampled, press the proper
MEMORY BANK
(59) button where
you want the sample to be stored.
5. Then press the
SAMPLER
(59) button to start recording the sample.
The Memory bank in use will have a blinking
LED
, if a battery is not in
place or the battery is low (See
BATTERY BACKUP
section). The sam-
ple will be stored in this
MEMORY BANK
(59) & ready to play.
NOTE: TAPPING THE SAMPLER BUTTON BEGINS THE SAMPLING PROCESS (THE SAM-
PLER INDICATOR WILL "GLOW" BLUE DURING RECORDING). TAPPING THE SAMPLER
BUTTON A SECOND TIME ENDS THE SAMPLE (THE SAMPLER INDICATOR WILL TURN
OFF). IF YOU DO NOT TAP THE SAMPLER BUTTON A SECOND TIME, THE SAMPLING
PROCESS STOPS AUTOMATICALLY AFTER 8, 16 OR 48 SECONDS DEPENDING ON
WHICH MEMORY BANK WAS SELECTED.
CUE SAMPLER:
1. To record in
CUE
, press the
CUE SAMPLER
button and then press
the
CUE
button for the channel to be sampled. Be sure your
CH
slide
controls are at zero so the sample does not play in
PGM
. Follow the
SAMPLE RECORDING
instructions to complete the process.
2. To test the recorded sample before playing in
PGM
, press the
CUE
SAMPLER
(59) button, placing the sampler in
CUE
. The blue
CUE
SAMPLER LED
will illuminate while in use. Use the
CUE
controls to
monitor this sample. Be sure your rotary
SAMPLER LEVEL
(57) is
turned counter clockwise so that the sample is not played in
PGM
. Set
your sampler to
SINGLE
or
REPEAT
, then press the
SAMPLER
button
and the sample will begin playing in
CUE
. If you are satisfied with your
sample, leave it stored in the
MEMORY BANK
(59). If not, please repeat
the steps for
SAMPLE RECORDING
.
SAMPLE PLAYBACK:
1. Set the
MODE SELECTOR
(58) switch to
SINGLE
or
REPEAT
.
2. Select the desired sample by pressing the proper
MEMORY BANK
(59) button.
3. Tapping the
SAMPLER
(59) button with the
MODE SELECTOR
(58)
switch in the
SINGLE
position causes
SAMPLER
to play back one time
(the
SAMPLER INDICATOR
will "glow"
GREEN
). Each push of the
SAMPLER
button restarts the sample from the beginning. Rapid press-
ing of the
SAMPLER
button will cause a stuttering effect. Once the sam-
ple has started playback & the
SAMPLER
button is not pushed a sec-
ond time, the
SAMPLE
will
SINGLE
to the end & stop. This Sample will
play through completely regardless of switching the
MEMORY BANK
.
Switching the
MEMORY BANK
and pressing the
SAMPLER
button
while the sample is in play will repeat the sample previously selected
until it has completed its play cycle.
4. To play a new sample from another
MEMORY BANK
the old sample
(8)
must be stopped. Choose the
MEMORY BANK
to play. Then press
SAMPLER
to begin the new Sample playback.
5. Tapping the
SAMPLER
(59) button with the
MODE SELECTOR
(58)
switch in the
REPEAT
position causes the
SAMPLE
to loop play contin-
uously. In
REPEAT
mode, the
SAMPLER
button acts an
ON/OFF
switch. The first push starts the sample, the second push stops it.
6. The
SAMPLER LEVEL
(57) controls the decibel level of the sample.
This feature allows you to adjust the volume of the sample to play over
or under
PGM
.
ROBO PLAY:
1. With the
ROBO
(59) button
OFF
the blue
LED
is
OFF
& the
MODE
SELECTOR
(58) switch in either the
SINGLE
or
REPEAT
mode, press-
ing the
SAMPLER
(59) button will cause the sample to play along with
the selected source.
2. When the
ROBO
(59) button is
ON
, the
BLUE LED
is on & starting
the sampler mutes the selected source. When the sample ends, the
source automatically turns back on.
BATTERY BACKUP:
1.
BATTERY BACKUP:
The
PDM-03
is equipped with battery backup to
retain samples. To activate this feature, a
9 V
battery (not included)
should be connected to the
BATTERY HOLDER
(60) located on the rear
panel. This enables the storage of samples in memory. When the unit is
unplugged, the battery backup retains the samples for future use.
NOTE: IF THE UNIT IS UNPLUGGED WITH NO BATTERY ATTACHED, ALL SAMPLES WILL
BE LOST.
2.
LOW BATTERY INDICATOR:
When the selected memory bank
LED
blinks, this will indicate that there is a low battery or no battery in the
PDM-03
. The
LED
blinks a warning if no battery is connected to the
PDM-03
. When changing or placing the battery into the
PDM-03
, make
sure the unit is plugged in and the power is
ON
. Failure to adhere to this
will result in lost memory and "vanished" samples.
INPUTS:
Phono:.................................................................................3 mV, 47 KOhm
Line:................................................................................150 mV, 27 KOhm
MIC 1, 2, & 3:...................................................1.5 mV, 2 K Ohm Balanced
Bass:.................................................................................................± 12dB
High:..................................................................................................± 12dB
OUTPUTS:
Amp/Booth:.....................................................................0 dB 1 V, 400 Ohm
Max:................................................................................20 V Peak-to-Peak
Rec....................................................................................150 mV, 5 KOhm
Zone................................................................................0 dB 1 V 400 Ohm
Balanced..........................................................................6 dB 2 V 400 Ohm
GENERAL:
Frequency Response:.............................................20 Hz - 20 KHz +/- 2 dB
Distortion:...........................................................................................0.02%
S/N Ratio:........................................................................Better Than 80 dB
Talkover Attenuation:.........................................................................-16 dB
Headphone Impedance:..................................................................16 Ohm
Power Source:....................................................115/230 V, 60/50 Hz, 20 W
Unit Dimensions:........................................................W 19" x H 4" x D 9.1"
.......................................................................(482.6 x 100.6 x 231.2 mm)
Weight:............................................................................. 10.34 lbs (4.7 kg)
SPECIFICATIONS SUBJECT TO CHANGE WITHOUT NOTIFICATION FOR IMPROVEMENT.
SPECIFICATIONS:
Summary of Contents for PDM-01
Page 3: ... 3 PDM 0 01 Front REAR ...
Page 4: ... 4 4 PDM 0 02 Front REAR ...
Page 5: ... 5 ...
Page 19: ... 19 NOTES P PD DM M S SE ER RIIE ES S P PD DM M S SE ER RIIE ES S ...


