background image


13

Maintenance

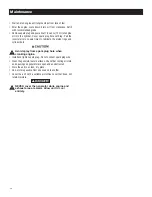
3.3.1 GENERATOR 

MAINTENANCE

Generator maintenance consists of keeping the unit clean and dry. 

Operate and store the unit in a clean dry environment where it will 

not be exposed to excessive dust, dirt, moisture or any corrosive 

vapors. Cooling air slots in the generator must not become clogged 

with snow, leaves, or any other foreign material.
Check the cleanliness of the generator frequently and clean when 

dust, dirt, oil, moisture or other foreign substances are visible on 

its exterior surface.

n


Never insert any object or tool through the air 

cooling slots, even if the engine is not running.

NOTE:

DO NOT use a garden hose to clean generator. Water can enter 

the engine fuel system and cause problems. In addition, if water 

enters the generator through cooling air slots, some water will 

be retained in voids and crevices of the rotor and stator winding 

insulation. Water and dirt buildup on the generator internal 

windings will eventually decrease the insulation resistance of 

these windings.

3.3.2  TO CLEAN THE GENERATOR

Use a damp cloth to wipe exterior surfaces clean.

• 

A soft, bristle brush may be used to loosen caked on dirt, oil, 

• 

etc.

A vacuum cleaner may be used to pick up loose dirt and debris.

• 

Low pressure air (not to exceed 25 psi) may be used to blow 

• 

away dirt. Inspect cooling air slots and openings on the generator. 

These openings must be kept clean and unobstructed.

3.3.3 ENGINE 

MAINTENANCE



 When working on the generator, always 

disconnect negative cable from battery. Also 

disconnect spark plug wire from spark plug and 

keep wire away from spark plug.

3.3.4  CHECKING OIL LEVEL

See the “Before Starting the Generator” section for information on 

checking the oil level. The oil level should be checked before each 

use, or at least every eight hours of operation. Keep the oil level 

maintained.

3.3.5  CHANGING THE OIL AND OIL FILTER

Change the oil and oil filter after the first 30 hours of operation. 

Change the oil every 100 hours or every season thereafter. If 

running this unit under dirty or dusty conditions, or in extremely 

hot weather, change the oil more often.

n


Hot oil may cause burns. Allow engine to 

cool before draining oil. Avoid prolonged 

or repeated skin exposure with used oil. 

Thoroughly wash exposed areas with soap.

Use the following instructions to change the oil after the engine 

cools down:

Clean area around oil drain plug.

• 

Remove oil drain plug from engine and oil fill plug to drain oil 

• 

completely into a suitable container.

When oil has completely drained, install oil drain plug and 

• 

tighten securely.

Place a suitable container beneath the oil filter and turn 

• 

filter counterclockwise to remove. Discard according to local 

regulations.

Coat gasket of new filter with clean engine oil. Turn filter 

• 

clockwise until gasket contacts lightly with filter adapter. Then 

tighten an additional 3/4 turn.

Fill oil sump with recommended oil. (See “Before Starting the 

• 

Generator” for oil recommendations).

Wipe up any spilled oil.

• 

Dispose of used oil at a proper collection center.

• 

3.3.6  REPLACING THE SPARK PLUG

See Engine Specifications for recommended spark plug. 

Replace 

the plug once each year.

 This will help the engine start easier and 

run better.

1.  Stop the engine and pull the spark plug wire off of the spark 

plug.

2.  Clean the area around the spark plug and remove it from the 

cylinder head.

3.  Set the spark plug's gap to 0.70-0.80 mm (0.028-0.031 in.). 

Install the correctly gapped spark plug into the cylinder head 

(Figure 14).

Figure 14 - Spark Plug Gap

3.3.7  BATTERY SERVICE (REPLACEMENT)

The battery shipped with the generator has been provided fully 

charged. Caution must be taken when connecting the battery.

NOTE:

A battery may lose some of it’s charge when not in use for 

prolonged periods of time. The battery may have to be recharged 

before the first use. (See the "Know the Generator" section.)

Summary of Contents for 005930-0

Page 1: ...www generac com or 1 888 436 3722 Owner s Manual 6 500 8 000 Watt XP Series Portable Generator MODELS 005930 0 005931 0...

Page 2: ...rting the Generator 9 2 9 1 Adding Engine Oil 9 2 9 2 Adding Gasoline 10 2 10 Starting the Engine Electric Start Only 10 2 11 Starting Pull Start Engines 11 2 12 Stopping the Engine 11 2 13 Low Oil Le...

Page 3: ...US SITUATION OR ACTION WHICH IF NOT AVOIDED WILL RESULT IN DEATH OR SERIOUS INJURY Indicates a hazardous situation or action which if not avoided could result in death or serious injury Indicates a ha...

Page 4: ...or as you could have carbon monoxide poisoning ELECTRICAL HAZARDS The generator produces dangerously high voltage when in operation Avoid contact with bare wires terminals connections etc while the un...

Page 5: ...his equipment Always reference the latest revision available for the standards listed 1 NFPA No 70 NFPA HANDBOOK OF NATIONAL ELECTRIC CODE 2 Article X NATIONAL BUILDING CODE available from the America...

Page 6: ...ot to the hole in the frame Secure foot with a bolt and flat washer small Repeat for other foot Slide the axle through the holes on the axle brackets Slide on one 5 8 flat washer thick wheel and a 5 8...

Page 7: ...FCI Circuit Breaker Use to reset the full control panel GFCI electrical system 10 Voltage Selector Switch Allows the user to choose between 120 240 volts or 120 volts only When in the 120 volt only po...

Page 8: ...0 hrs 2 3 CORD SETS AND CONNECTION PLUGS 2 3 1 120 VAC 20 AMP DUPLEX RECEPTACLE This is a 120 Volt outlet protected against overload by a 20 Amp push to reset circuit breaker Figure 5 Use each socket...

Page 9: ...oad by a 35A 240V main breaker Figure 7 Testing the GFCI 2 3 4 120 VAC 30 AMP RECEPTACLE Use a NEMA L5 30 plug with this receptacle rotate to lock unlock Connect a suitable 3 wire cord set to the plug...

Page 10: ...parts of this generator be properly connected to an approved earth ground Figure 9 Local electrical codes may also require proper grounding of the unit For that purpose connecting a No 10 AWG American...

Page 11: ...00 Lawn Mower 1200 Light Bulb 100 Microwave Oven 700 to 1000 Milk Cooler 1100 Oil Burner on Furnace 300 Oil Fired Space Heater 140 000 Btu 400 Oil Fired Space Heater 85 000 Btu 225 Oil Fired Space Hea...

Page 12: ...Acidic gas can damage the fuel system of an engine while in storage To avoid engine problems the fuel system should be emptied before storage of 30 days or longer See the Storage section Never use eng...

Page 13: ...OIL LEVEL SHUTDOWN SYSTEM The engine is equipped with a low oil level sensor that shuts down the engine automatically when the oil level drops below a specified level If the engine shuts down by itsel...

Page 14: ...park Plug Gap 0 030 inch or 0 76 mm Gasoline Capacity 9 U S gallons Oil Type See Chart in Adding Engine Oil Section Oil Capacity with filter 1 5 Qts without filter 1 2 Qts Run Time 50 Load 11 25 Hours...

Page 15: ...ined 3 3 5 CHANGING THE OIL AND OIL FILTER Change the oil and oil filter after the first 30 hours of operation Change the oil every 100 hours or every season thereafter If running this unit under dirt...

Page 16: ...surface If the filter is too dirty replace it with a new one Dispose of the old filter properly Clean air cleaner cover then insert new paper filter into the base of the air cleaner Re install air cl...

Page 17: ...n valve clearance is correct hold the pivot ball stud in place with the allen wrench and tighten the rocker arm jam nut Tighten the jam nut to 174 in lbs torque After tightening the jam nut recheck va...

Page 18: ...s and cylinder bore n Avoid spray from spark plug hole when cranking engine Install and tighten spark plug Do not connect spark plug wire Clean the generator outer surfaces Check that cooling air slot...

Page 19: ...8 Over choking 9 Low oil level 10 Excessive rich fuel mixture 11 Intake valve stuck open or closed 12 Engine has lost compression 1 Turn Fuel Shut off to ON 2 Clean or replace air filter 3 Fill fuel t...

Page 20: ...18 Notes...

Page 21: ...19 Notes...

Page 22: ...d be aware that Generac may deny any and or all warranty coverage or responsibility if your generator or a part component thereof has failed due to abuse neglect improper maintenance or unapproved mod...

Page 23: ...replacement as required maintenance in the Owner s Manual shall be warranted for the period of time prior to first scheduled replacement point for that part If the part fails prior to the first schedu...

Page 24: ...on Generac replacement part s will void the warranty in its entirety 4 Generac may choose to Repair Replace or Refund a piece of equipment 5 Warranty Labor Rates are based on normal working hours Addi...

Reviews: