Commissioning and Setup
Installation Manual for Generac PWRCell Inverter
27
4.
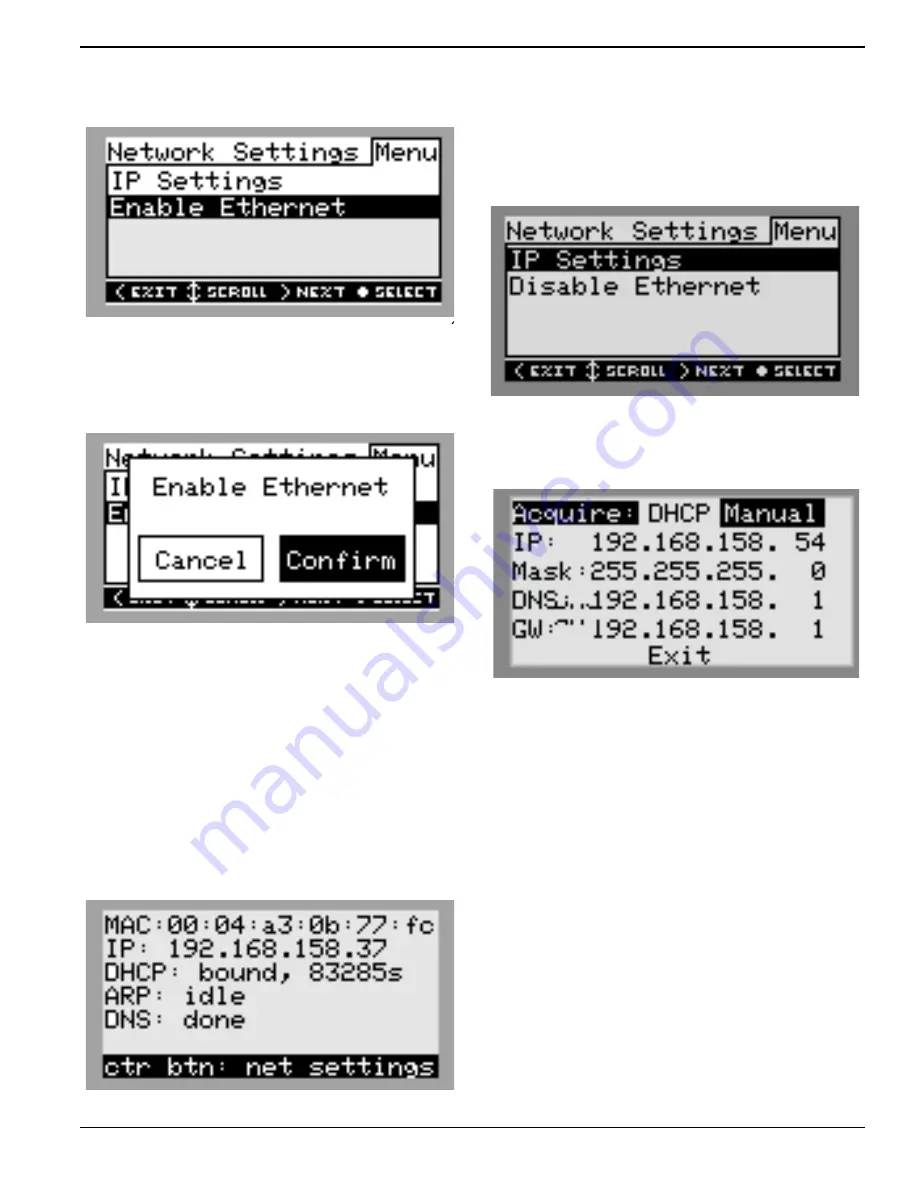
See
. Use the up and down arrows to
highlight Enable Ethernet then press the center
button.
010046
Figure 6-25. Ethernet Configuration (2 of 4)
NOTE:
Select IP Settings for advanced settings.
5.
See
. Press the right arrow to highlight
Confirm then press the center button.
010047
Figure 6-26. Ethernet Configuration (3 of 4)
6.
Verify the control panel Internet LED is lit indicating
a valid Internet connection.
NOTE:
If the Internet LED is not lit, see
7.
The Generac PWRcell system is now Ethernet-
enabled and can send and receive data.
8.
Log onto
and register the REbus devices.
NOTE:
See
. The Ethernet screen on Gen-
erac PWRcell’s Inverter LCD displays IP address, MAC
address and connection status.
009981
Figure 6-27. Ethernet Configuration (4 of 4)
Manually Configuring IP Settings
NOTE:
On networks not configured for DHCP, use the
MAC address to locate the device on the network.
To manually configure settings:
1.
See
. Press the center button from the
Ethernet settings screen and select IP Settings.
010048
Figure 6-28. Ethernet Configuration (1 of 2)
2.
. From the IP Settings menu select
Manual.
010049
Figure 6-29. Ethernet Configuration (2 of 2)
3.
Adjust any of the following:
•
IP
•
Subnet Mask
•
DNS
•
Gateway
NOTE:
Contact your network system administrator to
connect the Generac PWRcell Inverter to a restricted net-
work.


