Commissioning and Setup
32
Installation Manual for Generac PWRCell Inverter
Temporarily Overriding the TOU Scheduler
The scheduler can be temporarily overridden at any time
without disabling it. A manual override will apply until the
next regularly scheduled system mode change.
To temporarily override the scheduler:
1.
Navigate to the system home page.
2.
Press the center button.
3.
Select the desired temporary system mode.
NOTE:
See the Generac PWRcell Inverter Owner’s
Manual for more information on system modes.
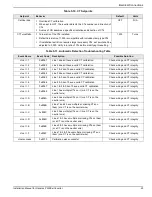
When the scheduler has been overridden:
•
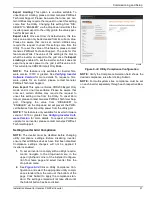
Temporary Override will display on the home page,
alternating with the words Scheduler Active and
the name of the current system mode.
•
See
. Running, Overridden will display
on the Beacon device page.
Figure 6-24. Overriding Scheduler
•
The countdown timer on the Beacon device page
will indicate the remaining time until the next mode
change.
After the next scheduled mode change, the scheduler will
resume normal operation.
Disabling the TOU Scheduler in Anticipation of a
Grid Outage
In the event of an impending storm and potential outage,
top off the battery by disabling the scheduler and switch
-
ing the system mode to priority backup or clean backup
mode.
To disable the TOU Scheduler:
1.
Navigate to the Beacon device page and disable
the scheduler. See
for
more information.
2.
Navigate to the system home page and change the
system mode to a backup-only mode, such as Pri
-
ority Backup or Clean Backup. See the Generac
PWRcell Inverter Owner’s Manual for more infor
-
mation on system modes.
3.
Once the emergency has passed, re-enable the
scheduler. See
for more
information.
NOTE:
If Priority Backup mode is not listed with the other
system modes, the system installer may have removed
the mode to comply with utility rules. Some utilities do not
permit a battery to charge from the grid..
Manually Configuring IP Settings
NOTE:
On networks not configured for DHCP, use the
MAC address to locate the device on the network.
To manually configure settings:
1.
Disconnect and move the blue Cat 5 connector
connected to the topside of the Beacon to the RJ-
45 Ethernet port on the backside of the inverter
Control Panel.
2.
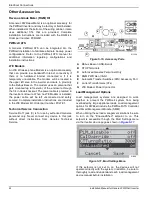
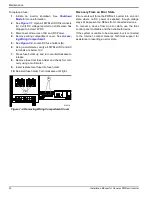
See
. When step 1 is conducted prop
-
erly and the inverter is receiving Internet, the
inverter control panel will have an additional device
page to configure Ethernet Settings. From the
home screen, press the left arrow key.
Figure 6-25. Ethernet Configuration (4 of 4)
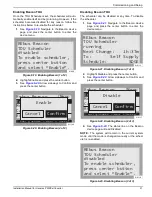
3.
See
. Press the center button from the
Ethernet settings screen and select IP Settings.
Figure 6-26. Ethernet Configuration (1 of 2)
TOU Scheduler
REbus Beacon
SDGE
Self Supply
1h:37m
running, overridden
Next Change:
To:
Schedule:
010119
IP: 192.168.158.37
MAC:00:04:a3:0b:77:fc
DHCP: bound, 83285s
ARP: idle
DNS: done
ctr btn: net settings
009981
IP Settings
Network Settings Menu
< EXIT SCROLL > NEXT • SELECT
Disable Ethernet
010048


