17
5.
Push and hold the right spring-loaded clamp for-
ward with your thumb.
7.
Release
only
the first stage of the clamp, sliding
your thumb down towards the bottom to lock the
tab in place.
8.
Release the clamp,
. This will bring proper ten-
sion,
, to the sanding belt.
6.
Insert the right tab of the sanding belt in the slot,
pushing all the way in (as far as possible), until it is
tight,
.
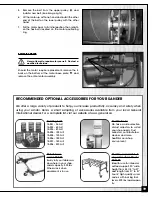
Note: The spring-loaded clamp at the right end of the drum is a two stage spring. The first stage grabs the paper
and the second stage pulls the clamp backward inside the drum, providing proper tension to the sanding belt.
Tip: Use a flat stick or any similar non-cutting object to force the tab further into the slot so it is as tight as possible,
.
Note: On occasion, due to slight variations in the length of the sanding belt or the depth of installation in the left
belt clamp, even with the belt properly wound onto the drum, there may be slightly too much belt left at the right
end of the drum. This may cause a slight overlap on the last wrap on the drum,
, and this despite installing the
right end of the belt as far into the clamp as it will go. In such cases, to avoid having to unroll and realign the
entire belt on the drum after it has already been secured at both ends and is otherwise properly installed, use a
utility knife or scissors to cut and remove the overlapped section of paper. To avoid belt tearing during sanding,
avoid cutting at right angles,
, - make a rounded or curved cut,
. (See pictures below.)
FIRST STAGE
SECOND STAGE


