14
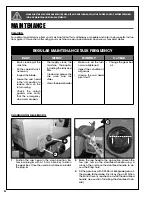
INSTALLING A BLADE
1.
Remove the blade guard screw
A
using a 4 mm
Allen key.
2.
Detach the blade guard arm and slide open the
guard.
A
There are a variety of different types of blades on the market to suit various cutting applications. Your results may vary
based on usage, experience and personal preference. Ask your local tool dealer for suggestions for 12“ x 1 1/4" (305 X
32 mm) cold cut blades. Please note that General International offers an optional a 12” hi-speed steel general purpose
blade (
#60-255
).
3.
Remove the blade flange screw using a 10 mm Al-
len wrench. Turn clockwise as shown.
4.
Remove the blade flange from the blade holder.
5.
Install the blade on the blade holder, making sure
that the blade is installed with the teeth pointing
down as shown
B
.
6.
Hold the blade against the blade holder making
sure it sits flush, then align the two mounting holes
C
with the corresponding holes of blade holder.
C
C
B
BEFORE ASSEMBLING, MAKE SURE THAT THE SWITCH IS IN THE “OFF” POSITION AND THAT THE POWER CORD IS
UNPLUGGED. DO NOT PLUG IN OR TURN ON THE MACHINE UNTIL YOU HAVE COMPLETED THE ASSEMBLY AND
INSTALLATION STEPS DESCRIBED IN THIS SECTION OF THE MANUAL.


