22
MAINTENANCE
CLEANING
For optimum performance from your machine, follow this maintenance schedule and refer to any specific instruc-
tions given in this section. After using your machine, sweep up and discard any excess chips amd debris.
MAKE SURE THE MACHINE HAS BEEN TURNED OFF AND UNPLUGGED FROM THE POWER SOURCE BEFORE PERFORM-
ING ANY MAINTENANCE OR ADJUSTMENTS.
REGULAR MAINTENANCE TASK FREQUENCY
DAILY
WEEKLY
MONTHLY
2 x YEAR
• Basic cleaning of the
machine
• Fill the coolant tank if
necessary
• Inspect the blade
• Leave the saw head
in the “up” position to
reduce stress on the
return spring
• Check the splash
guards and verify
that the emergency
stop works properly
• Thoroughly clean the
machine thoroughly,
including the tank and
filter
• Clean and grease the
vise screw and the
slides
•
Clean the blade holder
• Make sure all the fast-
ners are tightened
• Inspect the condition of
all guards
• Grease the saw head
pivot shaft
• Change the gear box
oil
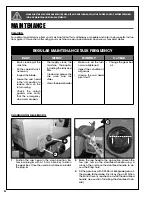
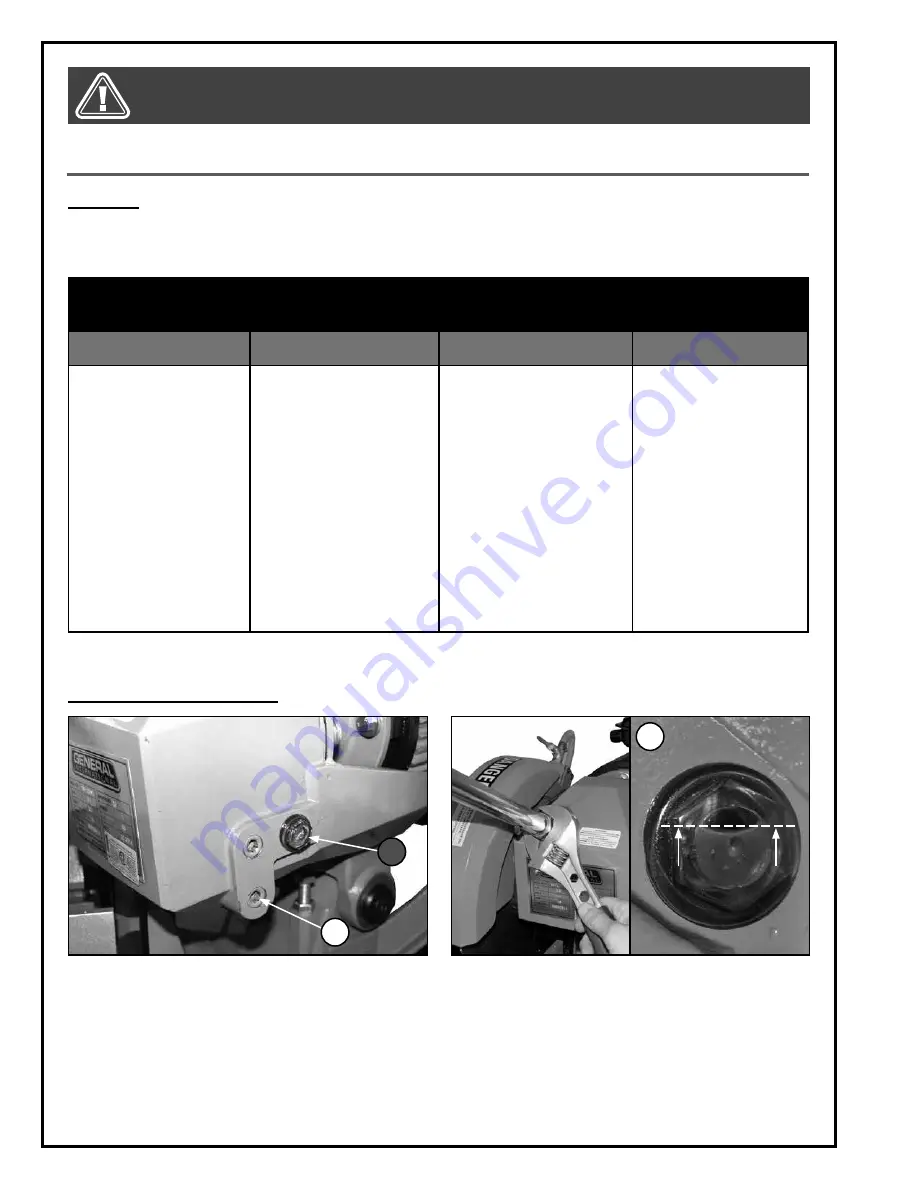
CHANGING THE GEAR BOX OIL
B
A
C
1
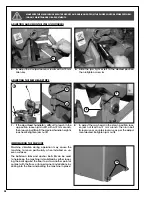
. Position the saw head in the down position. Re-
move oil plug
A
with a 10 mm Allen Key to drain
the gear box. Once the used oil is drained, re-install
the plug
A
.
2
. Raise the saw head to the up position. Loosen the
two jam nuts on the downfeed handle using a
wrench, then remove the downfeed handle to ac-
cess the filling hole.
3.
Fill the gear box with 0,25 liter of 460 grade gear oil.
The gauge
B
should be 3/4 full as shown
C.
When
the correct level is reached, re-install the downfeed
handle (see section “Installing the downfeed han-
dle”).


