Installation
2 - 3
2.
Be sure all piping is supported. Do not allow the
weight of any piping to bear on the dryer or filters.
3.
Purge Exhaust Piping is not required on Models
OP15 through OP300. However, if it is necessary to
have a remote mounted muffler, consult with your lo-
cal General Pneumatics Sales Representative for
special piping instructions.
On Models OP400 and OP500, refer to the Purge Ex-
haust Muffler Section of the manual for Purge Ex-
haust Piping instructions.
2.5
Purge Exhaust Restrictor
The dryer’s Purge Exhaust Restrictor quiets the gas flow
and prevents desiccant bed fluidization by controlling
(slowing) the rate of depressurization.
On dryer models OP15 through OP200 the Purge Exhaust
Restrictor is designed into the Purge Exhaust Valve.
On dryer models OP250 through OP500 the Purge Ex-
haust Restrictor must remain attached to the purge ex-
haust switching valve body to operate properly.
2.6
Purge Exhaust Muffler
The dryer’s Purge Exhaust Muffler quiets the gas flow to
atmosphere during depressurization and regeneration
(purge) cycles.
On models OP400 and OP500, the purge exhaust muffler
must be piped BY THE CUSTOMER to a remote location.
A removable section of pipe should be provided at the
Purge Exhaust Restrictor for ease of maintenance and the
muffler should be mounted in a self-draining position.
Note: The pipe run from the dryer to the muffler should
not exceed 100 equivalent feet of pipe using a pipe size
equal to or larger than the Purge Exhaust Restrictor con-
nection. Consult with your local General Pneumatics Sales
Representative for requirements when the equivalent feet
of pipe exceeds 100 feet.
2.7
Electrical Connection
NOTE 1:
Use proper, load-rated components as ap-
proved by NEC, NEMA, CSA, UL, etc., as re-
quired. Local and municipal codes may also
apply. All installations and connections must
be in accordance with recognized electrical
codes in effect.
NOTE 2:
It is mandatory that each dryer be individually
GROUNDED. Do not use your plant’s frame
as a ground. Use an adequate ground with the
conductor sized to NEC.
NOTE 3:
A disconnect switch is not provided as stan-
dard equipment and therefore, must be sup-
plied by the customer. The dryer’s electrical
load is indicated on the Dryer Specification La-
bel located on the inside cover of the dryer con-
trol enclosure.
NOTE 4:
The manufacturer is not liable for code viola-
tions, component damage, downtime or conse-
quential damages related to customer supplied
and installed electrical components and con-
nections.
NOTE 5:
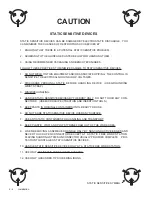
Exercise CAUTION for Static Sensitive De-
vices before making electrical connections.
NOTE 6:
DRYER CONTROLS FOR HAZARDOUS
LOCATIONS. Optima dryer controls for haz-
ardous locations comply with the National Elec-
trical Code (NEC) for application in Class I, Di-
vision 2, Group B through D hazardous loca-
tions. Per NEC 501-3 (b),
all incendive devices
(power supply, common alarm relay, fuse)
that
may release enough energy to ignite B through
D gases and vapors are located in a NEMA 7
enclosure.
Also, all non-incendive devices (so-
lenoid valves, DIP switch and pressure switch
contacts)
that do not normally release enough
energy to ignite B through D gases and vapors,
are located in a NEMA 4 enclosure.
1.
Refer to the Dryer Specification Label, (located on the
inside cover of the dryer control enclosure) for your
specific dryer model’s electrical input requirements.
ENSURE THAT THE INTENDED POWER SOURCE
CONFORMS TO THESE REQUIREMENTS.
CAUTION: Surges, spikes and input voltage of less
than eighty-five (85) VAC or greater than one hundred
and thirty-two (132) VAC, may cause the Dryer Con-
trol System to operate erratically, or malfunction. This
malfunction may or may not be accompanied by an
alarm. Adequate surge, spike, brownout, and black-
out protection must be provided to protect your equip-
ment and allow safe shutdown time (an uninterrupted
power supply is recommended). Failure to do so may
result in wet pilot gas entering the control enclosure
and damage to the equipment. Failure to provide
adequate protection to the input voltage will void war-
ranties.
2.
Using the conduit connection ports provided, connect
the electrical input and ground leads to the Power In-
put and Remote Alarm Terminal Block. Make con-
nections in accordance with the lead connection in-
scriptions (GND, H, N). Connect ground lead (GND)
FIRST.
NOTE: For hazardous locations, the Power Input and Re-
mote Alarm Terminal Block are located in the NEMA 7
enclosure.


