Maintenance and Repair
4 - 3
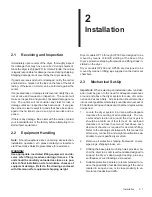
Activated Alumina
Model
(lbs. per chamber)
OPD-4
OPD-25
OP15
24
——
OP25
42
——
OP30
72
——
OP40
72
——
OP50
92
——
OP60
145
——
OP75
145
——
OP100
192
——
OP125
239
——
OP150
318
——
OP200
416
——
OP250
540
——
OP300
675
——
OP400
875
75
OP500
1350
150
Table 4.1
DESICCANT REQUIREMENTS
For Dryer Models OP15 through OP300
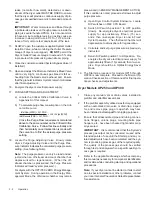
a) Fill each chamber with OPD-4 (4mm bead) des-
iccant until the specified quantity has been in-
stalled. Light tapping on the chamber sides with
a soft-face mallet should yield additional free
space to allow installation of the specified quan-
tity. DO NOT TAMP OR RAM DESICCANT.
For Dryer Models OP400 and OP500
a) Install the specified quantity of OPD-25 (1/4"
bead) desiccant.
b) Level layer of OPD-25.
c)
Finish filling each chamber with OPD-4 (4mm
bead) desiccant until the specified quantity has
been installed. Light tapping on the chamber
sides with a soft-face mallet should yield addi-
tional free space to allow installation of the speci-
fied quantity. Do Not Tamp Or Ram Desiccant.
Note: Do not be alarmed if the specified quantity
of desiccant cannot be installed in each chamber.
Desiccant levels will settle after approximately
two to three weeks of normal operation. Follow-
ing this “settling” period, desiccant should be
added as necessary to return levels to BOTTOM
of each chamber’s retaining screen (when in-
stalled).
9.
Clean the fill port, fill port plug threads, or fill port
flanges on each desiccant chamber. Apply TFE tape
to fill port plug threads. Re-install the fill port plug or
fill port flange in each desiccant chamber, and torque
drain port plugs or flange bolts to a reasonable limit.
4.3
Filter Element Replacement
Coalescing prefilters and particulate afterfilters are in-
cluded with all Optima Series Dryers. The filter elements
should be replaced when the differential pressure gauge
on top of the filter reads 7 to 10 psid, or once a year,
whichever comes first. Refer to Appendix B for the re-
placement element part numbers. Replace elements in
accordance with the following instructions.
Dryer Models OP15 through OP250
WARNING!
Ensure that the Dryer and any associated Prefilters
and Afterfilters are valve isolated and fully depressur-
ized before attempting to remove or disassemble any
components or subassemblies. Failure to do so may
result in serious personal injury and/or equipment
damage.
1.
Isolate the filter by opening the system bypass valve
(refer to Figure 2.1, page 2-2), and closing both inlet
and outlet isolation valves.
2.
Open the service valve to vent the filter to atmo-
spheric pressure.
3.
Disconnect drain lines at manual and automatic drain
valves (if installed).
WARNING!
A "hissing" sound while the bowl is being removed
indicates the filter has not been properly depressur-
ized. DO NOT continue to remove the bowl until the
filter has been completely vented to atmospheric pres-
sure.
CAUTION: Filter bowls may be heavy. Caution should be
taken when removing the bowl.
4.
Remove the bottom bowl by unscrewing it from the
head. A strap wrench may be needed.
5.
Remove the element from the filter head with a brisk
downward pull, or by working the element back and
forth until it snap frees. Discard the element in accor-
dance with applicable regulations. Used elements
typically hold contaminants such as compressor lubri-
cants and particulate matter.
Note: The element may be unsnapped by differential
pressure in normal operation. This will not affect filtration,
as the O-ring on the element maintains a positive seal.
6.
Clean accumulated debris from the bowl with soap
and water, and dry thoroughly.

