ELECTRICAL REQUIREMENTS
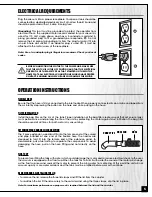
Plug the vacuum into a proper receptacle. Your power tools should be
connected to a dedicated electrical circuit of not less than #14 wire and
should be protected with a 15 amp time lag fuse.
Grounding:
This tool must be grounded to protect the operator from
electrical shock. The supplied motor recommended for your vacuum is
wired for 110 Volt, single phase, and has a 3-conductor cord and 3-
prong grounded plug to fit a grounded-type receptacle,
. Do not
remove the 3rd prong (grounding pin) from the plug to make it fit into
an old 2-hole wall socket. If an adapter plug is used,
, it must be
attached to the metal screw of the receptacle.
Note: Use of an adaptor plug is illegal in some areas. Check your local
codes.
BEFORE CONNECTING THE MOTOR TO THE POWER LINE, MAKE SURE
THAT THE SWITCH IS IN THE OFF POSITION AND THAT THE ELECTRICAL
CURRENT IS OF THE SAME TYPE AS THAT STAMPED ON THE MOTOR
NAME PLATE. ALL ELECTRICAL CONNECTIONS SHOULD HAVE PROPER
CONTACT. RUNNING ON LOW VOLTAGE WILL DAMAGE THE MOTOR.
OPERATION INSTRUCTIONS
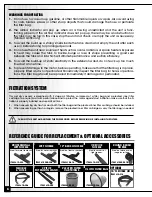
FLEXIBLE HOSE
Be sure that the hose is firmly connected to the inlet nozzle. When properly connected it can only be unclipped from
the air inlet by depressing the button on the hose end while pulling on the hose.
FILTER INSTALLATION
Install the bag filter on the rim of the tank. Proper installation of the bag filter creates a seal that will ensure maxi-
mum performance and prolong the life of the unit by protecting the motor against dust infiltration. The bag filter
should be used at all times, for both wet or dry vacuuming.
EXTENSION WAND AND NOZZLE CONNECTION
The 2 piece extension wand twist-fits into the female end of the curved
end pipe installed at one end of the flexible hose. The nozzles are
designed to twist fit into the female end of the extension wand. To
disassemble, pull while twisting to separate the components. To avoid
damaging the hose, pull on the hose fittings and not directly on the
hose.
FLOAT CUP
To prevent overfilling the tank with water which could damage the motor and/or cause electrical shock to the user,
the vacuum is equipped with a float cup. When the tank fills to its limit with water the sound of the motor will change
as the float cup rises and seals off the motor to prevent the rising water from entering. At this point the unit will not
vacuum up any more water or debris and the tank must be emptied before work can continue.
REMOVING AND RE-INSTALLING THE LID
• To remove the lid, release the three lid clasps and lift the lid from the canister.
• To re-attach the lid, fit the lid securely to the canister and using the three clasps, clip the lid in place.
Note: For maximum performance a proper seal is required between the lid and the canister.
5
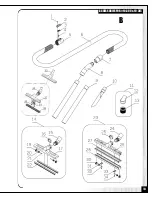
CURVE PIPE
HOSE
HOSE END
Summary of Contents for 10-300
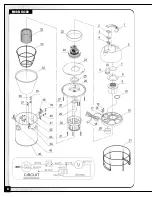
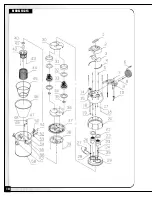
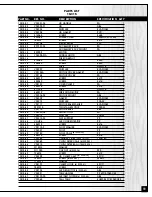
Page 8: ...8 MODEL 10 300 ...
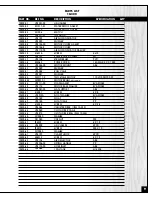
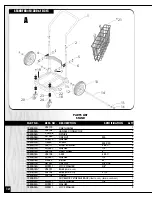
Page 10: ...MODEL 10 315 10 ...
Page 13: ...13 ACCESSORIES FOR 10 300 10 315 B ...
Page 15: ...15 NOTES ...


