background image

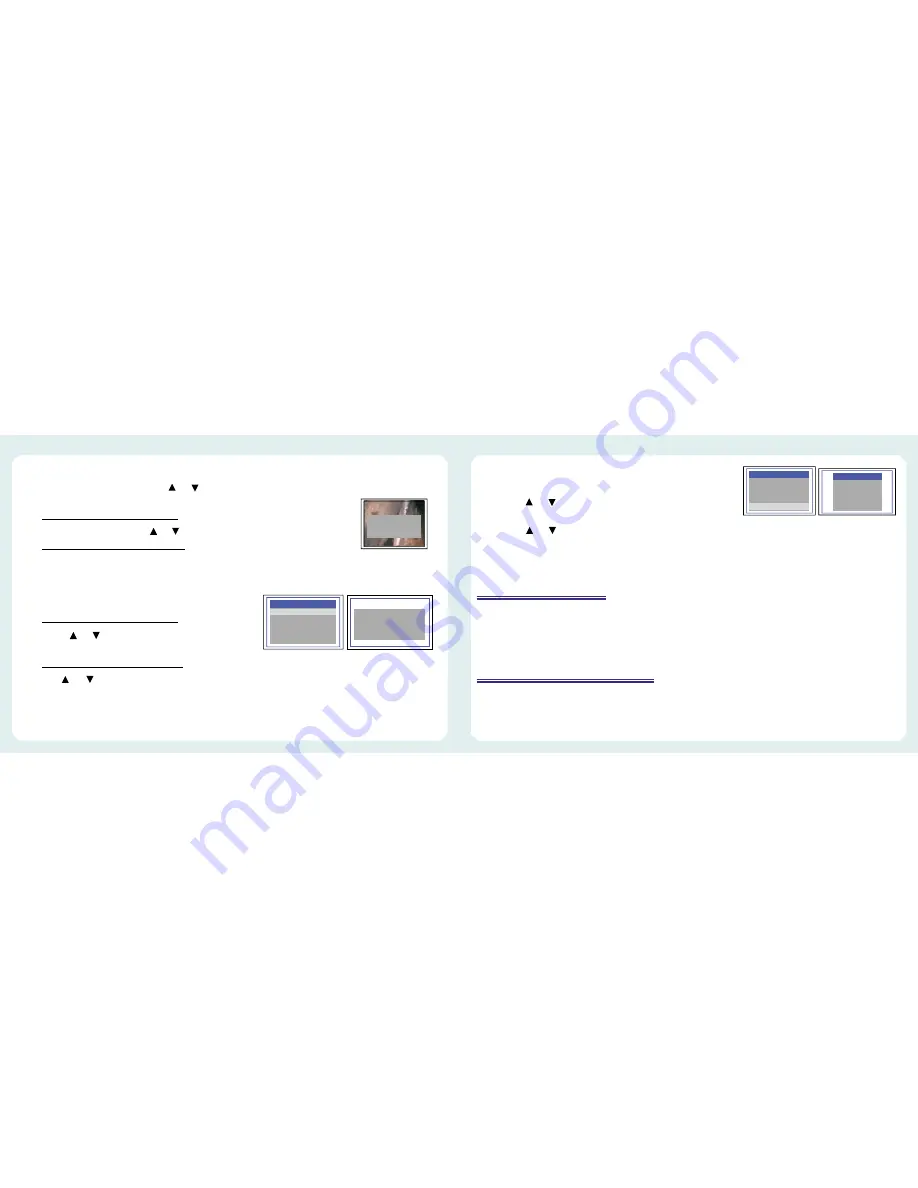
Setting auto power off

1.Press           during Preview mode.
2.Press       or      for “Auto power off” command.
3.Press 
4.Press       or       to select desired time length or choose “Disable”.
5.Press  
The console will automatically turn off if it has not been used for this preset length of time.

Re-charging the battery

Re-charging the console battery

Plug the adapter into the outlet and plug the power jack into the socket on the console.

 Creation of Memory Card Folder

The following information applies to the included SD card only.  All photos and videos are stored in the 

[100MEDIA] folder under the [DCIM] folder.  All files will be named according to the time/date setup.

(Figure.15)

TIME  SET

DISABLE

5      MIN

10    MIN

15    MIN

30    MIN

POWER  OFF

POWER OFF

MANUAL

DELDTE ALL

VIDEO OUTPUT

DATE/TIME SETUP

LANGUAGE

VIDEO FORMAT

AUTO POWER OFF

MENU

(Figure.14)

MANUAL

DELDTE ALL

VIDEO OUTPUT

DATE/TIME SETUP

LANGUAGE

VIDEO FORMAT

AUTO POWER OFF

MENU

ERASE  ALL

yes     no

(Figure.13)

DELETE 


yes     no

Deleting a specific photo 

(Browse mode only)

1. Enter Browse mode, then press       or      to locate the photo or video you wish to delete.
2. Press  

Image Status:  “Delete yes or no” options

3. To select your option, press      or  

Image Status: The selected option flashes. 

4. Press           to execute your selected option or press ESC to cancel.

Deleting all photos

1. Press           during Preview mode.

Image Status:  Showing the Main Manual

2. Press       or       for “Delete All” command.
3. Press  

Image Status: “yes” or “no” option appears

4. Use       or       to select “yes”.
5. Press            to execute.

OK

OK

OK

OK

OK

OK

OK

OK

Summary of Contents for DCS1600

Page 1: ...DCS1600 USER S MANUAL HIGH PERFORMANCE DATA LOGGING VIDEO BORESCOPE SYSTEM...

Page 2: ...Video Recording 9 Viewing photos videos 9 Setting Time Date 10 Setting Time Display 10 Viewing on a TV monitor 11 Setting video format 11 Deleting a specific photo Browse mode only 12 Deleting all pho...

Page 3: ...ector 2 CONSOLE 1 RECORD 2 SNAP 3 POWER 4 PREVIOUS 5 NEXT 6 OK 7 ESC 8 SD Port 9 TV out INSERT TUBE DCS1600 2 1 3 1 2 3 4 5 6 7 8 9 10 13 12 11 10 AC Jack 11 USB port 12 Light adjustment 13 Hanger Hol...

Page 4: ...insert tube into the connector according to the direction of the arrow and tighten the screw nut STEP 2 Press and hold down the power button on the console for 3 seconds until the image is displayed...

Page 5: ...NGLISH FRENCH ENGLISH ESPANOL ITALIAN LANGUAGE MANUAL DELDTE ALL VIDEO OUTPUT DATE TIME SETUP LANGUAGE VIDEO FORMAT AUTO POWER OFF MENU TIME SET DISABLE 5 MIN 10 MIN 15 MIN 30 MIN POWER OFF POWER OFF...

Page 6: ...and then the next photo or video will be displayed P 6 P 9 Figure 8 Figure 8 Figure 7 Figure 6 Operating Instructions Power On Off STEP1 To turn the console on press the power button for 3 5 seconds...

Page 7: ...or to decrease 5 Press for next adjustment 6 Repeat step 4 and 5 until the correct time date are set 7 Press to complete the set up Setting Time Display 1 Press 2 Press or to move to Date Time comman...

Page 8: ...e 15 TIME SET DISABLE 5 MIN 10 MIN 15 MIN 30 MIN POWER OFF POWER OFF MANUAL DELDTE ALL VIDEO OUTPUT DATE TIME SETUP LANGUAGE VIDEO FORMAT AUTO POWER OFF MENU Figure 14 MANUAL DELDTE ALL VIDEO OUTPUT D...

Page 9: ...e Both photos and videos are named in the same way but with different file extensions jpg and asf Specifications Camera System and Insert Tube 0 2 Diameter Insert Tube 325 H 250 V Housing Steel Light...

Page 10: ...Please check the insert tube connector or simply re connect the insert tube to correct the problem 3 Unable to capture photos video Please check the status of the SD card Users will not be able to cap...

Page 11: ...use any corrosive liquid for cleaning such as alcohol Do not try to disassemble the product This presents a shock hazard and could damage the unit Do not bend the insert tube over 180 degrees during...

Reviews: