background image

HARDNESS TESTER ASTM RATED—PEN STYLE 

USER’S MANUAL 

EMHT40 

Please read this manual carefully and thoroughly before using this product. 

99 Washington Street 
Melrose, MA 02176 

Phone

 781-665-

1400

Toll Free 1-800-517-8431

Visit us at www.T

estEquipmentDepot.com

Summary of Contents for EMHT40

Page 1: ...PEN STYLE USER S MANUAL EMHT40 Please read this manual carefully and thoroughly before using this product 99 Washington Street Melrose MA 02176 Phone 781 665 1400 Toll Free 1 800 517 8431 Visit us at...

Page 2: ...erfacing with a PC 19 20 Specifications 20 Operating Maintenance Tips 21 APPENDIX Non conventional support rings 21 22 INTRODUCTION The EMHT40 is a pen style instrument that uses the Leeb testing meth...

Page 3: ...es a trigger at one end of the instrument to fire the plunger the impact device against the work piece at the other end A permanent magnet close to the work piece senses the impact and generates two v...

Page 4: ...ot just the testing method but the type of impact device as well For example a hardness value of 510 on the Leeb scale determined by using the D type tungsten carbide impact device provided with the E...

Page 5: ...c bag An 110VAC adaptor with an output of 3 7VDC output available from a full size USB jack A cable with a full size USB plug at one end and a mini USB plug at the other When used to connect the EMHT4...

Page 6: ...unctions provided by the three button keypad on the bottom of the unit Familiarize yourself with the position of all indications and the functions of the controls before moving on to the Setup Instruc...

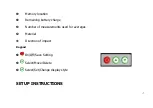
Page 7: ...mory location Remaining battery charge Number of measurements used for averages Material Direction of impact Keypad On Off Save Setting Select Move Delete Select Set Change display style SETUP INSTRUC...

Page 8: ...ieces weighing between 4 4 and 11 lb 2 and 5kg as well as work pieces with protruding parts or thin walls should be anchored to a solid support to prevent them from moving or flexing as a result of te...

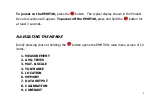
Page 9: ...l appear To power off the EMHT40 press and hold the button for at least 3 seconds NAVIGATING THE MENUS Briefly pressing but not holding the button opens the EMHT40 s main menu screen of 10 items 1 MEA...

Page 10: ...cting a main menu item displays either 1 a default value that can be adjusted by using the and buttons or 2 a sub menu of options that can be navigated using the same buttons To save any displayed set...

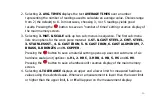
Page 11: ...options for the work piece material 1 ST CAST STEEL 2 CWT STEEL 3 STAINLESS ST 4 G CAST IRON 5 N CAST IRON 6 CAST ALUMINUM 7 BRASS 8 BRONZES and 9 COPPER Pressing the button to save a material settin...

Page 12: ...ng it from an invisible zero press the button as many times as necessary to reach the desired value You can only increase the digit s value by one per button press to change the value from 6 to 5 for...

Page 13: ...digits of the lower hardness limit Note that when you press the button to save the units digit of the lower hardness limit the up arrow moves up to its initial position below the thousands digit of th...

Page 14: ...AUTO STORE and 2 CLOSE STORE Use the or button to highlight the desired method of storing measurements automatic or manual Then press the button to select it and resume display of the main memory scr...

Page 15: ...first and last numbers of a sequence of memory locations that you wish to erase When you are satisfied with the memory location settings press the button The EMHT40 will respond by showing the text P...

Page 16: ...ou are satisfied with the memory location settings press the button to resume display of the main memory screen Selecting 2 BATCH STORE calls up another screen with the text BATCH OUT over two options...

Page 17: ...sate for consistent measurement errors caused by normal wear of the impact device When you are satisfied with the calibration adjustment press the button to resume display of the main memory screen 9...

Page 18: ...HT40 press the button The typical display shown at left below will appear To power off the EMHT40 press and hold the button for at least 3 seconds Hint Pressing the button with the measurement screen...

Page 19: ...lar from the shaft of the impact device 2 Cock the plunger by sliding the top half of the shaft down toward the LCD 3 Place the black plastic end of the unit on a flat part of the work piece If the wo...

Page 20: ...the program and drivers The disc contains several folders and files containing the instructions needed to install the drivers and to install and operate the program Use the included USB cable to teth...

Page 21: ...oid damaging it Using the AC adaptor it takes about 4 hours to fully charge the battery from a completely discharged state Trickle charging the battery from a PC s USB port takes longer Over time the...

Page 22: ...ical inside surfaces R11 to R13 5 03 03 11 HZ12 5 17 For cylindrical inside surfaces R12 5 to R17 6 03 03 12 HZ16 5 30 For cylindrical inside surfaces R16 5 to R30 7 03 03 13 K10 15 For spherical outs...

Page 23: ...ical inside surfaces SR16 5 SR30 12 03 03 18 For cylindrical outside surfaces with a radius adjustable from R10 to 99 Washington Street Melrose MA 02176 Phone 781 665 1400 Toll Free 1 800 517 8431 Vis...

Reviews: