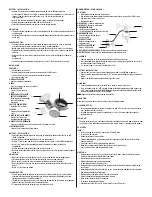
DISPLAY
• Light sensor detects low light conditions and LCD lights up automatically when adapter is connected.
POWER
• Open the battery compartment door on the back of the main unit.
• Insert four (4) “AA” batteries according to the polarities shown and replace the battery
compartment door.
• Connect 7.5V AC/DC adapter provided to the main display unit and plug into the wall power outlet.
NOTE:
The AC/DC adaptor connection is required for automatic backlight control. When the main unit
operates solely on the battery power, the auto backlight control functions are disabled.
• When placing the main unit on the table or other horizontal surface, connect the table stand to the
back of the unit.
• When mounting the main unit on the wall or vertical surface, detach the table stand and use the
mounting hardware provided.
PLACEMENT TIPS
• Make sure that the main unit is locating within the operating range of all remote sensors.
• Ideally the remote sensors should be mounted within the line of sight of the main unit.
• Transmission range may be affected by trees, metal structures and electronic appliances.
• Test reception before permanently mounting all the remote sensors.
Avoid placing the main unit in the following areas:
• Direct sunlight and surfaces emitting and radiating heat, such as heating ducts or air conditioners.
• Areas with interference from the wireless devices (such as cordless phones, radio headsets, baby
listening devices) and electronic appliances.
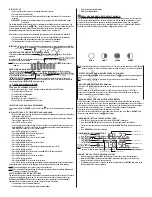
BUTTONS AND CONTROLS
MAIN UNIT CONTROL BUTTONS
A.
UP
▲
- Selects the next available window counter-clockwise.
- Increases parameters.
B.
DOWN
▼
- Selects the next available window clockwise.
- Decreases parameters.
C.
SET
- Alternates the parameters for the selected window.
- If depressed and held, enters into the programming mode or changes
parameter’s units.
- Pressed again closes programming mode and confirms selected parameters.
D.
CHANNEL
- Manually selects the channel # for receiving temperature and humidity
sensor data.
- Enables the temperature and humidity channel auto-scan modes.
E.
MEMORY
- Records: moon phase, temperature, humidity, rainfall and wind records.
Then stores in memory.
- Moon phase: determined by the day of month interval.
- Sets and stores pressure & altitude units in Memory.
F.
HISTORY
- Allows displaying the sea-level pressure history.
G.
ALARM/CHART
- Displays alarm times and programmed alerts for temperature, rainfall and
wind.
- Press and hold, to enter the alarm/alert programming mode.
- Press and hold in pressure and forecast window, to view different bar charts.
H.
SENSOR
– AUTO, ON, OFF
- Sets the light sensor to: automatic, on or off.
I.
SENSITIVITY
– HIGH/LOW
- Adjusts the automatic light sensor sensitivity.
J.
LIGHT/SNOOZE
- Illuminates the display backlight for 5 seconds.
- Activates Snooze delay for alarms (programmable 1 to 15 minutes).
K.
AC/DC ADAPTOR
- Connects main unit to the power outlet through the AC to 7.5V DC adapter
INPUT
provided.
L.
USB PORT
- USB Port provides PC connectivity.
I
A
B
C
D
E
F
G
J
K
L
Radio Controlled
Clock Signal Status
Clock Module icon
Time/Date Display
Single Alarm
Weekly/City/Second
Year/UTC time Display
Weekly Alarm
Battery Status


