9
English
OPErATION
WArNING:
To reduce the risk of serious personal injuries, read and follow all
important safety warning and instructions before using this tool.
WArNING:
Always be sure that the tool is switched off before insertion or
removal of the battery pack.
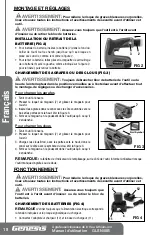
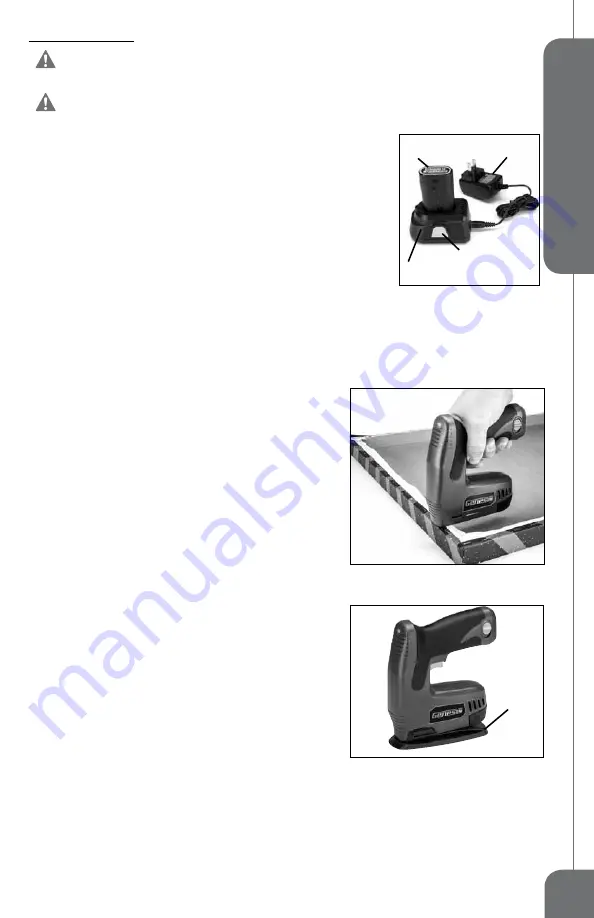
CHARGING THE BATTERY (FIG 4)
NOTE:
Always Check that the power supply corresponds to the voltage on
the ratings plate.
• Connect the charging adaptor (12) and the charging stand (11).
• Plug the adaptor into a 120 Volt AC power source. The GreeN light on the
charging stand will illuminate, indicating the charger is powered.
• Insert the battery (2) all the way into the charging stand until it locks in place
with a click, as shown in fIG 4. The reD light on the stand indicates that the
battery is charging.
• The light will turn GreeN after charging is complete.
• To remove the battery from the stand, depress the locking tab (c) on the stand to release the battery pack.
• Batteries may become warm while charging. This is normal.
• If the battery is hot after continuous use in the tool, allow it to cool down to room temperature before charging.
This will extend the life of your batteries.
NOTE
:
It takes approximately 3-5 hours to charge up a completely discharged battery.
DRIVING A STAPLE OR A NAIL
• Hold the handle firmly with the nose of the tool flat against the
work surface.
• Press the activation contact (5-fIG 1) down against the work
surface until the LeD readiness indicator (4-fIG1) turns Green.
• Squeeze the trigger to deliver a staple or a nail into the
workpiece.
• Once a staple or a nail has been delivered, release the trigger,
and lift the tool off the work surface.
REMOVING A JAMMED STAPLE
If there is a jammed staple in the tool, you must remove it before
further use. Attempting to drive a staple while the tool is jammed
could damage the mechanism.
• remove the battery pack.
• Hold the tool upside down. Squeeze the magazine release and
slide the magazine open.
• remove the unused staples.
• remove the jammed staple with needle-nose pliers.
USING A STAPLER BASE (FIG 6)
The tool comes with a stapler base (10). It converts the tool into a
regular desktop stapler. To install the stapler base, clip it on to the
tool as shown in fIG 6.
FIG 4
2
12
11
C
FIG 5
FIG 6
10


