Section 4 • Repair Procedures
4 - 36
GR-20J • GR-26J
Part No. 227656
September 2016
Turntable Components
9-1
Turntable Rotation Motor
How to Remove the Turntable
Rotation Motor
Note: When removing a hose assembly or fitting,
the fitting and/or hose end must be torqued to
specification during installation. Refer to Section 2,
Hydraulic Hose and Fitting Torque Specifications.
Bodily injury hazard. This
procedure requires specific repair
skills, lifting equipment and a
suitable workshop. Attempting this
procedure without these skills and
tools could result in death or
serious injury and significant
component damage. Dealer
service is strongly recommended.
1 Turn the key switch to ground control and pull
out the red Emergency Stop button to the on
position at both the ground and platform
controls.
Note: Rotate the red Emergency Stop button at
platform control one quarter turn in a clockwise
direction to restore the power supply. The red
Emergency Stop button returns automatically to
the out, or on position.
2 Raise the jib boom to the maximum height.
3 Turn the key switch to off position and push in
the red Emergency Stop button to the off
position at both the ground and platform
controls.
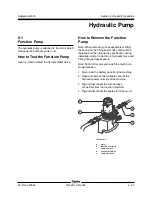
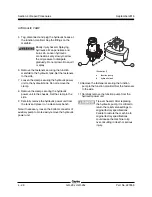
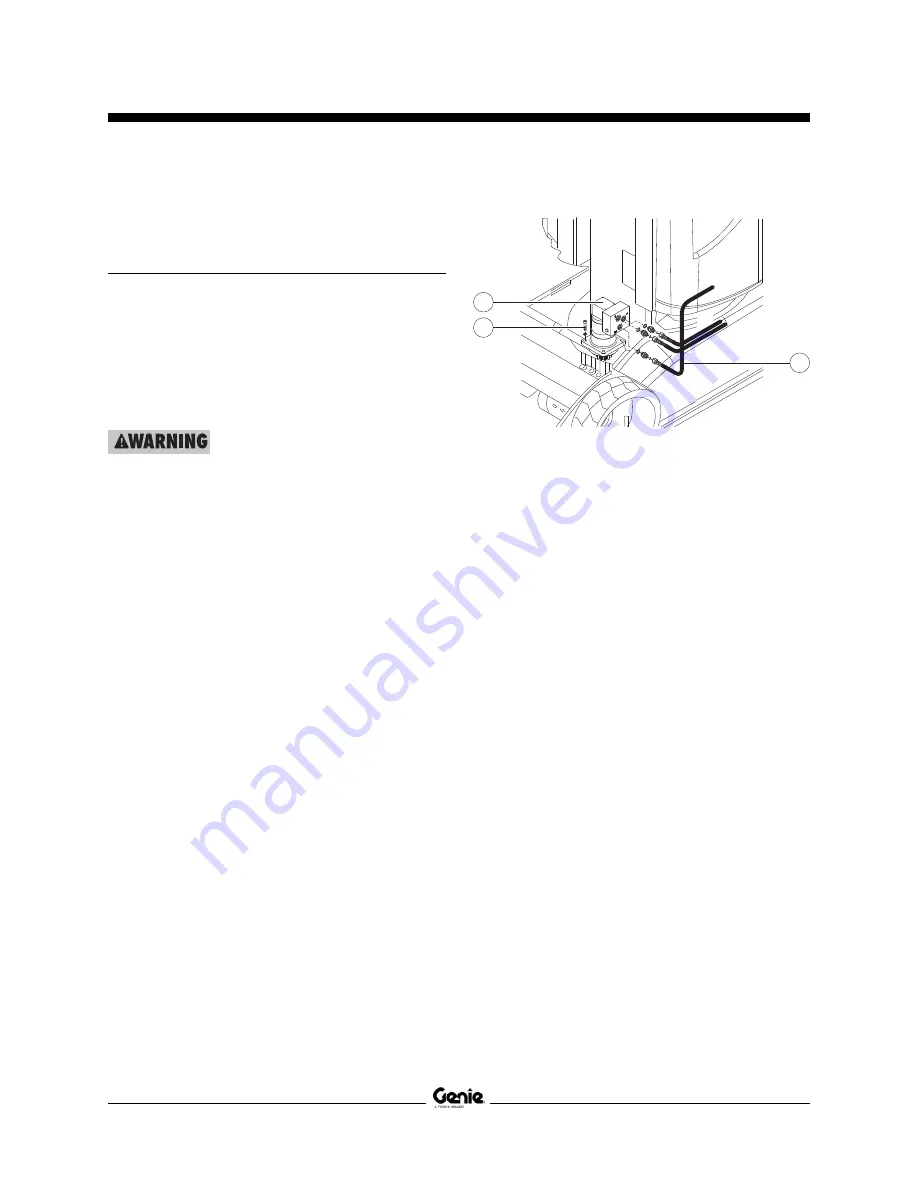
a
turntable rotation motor
b
fasteners
c
hydraulic hoses
4 Remove the fasteners securing the rear chassis
cover to the chassis at the non-steer end of the
machine. Remove the chassis cover. Lay the
cover and fasteners to the side.
5 Remove the fasteners securing the side covers
to the chassis. Remove the side covers from
the machine. Lay the side covers and fasteners
to the side.
6 Remove the fasteners securing the turntable
motor protection plate to the chassis. Remove
the protection plate from the machine. Lay the
protection plate and fasteners to the side.
Note: The turntable motor protection plate is
located above the turntable rotation motor.
a
b
c

