Section 4 • Repair Procedures
November 2014
Part No. 229753
GS-2669 RT • GS-3369 RT • GS-4069 RT
4 - 35
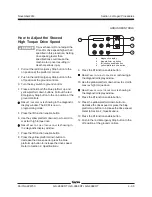
b
c
d
a
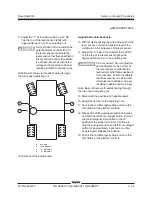
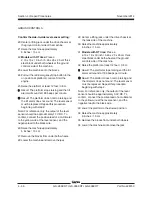
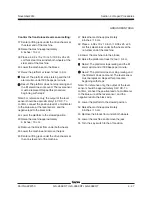
How to Adjust the Stowed
High Torque Drive Speed
Tip-over hazard. Do not adjust the
lift and/or drive speed higher than
specified in this procedure. Setting
drive speed greater than
specifications could cause the
machine to tip over resulting in
death or serious injury.
1 Pull out the red Emergency Stop button to the
on position at the platform controls.
2 Push in the red Emergency Stop button to the
off position at the ground controls.
3 Turn the key switch to ground control.
4 Press and hold both the blue platform up and
yellow platform down buttons. Pull out the red
Emergency Stop button to the on position at the
ground controls.
Result:
TUNE
SPEEDS
is showing in the diagnostic
display window. The ECM is now in
programming mode.
5 Press the lift function enable button.
6 Use the yellow platform down arrow to scroll to
max fwd high torque drive.
Result:
MAX
FWD
HIGH
TORQUE
DRIVE
is showing in
the diagnostic display window.
7 Press the lift function enable button.
8 Press the yellow platform down button to
decrease the drive speed or press the blue
platform up button to increase the drive speed.
Refer to Section 2,
Specifications
.
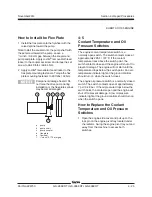
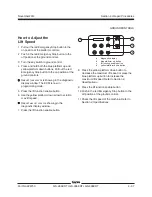
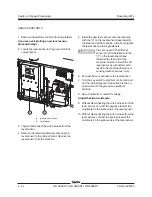
a
diagnostic display
b
blue platform up button
c
lift function enable button
d
yellow platform down button
9 Press the lift function enable button.
Result:
MAX
FWD
HIGH
TORQUE
DRIVE
is showing in
the diagnostic display window.
10 Use the yellow platform down arrow to scroll to
max rev high torque drive.
Result:
MAX
REV
HIGH
TORQUE
DRIVE
is showing in
the diagnostic display window.
11 Press the lift function enable button.
12 Press the yellow platform down button to
decrease the drive speed or press the blue
platform up button to increase the drive speed.
Refer to Section 2,
Specifications
.
13 Press the lift function enable button.
14 Push in the red Emergency Stop button to the
off position at the ground controls.
GROUND CONTROLS
Summary of Contents for GS-2669 RT
Page 169: ...Section 6 Schematics November2014 6 9 Control Panel Circuit Diagram 6 10 ...
Page 235: ...Section 6 Schematics November2014 6 75 6 76 Electrical Schematic GS 4069 RT Gas LPG Models AS ...
Page 238: ...November2014 Section 6 Schematics 6 78 Electrical Schematic GS 4069 RT Gas LPG Models AS 6 77 ...
Page 243: ...Section 6 Schematics November2014 6 83 Electrical Schematic GS 4069 RT Diesel Models AS 6 82 ...
Page 246: ...November2014 Section 6 Schematics 6 86 Electrical Schematic GS 4069 RT Diesel Models AS 6 85 ...
Page 251: ...Section 6 Schematics November2014 6 91 Electrical Schematic GS 4069 RT Gas LPG Models CE 6 92 ...
Page 254: ...November2014 Section 6 Schematics 6 94 Electrical Schematic GS 4069 RT Gas LPG Models CE 6 93 ...
Page 259: ...Section 6 Schematics November2014 6 99 6 100 Electrical Schematic GS 4069 RT Diesel Models CE ...
Page 267: ...Section 6 Schematics November2014 6 107 Hydraulic Schematic GS 2669 RT and GS 3369 RT 6 108 ...
Page 270: ...November2014 Section 6 Schematics 6 110 Hydraulic Schematic GS 4069 RT 6 109 ...


