Section 3 • Scheduled Maintenance Procedures
November 2014
3 - 16
GS-2669 RT • GS-3369 RT • GS-4069 RT
Part No. 229753
Checklist B Procedures
B-1
Inspect the Battery
Genie requires that this procedure be performed
every 250 hours or quarterly, whichever comes
first.
Proper battery condition is essential to good
machine performance and operational safety.
Improper fluid levels or damaged cables and
connections can result in component damage and
hazardous conditions.
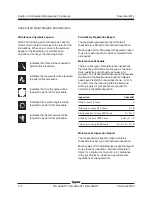
Electrocution/burn hazard. Contact
with electrically charged circuits
could result in death or serious
injury. Remove all rings, watches
and other jewelry.
Bodily injury hazard. Batteries
contain acid. Avoid spilling or
contacting battery acid. Neutralize
battery acid spills with baking soda
and water.
1 Put on protective clothing and eye wear.
2 Be sure that the battery cable connections are
free of corrosion.
Note: Adding terminal protectors and a corrosion
preventative sealant will help eliminate corrosion
on the battery terminals and cables.
3 Be sure that the battery retainers and cable
connections are tight.
4 Fully charge the battery. Allow the battery to
rest 24 hours before performing this procedure
to allow the battery cells to equalize.
5 Remove the battery vent caps and check the
specific gravity of each battery cell with a
hydrometer. Note the results.
6 Check the ambient air temperature and adjust
the specific gravity reading for each cell as
follows:
•
Add 0.004 to the reading of each cell for
every 10° F / 5.5° C above 80° F / 26.7° C.
•
Subtract 0.004 from the reading of each cell for
every 10° F / 5.5° C below 80° F / 26.7° C.
Result: All battery cells display an adjusted
specific gravity of 1.277 +/- 0.007. The battery
is fully charged. Proceed to step 10.
Result: One or more battery cells display a
specific gravity of 1.269 or below. Proceed to
step 7.
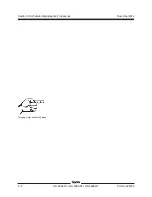
7 Perform an equalizing charge OR fully charge
the batteries and allow the battery to rest at
least 6 hours.
8 Remove the battery vent caps and check the
specific gravity of each battery cell with a
hydrometer. Note the results.
Summary of Contents for GS-2669 RT
Page 169: ...Section 6 Schematics November2014 6 9 Control Panel Circuit Diagram 6 10 ...
Page 235: ...Section 6 Schematics November2014 6 75 6 76 Electrical Schematic GS 4069 RT Gas LPG Models AS ...
Page 238: ...November2014 Section 6 Schematics 6 78 Electrical Schematic GS 4069 RT Gas LPG Models AS 6 77 ...
Page 243: ...Section 6 Schematics November2014 6 83 Electrical Schematic GS 4069 RT Diesel Models AS 6 82 ...
Page 246: ...November2014 Section 6 Schematics 6 86 Electrical Schematic GS 4069 RT Diesel Models AS 6 85 ...
Page 251: ...Section 6 Schematics November2014 6 91 Electrical Schematic GS 4069 RT Gas LPG Models CE 6 92 ...
Page 254: ...November2014 Section 6 Schematics 6 94 Electrical Schematic GS 4069 RT Gas LPG Models CE 6 93 ...
Page 259: ...Section 6 Schematics November2014 6 99 6 100 Electrical Schematic GS 4069 RT Diesel Models CE ...
Page 267: ...Section 6 Schematics November2014 6 107 Hydraulic Schematic GS 2669 RT and GS 3369 RT 6 108 ...
Page 270: ...November2014 Section 6 Schematics 6 110 Hydraulic Schematic GS 4069 RT 6 109 ...

