background image

Part No. 29487

Genie Z-45/22

4 - 23

Service Manual - First Edition

Section 4 - Scheduled Maintenance Procedures

TABLE

B

PROCEDURES

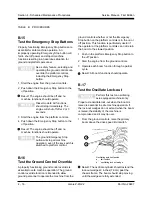
3 Turn the key switch to platform control, then

from the platform controls, pull out the
Emergency Stop button to the 

on position.

Result: The flashing beacon should be on and

flashing.

4 Press down the foot switch. Move the primary

boom control handle to the 

down position, hold

for a moment and then release it. Move the
secondary boom control handle to the 

down

position, hold for a moment and then release it.

Result: The descent alarm should sound when

each control handle is held down.

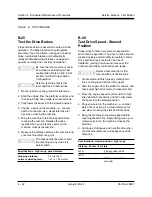
6 Press down the foot switch. Slowly move the

drive control handle off center, hold for a
moment and then release it. Slowly move the
drive control handle off center in the opposite
direction, hold for a moment and then
release it.

Result: The travel alarm should sound when

the drive control handle is moved off center in
either direction.

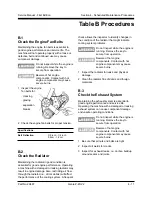
B-27
Test the Alarm Package
(optional equipment)

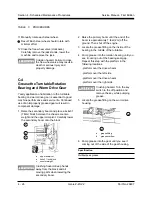
The alarm package includes:

· travel alarm

· descent alarm

· flashing beacon

Alarms and beacons are installed to alert
operators and ground personnel of machine
proximity and motion. The alarm package
components are installed on the right side, on top
of the turntable cover.

The alarm and beacons will
operate with the engine
running or not.

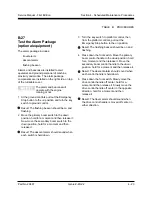
1 At the ground controls pull out the Emergency

Stop button to the 

on position and turn the key

switch to ground control.

Result: The flashing beacon should be on and

flashing.

2 Move the primary boom switch to the 

down

position, hold for a moment and then release it.
Now move the secondary boom switch to the
down position, hold for a moment and then
release it.

Result: The descent alarm should sound when

each switch is held down.

Summary of Contents for Z-45/22

Page 1: ...Technical Publications First Edition Part No 29487 Service Manual Z 45 22 ...

Page 2: ...and repair be performed at a Genie dealer service center Genie Industries has endeavored to deliver the highest degree of accuracy possible However continuous improvement of our products is a Genie policy Therefore product specifications are subject to change without notice Readers are encouraged to notify Genie of errors and send in suggestions for improvement All communications will be carefully...

Page 3: ...ury Many of the hazards identified in the operating instruction manual are also safety hazards when maintenance and repair procedures are performed Do Not Perform Maintenance Unless You are trained and qualified to perform maintenance on this machine You read understand and obey manufacturer s instructions and safety rules employer s safety rules applicable governmental regulations You have the ap...

Page 4: ... locking nuts are not reused These components may fail if they are used a second time Be sure to properly dispose of old oil or other fluids Use an approved container Please be mindful of the environment Personal Safety Any person working on or around a machine must be aware of all known safety hazards Personal safety and the continued safe operation of the machine should be your number one priori...

Page 5: ...ection Three Scheduled Maintenance Inspections Introduction 3 1 Table A 3 2 Table B 3 3 Table C 3 4 Table D 3 5 Maintenance Inspection Report 3 6 Section Four Scheduled Maintenance Procedures Introduction 4 1 A 1 Inspect the Operating Instruction and Safety Manuals 4 2 A 2 Inspect the Decals and Placards 4 2 A 3 Inspect for Damage Loose or Missing Parts 4 2 A 4 Check the Engine Oil Level 4 3 A 5 C...

Page 6: ...or 4 12 B 6 Inspect Electrical Wiring 4 13 B 7 Inspect the Tires and Wheels 4 13 B 8 Confirm Proper Brake Configuration 4 14 B 9 Check the Oil Level in the Torque Hubs 4 14 B 10 Check the Engine Choke Gasoline LPG Models 4 15 B 11 Check the Glow Plugs Diesel Models 4 15 B 12 Check and Adjust the Engine Idle Mixture Gasoline LPG Models 4 16 B 13 Check and Adjust the Engine RPM 4 16 B 14 Test the Ke...

Page 7: ...place the Gasoline Fuel Filter 4 29 C 10 Replace the PCV Valve Gasoline LPG Models 4 30 C 11 Clean or Replace the Distributor Cap and Rotor Gasoline LPG Models 4 30 C 12 Replace the Spark Plugs Gasoline LPG Models 4 31 C 13 Check and Adjust the Air Propane Mixture Gasoline LPG Models 4 31 C 14 Check and Adjust the Ignition Timing Gasoline LPG Models 4 32 D 1 Change The Hydraulic Oil 4 33 D 2 Chang...

Page 8: ...gine Low Idle Inoperative Diesel Models 5 19 12 All Functions Inoperative Engine Starts and Runs 5 20 13 All Lift and Steer Functions Inoperative Drive Functions Operational 5 21 14 Ground Controls Inoperative Platform Controls Operate Normally 5 22 15 Platform Controls Inoperative Ground Controls Operate Normally 5 23 16 Secondary Boom Up Function Inoperative 5 24 17 Secondary Boom Down Function ...

Page 9: ...Inoperative 5 53 37 Machine Will Not Drive At Full Speed 5 54 38 Machine Drives At Full Speed With Platform Elevated 5 55 39 Drive Enable System Is Malfunctioning 5 56 40 Auxiliary Functions Inoperative 5 57 Section Six Schematics Introduction 6 1 Electrical Symbol Legend 6 2 Electrical Schematic Gasoline LPG Models 6 3 Ground Control Box Legend Gasoline LPG Models 6 5 Relay Panel Legend Gasoline ...

Page 10: ...7 11 Primary Boom Components 3 1 Plastic Cable Track 7 13 3 2 Primary Boom 7 13 3 3 Primary Boom Lift Cylinder 7 16 3 4 Extension Cylinder 7 18 3 5 Platform Leveling Master Cylinder 7 19 Secondary Boom Components 4 1 Secondary Boom 7 21 4 2 Secondary Boom Lift Cylinders 7 26 Turntable Covers 5 1 Turntable Covers 7 27 Kubota V1702 B Engine 6 1 Timing Adjustment 7 28 6 2 Glow Plugs 7 28 6 3 RPM Adju...

Page 11: ... 2 Toggle Switches See 1 5 Toggle Switches 7 9 8 3 Wago Components 7 36 8 4 Resistors 7 37 Relay Panel 9 1 Control Relays 7 38 9 2 Power Relay 7 39 Hydraulic Pumps 10 1 Lift Steer Pump 7 40 10 2 Drive Hydraulic Pump 7 41 Function Manifold 11 1 Function Manifold Components 7 42 11 2 Valve Adjustments 7 44 Fuel and Hydraulic Tanks 12 1 Hydraulic Reservoir 7 46 12 2 Fuel Tank 7 47 Turntable Rotation ...

Page 12: ...od 7 55 Oscillating Axle Components 16 1 Oscillating Axle Lock out Cylinder 7 58 Steer and Oscillate Manifold 17 1 Steer and Oscillate Manifold Components 7 59 17 2 Valve Adjustments 7 60 Non steering Axle Components 18 1 Drive Motor 7 61 18 2 Torque Hub 7 61 2WD Drive Manifold 19 1 2WD Drive Manifold Components 7 62 19 2 Valve Adjustments 7 64 4WD Drive Manifold 20 1 4WD Drive Manifold Components...

Page 13: ...el diameter Wheel width Wheel lugs 4WD Wheel lugs 2WD Front Rear Lug nut torque Tire size Tire ply rating Tire contact area Overall tire diameter Tire pressure 2WD 4WD 17 ft 81 2 in 17 ft 10 3 4 in 5 4m 5 45m 6 ft 8 1 4 in 6 ft 4 5 8 in 203 8cm 194 6cm 5 ft 9 5 8 in 176 8cm 6 ft 6 in 7 ft 4 in 1 98m 2 23m 13860 lbs 14410 lbs 6287kg 6536kg 8 in 11 in 20 3cm 27 9cm 6 ft 6 ft 182 8cm 182 8cm 30 in 30...

Page 14: ...4 5 gpm 17 0 liters minute SPECIFICATIONS PerformanceSpecifications Drive speeds maximum 2WD 4WD Boom lowered high range Boom lowered low range Boom raised high range Boom raised low range Gradeability stowed Boom function speeds maximum from platform controls Boom extend Boom retract Primary boom lift Primary boom lower Secondary boom lift Secondary boom lower Turntable rotate 359 Platform rotate...

Page 15: ...placement gear pump 0 85 gpm 3 2 liters minute 2030 psi 138 bar SPECIFICATIONS Front drive motors 4WD models Displacement per revolution Rear drive motor Displacement per revolution Function pump Type Displacement Function circuit return line filter Function manifold Function relief valve pressure Secondary down relief valve pressure Primary down relief valve pressure Steer oscillate flow regulato...

Page 16: ...120 17 19 30 35 50 55 75 90 110 120 150 170 260 300 430 470 640 700 5 6 11 14 23 28 41 48 68 75 102 122 149 163 204 231 353 407 583 637 868 949 60 68 144 168 25 25 45 50 70 80 110 120 150 170 220 240 380 420 600 660 900 1000 7 8 16 19 34 34 61 68 95 109 149 163 204 231 298 326 515 570 814 895 1221 1356 10 1 4 5 16 3 8 7 16 1 2 9 16 5 8 3 4 7 8 1 Torque specification for lubricated bolts is 25 less...

Page 17: ...gine LSG 423 Displacement Number of cylinders Bore and stroke Horsepower Firing order High engine speed Low engine speed Governing Compression pressure Valve clearances Intake Exhaust Lubrication System Oil pressure operating temp 2150 rpm Oil capacity including filter Oil viscosity requirements Below 60 F 15 5 C 10 to 90 F 23 to 32 C above 10 F 23 C above 25 F 4 C Use oils meeting API classificat...

Page 18: ... 10 Fuel pump to cylinder block M 8 Intake manifold to cylinder head bolt or nut M 8 Oil pressure sending unit to block Oil pan drain plug to pan M 14 Oil pan to block M 6 Oil filter insert to block Rocker arm cover to cylinder head M 6 Spark plug to cylinder head M 14 Temperature sending unit to block M 14 Water jacket drain plug to block Water pump to block bolt Auxiliary shaft cover bolt M 6 Wa...

Page 19: ... Ampere hour Cold cranking ampere Reserve capacity 25A rate Glow plug resistance Fan belt tension Bolt torque specifications Item Torque Torque ft lbs Nm Cylinder head bolt Fuel injector nozzle holder to cylinder head Fuel injector retaining nut to nozzle holder body Flywheel to crankshaft bolt Oil pressure sending unit to block Oil pan drain plug to pan Rocker arm cover to cylinder head Rocker ar...

Page 20: ...35 41 48 56 57 66 78 90 91 108 124 147 145 166 196 225 203 235 275 318 271 318 368 431 9 10 12 14 22 25 30 34 45 52 61 70 76 86 103 117 123 144 168 196 192 224 260 304 253 296 343 402 362 419 490 568 SPECIFICATIONS Bolt torque specifications continued Size Standard ft lbs Nm M 6 M 8 M 10 M 12 M 14 M 16 M 18 M 20 Size Grade 7 M 6 M 8 M 10 M 12 M 14 M 16 M 18 M 20 Size Grade 9 M 6 M 8 M 10 M 12 M 14...

Page 21: ...of scheduled inspection Daily inspection Use checklist A Frequent inspection every 150 hours or three months Use checklists A and B Annual inspection Use checklists A B and C Two year inspection Use checklists A B C and D Make copies of this form to use for each inspection Store completed forms for three years Observe and Obey Maintenance inspections shall be completed by a person trained and qual...

Page 22: ... Parts A 4 Check the Engine Oil Level A 5 Check the Engine Coolant Level A 6 Check for Fuel Leaks A 7 Check the Hydraulic Oil Level A 8 Check for Hydraulic Leaks A 9 Check Tire Pressure A 10 Test the Platform and Ground Controls A 11 Test Auxiliary Power Operation A 12 Test the Tilt Level Sensor A 13 Test the Limit Switches Every 100 hours check for and or perform as necessary the engine maintenan...

Page 23: ...voir Filter Condition Indicator B 6 Inspect Electrical Wiring B 7 Inspect the Tires and Wheels including lug nut torque B 8 Confirm Proper Brake Configuration B 9 Check the Oil Level in the Torque Hubs B 10 Check the Engine Choke Gasoline LPG Models B 11 Check the Glow Plugs Diesel Models B 12 Check and Adjust the Engine Idle Mixture Gasoline LPG Models B 13 Check and Adjust the Engine RPM B 14 Te...

Page 24: ... Speed Select B 22 Test Fuel Select Operation Gasoline LPG Models B 23 Test the Turntable Rotation Stop B 24 Test the Drive Enable System B 25 Test the Drive Brakes B 26 Test Drive Speed Stowed Position B 27 Test the Alarm Package optional equipment travel alarm descent alarm flashing beacon Table C C 1 Check the Primary Boom Wear Pads C 2 Check the Turntable Rotation Bearing Bolts C 3 Check the F...

Page 25: ...ugs Gasoline LPG Models C 13 Check and Adjust the Air Propane Mixture Gasoline LPG Models C 14 Check and Adjust the Ignition Timing Gasoline LPG Models Table C continued MAINTENANCE TABLES Table D D 1 Change the Hydraulic Oil includes cleaning the suction strainers D 2 Change or Recondition the Engine Coolant including all coolant hoses and clamps D 3 Change the Fuel Lines D 4 Check Engine Valve C...

Page 26: ...Inspection A B C 2 Year Inspection A B C D Place a check in the appropriate box after each inspection procedure is completed Use the maintenance tables in this section and the step by step procedures in section 4 to learn how to perform these inspections If any inspection receives an N remove the machine from use repair and re inspect it After repair place a check in the R box Legend Y yes accepta...

Page 27: ...jury or damage to the machine Indicates special operation or maintenance information Indicates that a specific result is expected after performing a series of steps Observe and Obey Maintenance inspections shall be completed by a person trained and qualified on the maintenance of this machine Scheduled maintenance inspections shall be completed daily frequently every 3 months annually and every 2 ...

Page 28: ...the safety and instructional decals and placards in good condition is mandatory for safe machine operation Decals alert operators and ground personnel to the many possible hazards associated with using this machine They also provide users with operation and maintenance information An illegible decal will fail to alert personnel of a procedure or hazard and could result in unsafe operating conditio...

Page 29: ...from entering the area and do not operate the machine Repair the leak immediately 1 Check the fluid level in the coolant recovery tank Add water as needed Result The fluid level should be in the normal range 5 quarts 4 7 liters 5W 30 10W 30 10W 40 or 10W 50 20w 40 or 20W 50 9 5 quarts 9 liters 10W 30 A 4 Check the Engine Oil Level Maintaining proper engine oil level is essential to good engine per...

Page 30: ...eck the Hydraulic Oil Level Maintaining hydraulic oil at the proper level is essential to machine operation Improper hydraulic oil levels can damage hydraulic components Daily checks allow the inspector to identify changes in oil level that might indicate the presence of hydraulic system problems 1 Be sure that the machine is in the fully stowed position then visually inspect the sight gauge locat...

Page 31: ... Emergency Stop button to the on position press down the foot switch and repeat step 2 A 10 Test the Platform and Ground Controls Testing machine functions and the Emergency Stop buttons for malfunctions is essential for safe machine operation An unsafe working condition exists if any function fails to operate properly or either Emergency Stop button fails to stop all the machine functions and shu...

Page 32: ...vel Sensor The tilt sensor sounds an alarm in the platform when the incline of the chassis exceeds 3 Select a level test area 1 Start the engine from the platform controls 2 Open the engine side cover and press down on one side of the tilt sensor Result After a 1 second delay the alarm in the platform should sound a A 13 Test the Limit Switches Detecting limit switch malfunctions is essential to s...

Page 33: ...eer wheels indicator light should be on Drive movement should stop until the drive enable override switch is activated 4 Swing the turntable to the right until the platform is positioned over the right steer wheel Result The platform over steer wheels indicator light should be on Drive movement should stop until the drive enable override switch is activated a Oscillating Axle Limit Switches 1 With...

Page 34: ... burns 1 Remove the oil filler cap located on the valve cover 2 Pull the end of the oil drain hose out from under the engine 3 Remove the plug from the end of the drain hose and allow all of the oil from the engine to drain into a container capable of holding 3 gallons 4 Re install the plug into the drain hose 5 Use an oil filter wrench and remove the filter Ford models Remove the 3 bolts from the...

Page 35: ...nge the Engine Air Filter Engine specifications require that this procedure be performed every 100 hours Perform this procedure more often if dusty conditions exist Maintaining the engine air filter in good condition is essential to good engine performance and service life Failure to perform this procedure can lead to poor engine performance and component damage Perform this procedure with the eng...

Page 36: ...ted area away from heaters sparks flames and lighted tobacco Always have an approved fire extinguisher within easy reach 1 Loosen the vent plug located on the fuel filter water separator head 2 Loosen the drain plug located at the bottom of the bowl Allow the water to drain into a container until fuel starts to come out Immediately tighten the drain plug 3 Tighten the vent plug and clean up any sp...

Page 37: ...secure from operation Beware of hot engine components Contact with hot engine components may cause severe burns 1 Inspect the radiator for leaks and physical damage 2 Clean the radiator fins of debris and foreign materials B 2 Check the Radiator Maintaining the radiator in good condition is essential for good engine performance Operating a machine with a damaged or leaking radiator may result in e...

Page 38: ...d 2 Be sure that the battery cable connections are free of corrosion 3 Be sure that the battery hold down and cable connections are tight a B 5 Check the Hydraulic Reservoir Filter Condition Indicator Maintaining the hydraulic reservoir filter in good condition is essential to good system performance and safe machine operation The filter condition indicator will show when the hydraulic flow is byp...

Page 39: ... rating Tire pressure 2WD Tire pressure 4WD B 6 Inspect Electrical Wiring Maintaining electrical wiring in good condition is essential to safe operation and good machine performance Failure to find and replace burnt chafed corroded or pinched wires could result in unsafe operating conditions and may cause component damage Electrocution hazard Contact with hot or live circuits may result in death o...

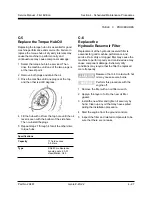
Page 40: ...l valve on the drive pump is closed clockwise a drive pump b lift pump c free wheelvalve brakedisengageposition brakeengageposition B 9 Check the Oil Level in the Torque Hubs Failure to maintain proper torque hub oil levels may cause the machine to perform poorly and continued use may cause severe component damage 1 Drive the machine to rotate the hub until the side plugs are located one on top an...

Page 41: ...d be fully retracted when the choke switch is activated 4 Turn the key switch to platform control 5 Pull out the platform control Emergency Stop button to the on position and then operate the choke switch and listen for choke solenoid operation a d c b B 11 Check the Glow Plugs Diesel Models Maintaining the glow plugs in good condition is essential to good engine performance and service life Impro...

Page 42: ...ine LPG Models Complete information to perform this procedure is available in the Ford LSG 423 2 3 Litre Industrial Engine Service Manual Ford number 194 216 Genie part number 29586 a Ford low idle adjustment a adjustmentscrew Ford high idle adjustment a 3 Move the engine speed control switch to high idle rabbit symbol from the ground controls Result High idle should be 2150 rpm Adjust high idle r...

Page 43: ...switch to ground control 5 Operate each machine function from the platform controls Result The machine functions should not operate 6 Turn the key switch to the off position Result The engine should stop and no functions should operate 7 Re assemble the governor and recheck high idle rpm Kubota engines 8 through 11 8 Turn the engine off 9 Loosen the lock nut on the Trombetta solenoid and then pull...

Page 44: ...ols whether or not the Emergency Stop button on the platform controls is in the on or off position This function is particularly useful if the operator at the platform controls can not return the boom to the stowed position 1 Push in the platform Emergency Stop button to the off position 2 Start the engine from the ground controls 3 Operate each boom function through a partial cycle Result All boo...

Page 45: ...ulic cylinder leveling slave cylinder which is controlled by the master cylinder located at the base of the primary boom A platform self leveling failure creates an unsafe working condition for platform and ground personnel 1 Start the engine from the ground controls then fully lower the boom into the stowed position 2 Adjust the platform to a level position using the manual platform leveling swit...

Page 46: ...bol Result The engine should change to high idle 6 Move the engine speed control switch to low idle turtle symbol Result The engine should change to low idle 7 Move the engine speed control switch to foot switch activated high idle rabbit and foot switch symbol 2150 rpm 1200 rpm Result The engine should not change to high idle 8 Press down the foot switch Result The engine should change to high id...

Page 47: ...ween the steer tires B 24 Test the Drive Enable System Proper drive enable system operation is essential to safe machine operation When the platform is over the steering wheels drive movement is stopped and the indicator light turns on and the drive enable switch must be used to reactivate the drive function This should inform the operator that the machine will move in the opposite direction that ...

Page 48: ...t line 6 Measure the distance between the test line and your machine reference point The brakes must be able to hold the machine on any slope it is able to climb Specifications high range paved surface Stopping distance normal operating temp B 26 Test Drive Speed Stowed Position Proper drive function movement is essential to safe machine operation The drive function should respond quickly and smoo...

Page 49: ...the opposite direction hold for a moment and then release it Result The travel alarm should sound when the drive control handle is moved off center in either direction B 27 Test the Alarm Package optional equipment The alarm package includes travel alarm descent alarm flashing beacon Alarms and beacons are installed to alert operators and ground personnel of machine proximity and motion The alarm ...

Page 50: ... parts Improperly shimmed wear pads or continued use of worn out wear pads may result in component damage and unsafe operating conditions 1 Start the engine from the ground controls then raise the end of the primary boom to a comfortable working height chest high 2 Extend the extension boom 10 inches 25cm 3 Measure each wear pad Replace the pad if it is less than 0 41 inches 1cm thick If the pad i...

Page 51: ...ty 5000 lbs 2268kg under the chassis between the rear drive wheels 3 Lift the wheels off the ground and then place jack stands under the chassis for support brakedisengageposition brakeengageposition a 4 Disengage the rear brakes by turning over the torque hub disconnect caps on each rear wheel hub 5 Manually rotate each rear wheel Result Each rear wheel should rotate with minimum effort 6 Re enga...

Page 52: ...r the drive wheels platform over the left side platform over the drive wheels platform over the right side Crushing hazard Turn the key switch to the off position and remove the key while pumping grease 5 Locate the grease fitting on the worm drive housing a greasefitting b greaseoverflow 6 Pump grease into the gear until you see it coming out of the side of the gear housing Specification Multipur...

Page 53: ...l is even with the bottom of the side hole Then re install the plugs 5 Repeat steps 1 through 4 for all the other drive torque hubs Specifications Capacity Type C 6 Replace the Hydraulic Reservoir Filter Replacement of the hydraulic reservoir filter is essential for good machine performance and service life A dirty or clogged filter may cause the machine to perform poorly and continued use may cau...

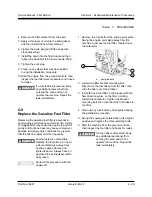
Page 54: ... installation procedure 5 Start the engine from the ground controls 6 Inspect the filter assembly to ensure that there are no leaks C 8 Replace the Diesel Fuel Filter Replacing the diesel fuel filter is essential to good engine performance and service life A dirty or clogged filter may cause the engine to perform poorly and continued use may cause component damage Extremely dirty conditions may re...

Page 55: ...y conditions may require that the filter be replaced more frequently Engine fuels are combustible Replace the fuel filter in an open well ventilated area away from heaters sparks flames and lighted tobacco Always have an approved fire extinguisher within easy reach Perform this procedure with the engine off 1 Remove the 3 bolts from the engine pivot plate Swing the engine pivot plate away from the...

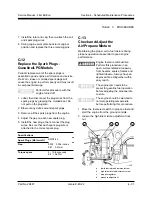
Page 56: ...butor Cap and Rotor Gasoline LPG Models Distributor caps and rotors that are clean and free of damage wear and corrosion are essential to good engine performance and service life A dirty or worn cap and rotor may cause the engine to perform poorly and continued use may cause component damage Extremely dirty conditions may require that the cap and rotor be replaced more frequently Perform this proc...

Page 57: ...l the new plugs the reconnect the plug wires Be sure that each spark plug wire is attached to the correct spark plug Specifications Spark Plugs Motorcraft Gap Torque specs C 13 Check and Adjust the Air Propane Mixture Maintaining the proper air to fuel mixture during propane operation is essential to good engine performance Engine fuels are combustible Perform this procedure in an open well ventil...

Page 58: ... exhaust gas analyzer If an exhaust gas analyzer is not available adjust to obtain peak or optimum rpm 5 Hold the adjustment screw and tighten the lock nut 6 Move the engine speed control switch to low idle turtle symbol and adjust the low idle screw to obtain an air to fuel mixture ratio of 13 0 1 to 13 2 1 C 14 Check and Adjust the Ignition Timing Gasoline LPG Models Complete information to perf...

Page 59: ...m suction hoses that are attached to the reservoir 5 Remove the strainer assemblies from the reservoir 6 Carefully clean any foreign material from the strainers open closed 7 Apply pipe thread sealant to the strainer mounting threads and then re install them 8 Apply pipe thread sealant to the drain plug and then re install it in the reservoir 9 Re install the two suction hoses 10 Fill the reservoi...

Page 60: ... the machine to access the radiator petcock 4 Open the petcock on the radiator and allow coolant to drain into a container a pivot plate bolt 5 After all the coolant has drained close the petcock Reconnect the coolant return hose to the radiator 6 Open the petcock on the engine block and allow the coolant to drain into a container After the fluid is drained close the petcock a a a 7 Replace all co...

Page 61: ... D 3 Change the Fuel Lines Maintaining the fuel lines in good condition is essential to safe operation and good engine performance Failure to detect a worn cracked or leaking fuel line may result in an unsafe operating condition poor engine performance and component damage Engine fuels are combustible Replace the fuel lines in an open well ventilated area away from heaters sparks flames and lighte...

Page 62: ...ct the fuel filter and hoses for leaks If a fuel leak is discovered keep any additional personnel from entering the area and do not operate the machine Repair the leak immediately d c a b D 5 Check Engine Cylinder Compression Gasoline LPG Models Complete information to perform this procedure is available in the Ford LSG 423 2 3 Litre Industrial Engine Service Manual Ford number 194 216 Genie part ...

Page 63: ...he hoses if they are damaged c b a D 6 Clean PCV Hoses and Fittings Gasoline LPG Models Maintaining PCV hoses is essential to good engine performance Improperly functioning PCV hoses will fail to ventilate the crankcase and continued use of neglected hoses could result in component damage Perform this procedure with the engine off 1 Remove the 3 bolts from the engine pivot plate Swing the engine p...

Page 64: ...e Workshop Manual Kubota code number 97897 00691 Genie part number 29587 D 8 Check Injection Timing Diesel Models Complete information to perform this procedure is available in the Kubota V1702 B Diesel Engine Workshop Manual Kubota code number 97897 00691 Genie part number 29587 D 9 Replace the Timing Belt Ford Complete information to perform this procedure is available in the Ford LSG 423 2 3 Li...

Page 65: ...Part No 29487 Genie Z 45 22 4 39 Service Manual First Edition Section 4 Scheduled Maintenance Procedures ...

Page 66: ...4 40 Genie Z 45 22 Part No 29487 Service Manual First Edition Section 4 Scheduled Maintenance Procedures ...

Page 67: ...ce start toggle switch 12V Hold start switch and check voltage at terminal 1 on CR1 12V Repair blk wire circuit from start switch to CR1 Check voltage at blk 53 on PR5 Check voltage at terminal 9 on CR1 Replace CR1 relay or relay socket 12V Repair open in blk 53 wire circuit from CR1 to PR5 0V 12V Check voltage at output cable terminal on PR5 Check PR5 grounding wire OR replace PR5 relay Check vol...

Page 68: ...e from temperature sending unit Replace temperature sending unit Remove blk 23 wire from TB23 Repair short in wht blk with diode wire circuit from over temperature light to TB23 Remove wht blk wire from over temperature light Replace defective over temperature light light not on Remove 1 spark plug and ground spark plug body Crank engine and observe spark Go to Chart 2A page 5 7 Disconnect and iso...

Page 69: ...ire with diode on initiate terminal of PR1 Check diode for open and replace OR repair open in blk wire circuit from PR5 to PR1 12V 12V Check voltage at red wire on common terminal of PR1 Repair open in red wire circuit from circuit breaker through TB20 to PR1 12V Hold start switch and check voltage at red wire on output terminal of PR1 Check PR1 grounding wire circuit OR replace PR1 relay CHART 2 ...

Page 70: ...22 wire to oil pressure sending unit wht 51 wire to PR1 initiate terminal and wht 51 to TR2 terminal 1 Hold start switch and check voltage at red wire on ignition module 12V Reconnect blk cable to starter and see Ford service manual for ignition system troubleshooting 0V Without replacing any wires hold start switch and check voltage at terminal 9 on CR3 Repair open in wht 52 wire circuit that con...

Page 71: ... 50 wire on vacuum switch 0V Turn machine off and see Repair section for vacuum switch check OK Check vacuum line for restrictions OK See Ford service manual to troubleshoot low manifold vacuum 12V bad Replace vacuum switch Disconnect wires from vacuum switch and connect the wires together Check the voltage at terminal 5 on CR4 12V Disconnect and isolate blk positive cable from starter Hold start ...

Page 72: ...oggle switch to TB33 Hold start switch and check voltage at terminal TB33 12V 0V Hold start switch and check voltage at blk 33 wire on anti diesel valve on engine carburetor 12V 0V Repair open in blk 33 wire circuit from TB33 to anti diesel valve 12V 0V Hold start switch and check voltage at blk 33 wire on gasoline solenoid at gasoline tank Repair open in blk 33 wire circuit from anti diesel valve...

Page 73: ...r short in blk 23 wire circuit from TB23 to temperature sending unit Engine Cranks Over But Will Not Start Diesel Models Be sure to check the engine oil level and fill as needed Be sure to check fuel levels and engine coolant level Be sure the diesel shut off valve is in the on position Be sure engine glow plugs operate normally see Maintenance section Replace defective over temperature light Be s...

Page 74: ...ohm 0V Hold start switch and check voltage at blk wire with diode on initiate terminal of PR1 Check diode for open and replace OR repair open in blk wire circuit from PR5 to PR1 12V 0V 12V Hold start switch and check voltage at red wire on output terminal of PR1 Repair open in red wire supplying 12V to PR1 common terminal OR check PR1 ground OR replace PR1 relay Reconnect starter and hold engine c...

Page 75: ...ommon terminal of PR4 Repair open in black cable supplying 12V to PR4 Hold choke switch and check voltage at red wire normally open terminal of PR4 Hold choke switch and check voltage at red wire on choke solenoid Repair open in red wire circuit from PR4 to choke solenoid Check solenoid ground Repair open in green grounding wire circuit Replace solenoid Note Resistance across solenoid terminals sh...

Page 76: ... the previous page Hold choke switch and check voltage at initiate terminal of PR4 Hold choke switch and check voltage at TB29 Repair open in blk wht wire circuit from fuel select switch to TB29 Repair open in blk 29 wire circuit from TB29 to PR4 Check green grounding wire circuit for PR4 Repair open in green grounding wire circuit Replace PR4 ...

Page 77: ...e from starter motor hold start switch and check voltage at LPG side blu red wire of fuel select switch Replace fuel select switch Hold start switch and check voltage at TB34 Repair open in blu red wire circuit from fuel select switch to TB34 Hold start switch and check voltage at blk 34 wire on LPG solenoid Repair open in blk 34 wire circuit from TB34 to LPG solenoid Move start switch on and off ...

Page 78: ...Repair open in blu wht wire circuit from fuel select switch to TB33 Hold start switch and check voltage at blk 33 wire on anti diesel valve on carburetor 12V Hold start switch and check voltage at blk 33 wire on anti gasoline solenoid at fuel tank 0V Repair open in blk 33 wire circuit from TB33 to anti diesel valve 0V 12V Repair open in blk 33 wire circuit from anti diesel valve to fuel solenoid C...

Page 79: ...lect switch 12V Repair open in circuit supplying 12V to center terminal of switch Start engine and switch rpm select to high idle rabbit symbol Check voltage at blk red wire on rpm switch Replace rpm select toggle switch Check voltage at TB30 Repair open in blk red wire circuit from toggle switch to TB30 Check voltage at initiate terminal blk 30 wire of PR2 Repair open in blk 30 wire circuit from ...

Page 80: ...rnor actuator Check voltage at terminal 1 on electronic governor Repair open in wht wire circuit from PR1 to electronic governor Check electronic governor green grounding wire terminal 2 Repair open in green wire grounding circuit Check voltage at governor terminal 3 yellow wire Repair open in yellow wire circuit from ignition module to electronic governor Reconnect all wires and see Maintenance s...

Page 81: ...ion Start engine and switch rpm select to low idle turtle symbol Check voltage at blk red wire on rpm switch Isolate ground and platform rpm switches check individually and replace defective switch Check voltage at blk 30 wire on PR2 Remove blk red wire with diode from PR2 initiate terminal and check voltage at blk 30 wire on PR2 Repair short in blk 30 wire Check voltage at blk red wire on PR5 Rep...

Page 82: ...ull continuity to ground Check high idle adjustment see Maintenance section or see Kubota workshop manual to troubleshoot fuel injector pump Check voltage on center terminal of rpm select switch Repair open in circuit supplying 12V to center terminal of switch Replace toggle switch Check voltage at TB30 Repair open in blk red wire circuit from toggle switch to TB30 Check voltage at initiate termin...

Page 83: ...tform and ground rpm switches check individually and replace defective switch Engine Low Idle Inoperative Diesel Models Check if mechanical linkage from 2 speed solenoid to fuel injection pump is binding or defective Check voltage at the red wire on the 2 speed solenoid Replace PR2 relay Check if 2 speed solenoid moves in and out freely Check linkage or replace solenoid Check adjustment of linkage...

Page 84: ... Open valves If engine has been run with valves closed it may have damaged one or both pumps closed open Disconnect center coil wire from distributor cap and isolate from grounding Remove function pump from drive pump but leave all hoses connected Hold start switch and crank engine over while observing spline drive at rear of drive pump spline turns Troubleshoot inoperative boom functions and inop...

Page 85: ...form rotate switch and recheck the pressure All Lift and Steer Functions Inoperative Drive Functions Operational Be sure the hydraulic suction line shutoff valve for the lift steer pump is in the open position Be sure all grounding wires for the hydraulic manifold valves are free of corrosion and have full continuity to ground Troubleshoot each function individually or consult Genie Industries ser...

Page 86: ... platform level switch Repair open in red wire circuit from key switch to function switches Troubleshoot the functions individually Repair open in red wire circuit from emergency stop button to the key switch Check voltage at red wire on ground controls contact of the key switch the red wire checked should originate at the emergency stop button Check voltage at red wht 36 wire at ground controls c...

Page 87: ...key switch platform contacts Chart 15 Platform Controls Inoperative Ground Controls Operate Normally Be sure all cables are in good condition with no kinks or abrasions Repair open in wht wire circuit from TP20 to function controllers Check voltage at TB19 Check voltage at TP34 and TP25 Repair open in red 1 and red 2 wire circuit from TB19 to TP34 and TP25 respectively Check voltage at blk wire on...

Page 88: ...n operates normally from the platform controls but not from the ground controls troubleshoot the ground control toggle switch See Repair section Note Oscillating axle equipped models from the stowed position the auxiliary power can not raise the boom above the drive limit switch Auxiliary power can raise the boom if it is already raised above the drive limit switch Hold ground control function swi...

Page 89: ...he defective valve coil s Install a pressure gauge at the quick disconnect coupling on the function manifold and hold the function switch Check for mechanical restriction keeping secondary from moving Remove and cap the up function steel pressure line attached to the cylinder on the fuel tank side Then with pressure gauge still attached operate the function up Repair the cylinder that was disconne...

Page 90: ...uration then remove and cap the function up pressure line port R1 on the manifold OR cap the hose at the point the hose connects to the engine side cylinder on the Hold function switch up and check pressure Repair both secondary function cylinders One of the previous tests involving the pump or manifold components was possibly overlooked or diagnosed incorrectly Recheck and or consult Geinie Indus...

Page 91: ...alve spool Note overriding the valve will require two people If a helper is not available interchange the valve item C with a like valve item B Check the resistance of the down directional valve coil Replace the valve Replace the coil Install a pressure gauge at the quick disconnect coupling on the function manifold and hold the function down switch Counting the turns adjust the secondary down rel...

Page 92: ... and recheck pressure Replace defective valve If secondary boom is in stowed position remove and plug the secondary down high pressure line from the cylinder on the fuel tank side of the machine Hold secondary down function and recheck pressure Repair both secondary function cylinders Internal defect in manifold OR one of the previous tests involving the pump or manifold components was possibly ov...

Page 93: ...oportional valve push in button on end of valve spool Note overriding the valve will require two people If a helper is not available interchange the valve item H with a like valve item I Replace the proportional valve Interchange primary function flow regulator valve item M with a like valve item L Replace defective flow regulator valve Continued on the next page Chart 18 Primary Boom Up Function ...

Page 94: ...anifold and hold the function switch Check for mechanical restrictions keeping primary boom from moving Check the resistance of the directional valve coils Replace the defective valve coil s Remove the up function pressure line from the manifold and cap the port P1 Then with pressure gauge still attached operate the function up Interchange the primary lift cylinder counter balance valve with a lik...

Page 95: ...or mechanical restrictions and or a condition exists in which the cylinder counterbalance valve is not allowing the cylinder to retract or the cylinder has internal defects Disconnecting hydraulic lines or adjusting the cylinder counterbalance valve in this situation can be very dangerous Please consult Genie Industries service department With primary boom fully lowered hold the function down swit...

Page 96: ...e item U Hold primary down function and recheck pressure Replace defective valve Remove the primary down high pressure line from the manifold and cap the port P2 Hold primary down function and recheck pressure Repair the primary function cylinder Internal defect in manifold OR one of the previous tests involving the pump or manifold components was possibly overlooked or diagnosed incorrectly Reche...

Page 97: ...m extend function operates normally from the platform controls but not from the ground controls troubleshoot the ground control toggle switch See Repair section Remove both wires from valve coil and check resistance across the coil terminals Replace the coil Hold toggle switch up and manually override proportional valve push in button on end of valve spool Note overriding the valve will require tw...

Page 98: ... with function inoperative Replace defective counterbalance valve function inoperative Check for mechanical restrictions OR the cylinder has internal defects OR replace counterbalance valve Please consult Genie Industries service department 2000 PSI Repair the cylinder and or replace cylinder counterbalance valves Remove the extend function pressure line from the manifold and cap the port EXTEN Th...

Page 99: ...platform controls but not from the ground controls troubleshoot the ground control toggle switch See Repair section function inoperative Check the resistance of the down directional valve coil 0 or infinite ohms Replace the defective valve coil function operates 4 to 5 ohms Install a pressure gauge at the quick disconnect coupling on the function manifold and hold the function switch 2000 PSI less...

Page 100: ...t the ground control toggle switch See Repair section Hold ground control function switch and check volts at wht red wire on turntable rotate function proportional valve Repair open in wht red wire circuit from TB6 to proportional valve Remove both wires from valve coil and check resistance across the coil terminals 0 or infinite ohms Replace coil Hold toggle switch up and manually override propor...

Page 101: ...erates function inoperative Replace defective sandwich block with counterbalance valves Check for mechanical restrictions keeping turntable from rotating OR repair rotation motor OR replace directional valve less than 2000 PSI Remove the left function pressure line from the manifold and cap the port S2 Then with pressure gauge still attached operate the function left Repair or replace the rotation...

Page 102: ...h left and manually override rotate left directional valve push in button on end of valve spool Note overriding the valve will require two people function operates Replace the rotate directional valve function inoperative Install a pressure gauge at the quick disconnect coupling on the function manifold and hold the function switch 2000 PSI Interchange the rotate left and right counterbalance valv...

Page 103: ...heck and or consult Geinie Industries service department Chart 24 Turntable Rotate Right Function Inoperative Be sure all other functions operate normally including turntable rotate left function If turntable rotate right function operates normally from the ground controls but not from the platform controls troubleshoot the platform controller See Repair section If turntable rotate right function ...

Page 104: ...es but manual leveling does not troubleshoot Platform Leveling Up Function Inoperative Replace the counterbalance valves in the sandwich block items Z AZ Plumb a pressure gauge into the barrel end hydraulic hose using a tee fitting Operate primary boom up function and read the pressure Deadhead the pressure gauge into the barrel end hydraulic hose from the master cylinder and raise the primary boo...

Page 105: ...level up directional valve push in button on end of valve spool OR inter change the valve item D with a like valve item E function operates Replace the platform leveling directional valve Install a pressure gauge at the quick disconnect coupling on the function manifold and hold the function switch Interchange the level up and down counterbalance valves in the sandwich block Replace defective coun...

Page 106: ...n pressure line from the manifold and cap the port PL2 Then with pressure gauge still attached operate the function down Replace the directional valve OR the manifold has internal defects OR one of the previous tests was possibly overlooked or diagnosed incorrectly Recheck and or consult Genie Industries service department Check for mechanical restrictions and or a condition exists in which the cy...

Page 107: ... operate normally If platform rotate left function operates normally from the ground controls but not from the platform controls troubleshoot the platform control toggle switch See Repair section If platform rotate left function operates normally from the platform controls but not from the ground controls troubleshoot the ground control toggle switch See Repair section Replace the platform rotate ...

Page 108: ...lve Replace the coil function operates Replace defective counterbalance valve Repair the hydraulic rotator OR replace the rotator counterbalance valves and or manifold Replace the platform rotate directional valve Interchange the platform rotate left and right counterbalance valves in the manifold installed on the primary boom extension located under the platform Check for mechanical restrictions ...

Page 109: ... 17 Oscillate Lock out Function Inoperative 12V 0V Check voltage at blk 57 wire on CR7 Open in wht wire 12V supply to oscillate limit switches OR one or both oscillate limit switches is defective Check CR7 green grounding wire OR replace CR7 relay or socket Drive limit switch shorted repair or replace Check voltage at blk 56 on CR6 Replace CR6 relay or relay socket Check voltage at blk 55 on oscil...

Page 110: ...unloader valve troubleshooting Repair or replace the steer microswitch in controller handle Hold the steer switch left and check voltage at TB31 Repair open in blu wire circuit from TP43 to TB31 Hold the steer switch left and check voltage at blk 31 wire on steer valve Repair open in blk 31 wire circuit from TB31 to steer valve Remove both wires from steer left coil and check resistance across coi...

Page 111: ...the steer switch right and check volt age at terminal 7 on the drive controller blu blk wire Hold the steer switch left and check voltage at TB32 Repair open in blu wire circuit from TP44 to TB32 Hold the steer switch right and check voltage at blk 32 wire on steer valve Repair open in blk 32 wire circuit from TB32 to steer valve Remove both wires from steer right coil and check resistance across ...

Page 112: ... drive Replace drive enable limit switch OR repair open in blk 38 or blk 59 wires from terminals TB38 and TB26 to limit switch no drive Disconnect drive pump electronic displacement controller EDC wires and check resistance across both wires on EDC side of quick disconnect Replace EDC 0 or infinite ohms 20 to 24 ohms Press down foot switch and check voltage at horsepower limiter board terminal 1 l...

Page 113: ...er 0V Disconnect drive pump EDC wires press down foot switch hold drive controller in full forward position and check voltage across terminals 4 and 5 on drive controller 4 to 5V Replace drive controller Press down foot switch hold drive controller in full forward position and check voltage across terminals TP37 and TP38 4 to 5V 0V Repair open in either wht or wht blk wire circuit from drive contr...

Page 114: ... drive pump start engine move the drive controller to full forward position and note the voltage across terminals TB27 and TB26 Reverse the volt meter leads and move the drive controller to full reverse position and note the voltage voltage readings are the same no improvement Defective Sundstrand drive pump contact Sundstrand authorized repair facility Adjust the drive pump null neutral See Sunds...

Page 115: ...d check voltage at blk 21 wire on terminal 6 of time delay relay 0V Repair open in blk 21 wire circuit from TP21 to time delay relay 12V Press down foot switch wait 3 seconds and check voltage at blk 41 wire on terminal 3 of time delay relay 0V Check voltage at wht wire on terminal 1 of time delay relay 12V 0V Repair open in wht wire circuit from supplying 12V to time delay relay Replace time dela...

Page 116: ...r open in red wht wire circuit from TP27 to TB21 0V 12V Press down foot switch and check voltage at red wht wire on drive mode select switch 12V Repair open in red wht wire circuit from toggle switch to TP27 0V Press down foot switch and check voltage at wht wire supplying 12V to drive mode select switch 12V 0V Replace toggle switch Repair open in wht wire circuit supplying 12V to toggle switch ...

Page 117: ...de switch Replace drive mode toggle switch Press down foot switch and check voltage at TB21 Repair short in red wht wire circuit from drive mode switch through TP27 to TB21 Press down foot switch and check voltage at blk 41 on traction bypass valve item Q Replace TR3 time delay relay Interchange bypass valve item Q with brake release valve item S Replace defective valve Interchange motor shift val...

Page 118: ...peed Be sure all other functions operate normally With boom fully stowed check TB37 for continuity to ground With boom fully stowed check horsepower limiter board terminal 6 for continuity to ground Repair or replace drive limit switch Orange wire shorted to ground repair orange wire circuit from TB37 to horsepower limiter board Re adjust horsepower limiter board See Repair section Chart 37 ...

Page 119: ...ressure to dissipate gradually Do not allow oil to squirt or spray General Repair Process Observe and Obey Troubleshooting and repair procedures shall be completed by a person trained and qualified on the repair of this machine Immediately tag and remove from service a damaged or malfunctioning machine Repair any machine damage or malfunction before operating the machine BeforeTroubleshooting Read...

Page 120: ... normally closed Key switch Relay panel contactor Solenoid or relay coil Horn Tilt sensor Limit switch normally closed held open Limit switch normally open held closed Horn button normally open T circuits connect Time delay relay Oil pressure switch normally closed Light Water temperature switch normally closed Quick disconnect terminal Diode Vacuum switch Foot switch Relay contact normally open T...

Page 121: ...6 3 ...

Page 122: ......

Page 123: ...6 5 ...

Page 124: ...6 6 ...

Page 125: ...6 7 ...

Page 126: ...6 8 ...

Page 127: ......

Page 128: ...6 10 ...

Page 129: ...6 11 ...

Page 130: ...6 12 ...

Page 131: ...r motor Cylinder Accumulator Orifice with size 0 035 Variable orifice or shut off valve Check valve Relief valve Priority flow divider Solenoid operated dump valve Differential sensing valve Solenoid operated proportional valve Flow regulator valve Solenoid operated 2 pos 3 way directional valve Solenoid operated 2 pos 4 way directional valve Solenoid operated 3 pos 4 way directional valve DO1 2 p...

Page 132: ...Z45 22 Hyd Index ...

Page 133: ...Z45 22 Hyd Index ...

Page 134: ...Z45 22 Hyd Index ...

Page 135: ...Z45 22 Hyd Index ...

Page 136: ...Z45 22 Hyd Index ...

Page 137: ...Z45 22 Hyd Index ...

Page 138: ...ll or may cause serious injury or damage to the machine Indicates special operation or maintenance information Indicates that a specific result is expected after performing a series of steps Observe and Obey Repair procedures shall be completed by a person trained and qualified on the repair of this machine Immediately tag and remove from service a damaged or malfunctioning machine Repair any mach...

Page 139: ...ry up down controller a dual lo adjustable trimpot b ramp rate adjustable trimpot c terminal R activates max out range d terminalunused e terminal X auxiliary f terminal ground g terminal battery positive h terminal A proportional output i thresholdadjustabletrimpot j max outadjustabletrimpot 4 Set the ramp rate Turn the trimpot adjustment screw clockwise 15 turns or until you hear a click then tu...

Page 140: ...ual range trimpot to achieve a 33 to 37 second cycle time Specifications Primary Boom Up Down Function Threshold Primary boom up Max out time Primary boom down Dual range time Primary Boom Extend Retract Controller Adjustments 1 Check the battery condition with a volt meter The reading should be 12V DC or more to accurately adjust the controller 2 Turn the key switch to platform control and pull t...

Page 141: ...tch to foot switch activated high idle rabbit and foot switch symbol Raise the primary boom until it is level Fully retract the primary boom 10 Start a timer and record how long it takes for the primary boom to reach full extension Adjust the max out trimpot to achieve a 29 to 33 second cycle time 11 Start a timer and record how long it takes for the primary boom to fully retract Adjust the dual r...

Page 142: ...ase the voltage Engine should be at normal operating temperature 9 Start the engine and move the engine speed control switch to foot switch activated high idle rabbit and foot switch symbol Raise the primary boom 1 inch 2 5cm above the drive limit switch 10 Start a timer and record how long it takes for the secondary boom to reach the full up position Adjust the max out trimpot to achieve a 23 to ...

Page 143: ...ise 15 turns or until you hear a click This is the only dual range adjustment for this controller Engine should be at normal operating temperature 6 Start the engine and move the engine speed control switch to foot switch activated high idle rabbit and foot switch symbol Rotate the turntable to the full right position 7 Start a timer and record how long it takes the turntable to rotate to the full...

Page 144: ...e A potentiometer counterclockwise to increase voltage or clockwise to decrease voltage Specifications A Pot Setting Voltage setting 2WD model Voltage setting 4WD model 7 Move the engine speed control switch to low idle turtle symbol 8 Press down the foot switch and then adjust the C potentiometer to obtain a 0 01V DC to 0 03V DC voltage reading 9 Move the engine speed control switch to foot switc...

Page 145: ...toe board 2 Do not press down the foot switch Connect the leads from an ohmmeter or continuity tester to each wire connector combination listed below and check for continuity Test red to black red to white black to white Do not use the colors of the connector as a guide for these tests Use the actual wire color to identify which contact to use for testing 3 Press down the foot switch Connect the l...

Page 146: ...erminals in the following combinations listed below to check for continuity no continuity infinite Ω continuity zero Ω no continuity no continuity no continuity continuity There are no terminal combinations that will produce continuity infinite Ω continuity no continuity no continuity no continuity continuity no continuity no continuity Right Singlepole doublethrow SPDT Doublepole double throw DPD...

Page 147: ...entire range of primary boom motion It operates in a closed circuit hydraulic loop with the master cylinder The slave cylinder is equipped with counterbalance valves to prevent movement in the event of a hydraulic line failure How to Remove the Slave Cylinder Before cylinder removal is considered bleed the slave cylinder to be sure there is no air in the closed loop 1 Tilt the platform with the gr...

Page 148: ...o extend using gravity until the cylinder is fully extended Close the bleed valve 2 3 Platform Rotator The platform rotator is a hydraulically activated helical gear assembly used to rotate the platform 180 degrees It is equipped with external counterbalance valves to hold platform in place and to provide pressure relief How to Remove the Platform Rotator 1 Remove the platform See 2 1 How to Remov...

Page 149: ... 5 seconds then release it 6 Fully rotate the platform to the left and continue holding the platform rotate switch until air stops coming out of the bleed valve Immediately release the platform rotate switch and close the bleed valve 7 Rotate the platform to the right until it is centered 8 Connect the clear hose to the bottom bleed valve and open the valve 9 Rotate the platform to the right and c...

Page 150: ...remove a single link open the lower clip and then use a screw driver to pry the link to the side 3 2 Primary Boom How to Shim the Primary Boom Wear Pads Measure each wear pad Replace the pad if it is less than 0 41 inches 1cm thick If the pad is more than 0 41 inches 1cm thick perform the following procedure 1 Raise the primary boom above the drive limit switch a drive limit switch 2 Extend the pr...

Page 151: ...y boom 4 Loosen the fasteners that secure the lower cable track tray Tie the upper and lower cable tracks together with wire ties Remove the cable track assembly from the primary boom a wood block b tie wrap c plastic cable track PRIMARY BOOM COMPONENTS Component damage hazard The primary boom cable track can be damaged if it is twisted 5 Raise the secondary boom and place a 4x4x31 inch 78cm block...

Page 152: ...ry boom pivot pin then carefully lift the primary boom off the machine How to Disassemble the Primary Boom Complete disassembly of the primary boom is only necessary if the outer or inner primary boom tube must be replaced The extension cylinder can be removed without completely disassembling the primary boom See 3 4 How to Remove the Extension Cylinder 1 Remove the primary boom See above How to R...

Page 153: ...bolts 11 Remove and label the wear pads from the primary boom weldment and the extension tube Pay careful attention to the location and amount of shims used with each wear pad PRIMARY BOOM COMPONENTS 3 3 Primary Boom Lift Cylinder The lift cylinder raises and lowers the primary boom How to Remove the Primary Boom Lift Cylinder This procedure requires specific repair skills lifting equipment and a ...

Page 154: ...g parts when lowering the secondary boom 2 Raise the primary boom until the end of the boom is 8 feet 2 5m off the ground 3 Support the primary boom with an overhead crane Do not lift the primary boom 4 Disconnect and plug the primary lift cylinder hydraulic hoses Bodily injury hazard Spraying hydraulic oil can perforate and burn skin Loosen hydraulic connections very slowly to allow the oil press...

Page 155: ...wer the secondary boom onto the block a uppermid pivot b 4x4x31 inch block c counterweight Crushing hazard Keep hands away from the block and all moving parts when lowering the secondary boom b a c a extension boom end cap b extensionboom c extension cylinder rod end weldment fasteners d primaryboom 2 Raise the primary boom until the extension boom end cap is 5 feet 1 5m off the ground 3 Extend th...

Page 156: ...efully lower the secondary boom onto the block a uppermid pivot b 4x4x31 inch block c counterweight b a c Crushing hazard Keep hands away from the block and all moving parts when lowering the secondary boom 3 Extend the primary boom 6 inches 15cm then raise the primary boom until it is level 4 Disconnect and plug the extension cylinder hydraulic hoses Cap the ports on the extension cylinder Bodily...

Page 157: ...ry lift cylinder on the turntable counterweight 11 Disconnect and plug the platform leveling master cylinder hydraulic hoses Cap the fittings on the master cylinder Bodily injury hazard Spraying hydraulic oil can perforate and burn skin Loosen hydraulic connections very slowly to allow the oil pressure to dissipate gradually Do not allow oil to squirt or spray 12 Remove the retaining fastener from...

Page 158: ... significant component damage Dealer service is required Follow the disassembly steps to the point required to complete the repair Then re assemble the secondary boom by following the disassembly steps in reverse order SecondaryBoom a upper secondary boom number 1 arm b upper tension link number 2 arm c lower tension link number 3 arm d lower secondary boom number 4 arm e secondary lift cylinder f...

Page 159: ...ce a rod through each rod end pivot pin and twist to remove the pins SECONDARY BOOM COMPONENTS 1 Remove the platform See 2 1 How to Remove the Platform 2 Remove the primary boom See 3 2 How to Remove the Primary Boom Crushing hazard Do not remove the 4x4x31 inch 78cm support block installed during primary boom removal a uppermid pivot b 4x4x31 inch block c counterweight 3 Use an overhead crane to ...

Page 160: ...trical cable and its entry location at the platform control box 20 Open the platform control box and label each wire termination from the cables Disconnect all control cable wiring from the platform control box 21 Pull all of the electrical cables out of the plastic cable track Do not pull out the hydraulic cables 22 Disconnect and plug the platform rotator hydraulic hoses at the union located nea...

Page 161: ...w oil to squirt or spray 35 Remove the pin retainers from each secondary lift cylinder barrel end pivot pin 36 Place a rod through each barrel end pivot pin and twist to remove the pin Remove each secondary lift cylinder from the machine a pivot pin b 10 to 12 inch 30cm rod Crushing hazard The secondary lift cylinders will fall when the barrel end pivot pins are removed if they are not properly su...

Page 162: ...the pin 47 Support the compression link by hand then carefully lift the lower mid pivot up and over the compression link and off of the machine SECONDARY BOOM COMPONENTS 48 Lower the compression link to a resting position Then attach the lifting strap from an overhead crane to the compression link and raise it to a vertical position 49 Remove the pin retaining fastener from the compression link to...

Page 163: ...they are not properly supported Prior to removing the secondary lift cylinder mark the location of the hydraulic fitting with a special internal orifice Be sure to install the fitting into the same location during re assembly a b 4 2 Secondary Boom Lift Cylinders There are two boom lift cylinders incorporated in the structure of the secondary boom assembly These cylinders operate in parallel and r...

Page 164: ...r and lower retaining clips from the gas strut 3 Gently pry the strut pivot sockets off of the ball studs and remove the strut 4 Remove the fasteners from the cover hinge pins 5 Raise the cover slightly to relieve the pressure on the cover hinge pins 6 Remove the cover hinge pins 7 Carefully lift and remove the cover from the machine If a turntable cover must be replaced be sure that all appropria...

Page 165: ...d turn on when the switch closes Component damage hazard Do not crank the engine with the over temperature light on The oil pressure switch is a normally closed switch that opens at approximately 7 1 psi 0 5 bar If the oil pressure drops below the switch point the switch closes and shuts off the engine A low oil pressure indicator light at the ground and platform controls should turn on when the s...

Page 166: ...ngine off 1 Remove the 3 bolts from the engine pivot plate Swing the engine pivot plate away from the machine to access both switches a pivot plate bolts 2 Disconnect the wiring from the desired switch 3 Remove the switch from the engine block and then install the new switch Do not over tighten Burn hazard Contact with hot engine fluids or components may cause severe burns Always use pipe thread s...

Page 167: ...ator arm Rotate the actuator arm until it is at a 70 degree angle to the linkage rod Governor Actuator and Linkage a clevis yoke b linkagerod c carburetor d throttle plate shaft e governoractuator f actuator shaft g actuator arm 4 Position the linkage rod so that the throttle is in the idle position Then adjust the clevis yoke on the linkage rod to obtain the proper length Install the yoke onto th...

Page 168: ... is recommended Adjust the choke only when the engine and choke are cold Automatic Choke With Poppet Valve This choke functions in both gasoline and propane mode The choke butterfly may be adjusted to a fully closed rich position for colder climates and the poppet valve will provide a flow path during propane fueled operation 7 2 Choke Adjustments This engine is equipped with one of three differen...

Page 169: ...e Loctite thread sealant to the coupler set screw Torque the set screw to 36 ft lbs 49 Nm Component damage hazard Do not force the drive pump during re installation or the flex plate teeth may become damaged 7 3 Timing Adjustment Complete information to perform this procedure is available in the Ford LSG 423 2 3 Litre Industrial Engine Service Manual Ford number 194 216 Genie part number 29586 7 4...

Page 170: ...34 bar If the oil pressure drops below the switch point the switch closes and shuts off the engine A low oil pressure indicator light at the ground and platform controls should turn on when the switch closes Component damage hazard Do not start or continue to run the engine with the low oil pressure light on How to Remove the Water Temperature and Oil Pressure Switches Perform this procedure with ...

Page 171: ...inal SOL c vacuum switch d normally open terminal ING 1 Connect the leads from an ohmmeter or continuity tester to the common and normally open terminals Result There should be no continuity infinite Ω 2 Apply mild suction to the vacuum port Result The switch should close and show full continuity zero Ω Component damage hazard Do not short vacuum switch terminals to ground a b d c ...

Page 172: ...d remove the key 2 Label and then disconnect all the wiring from the relay to be tested 3 Connect the leads from an ohmmeter to each terminal combination and check for continuity Terminals 13 and 14 represent the coil and should not be tested in any other combination a terminal no 5 b terminal no 1 c relay d terminal no 13 e terminal no 9 f terminal no 12 g terminal no 14 h terminal no 4 i termina...

Page 173: ... top side of the component 3 Use the provided screwdriver to gently pry up on the tab of the component and remove it 8 2 Toggle Switches See 1 4 Toggle Switches How to Test a Single Pole Double Throw Relay This procedure covers fundamental relay testing and does not specifically apply to all varieties of relays 1 Turn the keyswitch to the off position and remove the key 2 Label and then disconnect...

Page 174: ...om function switches A 15 ohm resistor parallels the 10 ohm resistor to reduce the voltage to the turntable rotate switch Turn the key switch to the off position and remove the key 1 Disconnect one of the resistor wires from the resistor or the opposite end terminal 2 Connect the leads from an ohmmeter to each end or wiring of the resistor being tested 3 Compare the ohmmeter reading with the resis...

Page 175: ...connect all the wiring from the relay to be tested 2 Connect the leads from an ohmmeter or continuity tester to each terminal combination and check for continuity Terminals 85 to 86 represent the coil and should not be tested in any other combination d e c a b Test Desired result terminal 85 to 86 terminal 87 to 87a 30 terminal 87a to 30 3 Connect 12V DC to terminal 85 and a ground wire to termina...

Page 176: ...lay Electrocution hazard Disconnect the ground cable from the battery before performing this procedure 1 Connect the leads from an ohmmeter to each terminal combination and check for continuity Test Desired result 2 small posts 2 large posts Any small post to any large post 2 Connect 12V DC to one of the small posts and ground to the other small post then test the following terminal combination Te...

Page 177: ...asoline LPG models Remove the coil wire from the distributor cap Diesel models Disconnect the 3 wires from the fuel on solenoid at the fuel injector pump Electrocution hazard Contact with hot or live circuits may result in death or serious injury Remove all rings watches and other jewelry 2 Disconnect the high pressure hydraulic hose from the pump and cap it Burn hazard Contact with hot oil may ca...

Page 178: ...ponent damage Dealer service is recommended 1 Disconnect the electrical connection at the electronic displacement controller EDC located on the main pump 2 Close the two hydraulic tank valves located at the main pump open closed 3 Disconnect the hydraulic hoses from the pump and cap them Bodily injury hazard Spraying hydraulic oil can perforate and burn skin Loosen hydraulic connections very slowl...

Page 179: ... 25 30 ft lbs 34 41 Nm 15 Flow regulator valve N Secondary 10 12 ft lbs 14 16 Nm 16 Relief valve 1200 psi 83 bar U Secondary down 25 30 ft lbs 34 41 Nm 17 Flow regulator valve O Swing 10 12 ft lbs 14 16 Nm 18 Proportional solenoid valve G Extend Retract 10 12 ft lbs 14 16 Nm 19 Proportional solenoid valve H Primary 10 12 ft lbs 14 16 Nm 20 Proportional solenoid valve I Secondary 10 12 ft lbs 14 16...

Page 180: ...Part No 29487 Genie Z 45 22 7 43 Service Manual First Edition Section 7 Repair Procedures FUNCTION MANIFOLD 1 2 3 4 5 6 8 9 10 11 12 13 14 18 19 20 21 15 16 17 24 25 27 26 33 31 30 29 28 23 22 7 32 ...

Page 181: ...djust the internal hex socket Turn it clockwise to increase the pressure or counterclockwise to decrease the pressure Then reinstall the relief valve cap Tip over hazard Do not adjust the relief valves higher than recommended They are set to prevent a tip over or damage to lift linkage 6 Restart the engine Hold the primary or secondary boom up down switch in the down position and recheck the valve...

Page 182: ...fy the manifold valves see 11 1 Function Manifold Components in this section 1 Push the button on the end of the valve in inch 6mm 2 Move the ground control function switch for the function being overridden to operate function Collision Hazard Impact with moving boom components may cause death or serious injury Use extreme caution when overriding a boom function and know the direction of intended ...

Page 183: ...ydraulic tank valves located at the main pump 3 Completely drain the oil from the reservoir by removing the drain plug located in the bottom front of reservoir Burn hazard Contact with hot oil may cause severe burns 4 Disconnect the hydraulic hoses from the reservoir 5 Remove the reservoir anchor hook from the back of the reservoir open closed 6 Remove the mounting fasteners from the bottom of the...

Page 184: ...tainer 1 Raise the elevate assembly enough to access the back of the fuel tank 2 Turn the manual fuel shutoff valve to the closed position 3 Gasoline LPG models Disconnect the electrical collectors from the fuel shutoff solenoid Disconnect drain and plug the fuel hose Diesel models Disconnect drain and plug the supply and return fuel hoses Cap the fuel return fitting on the fuel tank 4 Remove the ...

Page 185: ...nting bolts then remove the motor Do not allow the turntable to rotate until the hydraulic motor is installed 13 2 Rotation Bearing and Worm Drive How to Remove the Rotation Bearing or Worm Drive The turntable and all components above it must be removed prior to removing the rotation bearing or worm drive This procedure requires specific repair skills lifting equipment and a suitable workshop Atte...

Page 186: ...c tank valves located at the main pump open closed 8 Disconnect the three 3 4 inch hydraulic hoses from the main pump and plug them Bodily injury hazard Spraying hydraulic oil can perforate and burn skin Loosen hydraulic connections very slowly to allow the oil pressure to dissipate gradually Do not allow oil to squirt or spray 9 Disconnect the same three 3 4 inch hydraulic hoses from the drive tr...

Page 187: ...rks underneath the turntable and above the chassis Do not lift 22 Place a 5 inch 13cm tall block near the end of the forks for support a forks b block 23 Raise the forks up against the turntable Do not lift Be sure that the support block is still in its proper location 24 Place a safety strap around the upper mid pivot then secure the strap to the forklift carriage 25 Remove the turntable mounting...

Page 188: ... skills and tools may result in death or serious injury and significant component damage Dealer service is required If a repair requires that the turntable be removed from the chassis installing a new rotation bearing is recommended Consider the service life of the rotation bearing before installing a used bearing 1 Position the rotation bearing on the chassis 2 Locate the red mark on the outside ...

Page 189: ...worm drive away from the rotate bearing 0 035 inches 0 889mm 0 020 inches 0 508mm 11 Tighten the two 5 16 fasteners Observe the dial indicator to be sure that the worm drive does not move 12 Locate the 1 inch hex head on the end of the worm gear housing Turn the hex head to rotate the worm drive until it is positioned within the original reference marks on the chassis 13 Position the turntable so ...

Page 190: ...he king pin 7 Place a second jack under the yoke hub assembly 8 Use a soft metal drift to drive the king pin down and out Crushing hazard The yoke hub assembly will fall when the king pin is removed if it is not properly supported Always use a new cotter pin when re installing a clevis pin How to Remove the Hub and Bearing 1 Loosen the wheel lug nuts Do not remove them 2 Place a lifting jack under...

Page 191: ...oot pounds 11Nm 9 Install a new cotter pin Bend the pin to lock it in 10 Install the dust cap then the tire and wheel assembly Torque the wheel lug nuts to 125 foot pounds 169Nm 14 2 Steering Cylinders How to Remove a Steering Cylinder There are two identical steering cylinders that work in parallel They are part of the same hydraulic circuit but move in opposite directions The tie rod maintains e...

Page 192: ...sure the distance from the reference points on each tire Front to front and back to back 3 Center a jack under the steering axle then raise the machine 4 Loosen the jam nut on the adjustable end of the tie rod 2WD STEERING AXLE COMPONENTS 1 4 inch 0 635mm toe in to 1 4 inch 0 635mm toe out 5 Remove the cotter pin then remove the clevis pin from the adjustable end of the tie rod 6 Slide the tie rod...

Page 193: ...ses from the wheel motor and plug them Cap the wheel motor hydraulic fittings Bodily injury hazard Spraying hydraulic oil can perforate and burn skin Loosen hydraulic connections very slowly to allow the oil pressure to dissipate gradually Do not allow oil to squirt or spray 3 Loosen the wheel lug nuts Do not remove them 4 Block the non steering wheels and then center a lifting jack under the stee...

Page 194: ...Perform the Tie Rod Toe in Adjustment 9 Attach a strap from a lifting device to the yoke torque hub assembly and support it 10 Use a soft metal drift to drive the king pin down and out Crushing hazard The yoke torque hub assembly will fall when the king pin is removed if it is not properly supported 11 Place the yoke torque hub assembly on a flat surface with the torque hub down Remove the bolts t...

Page 195: ...r service is strongly recommended Perform this procedure on a firm level surface 1 Disconnect and plug the oscillating axle lock out cylinder hydraulic hoses Disconnect and plug the steer and accumulator hoses from the steer oscillate manifold to provide clearance for pin removal Bodily injury hazard Spraying hydraulic oil can perforate and burn skin Loosen hydraulic connections very slowly to all...

Page 196: ...DO1 valve F Steering 30 35 in lbs 3 4 Nm 2 Pilot operated unloader valve 1900 psi 131 bar C Sequencing 10 12 ft lbs 14 16 Nm 3 Sensing valve B Differential sensing 10 12 ft lbs 14 16 Nm 4 Normally closed poppet valve A Steering dump 25 30 ft lbs 34 41 Nm 5 2 position 4 way valve D Oscillate 10 12 ft lbs 14 16 Nm 6 Check valve E Oscillate check 35 40 ft lbs 47 54 Nm Steer and Oscillate Manifold 1 2...

Page 197: ...mit switch Do not lift the primary boom above the secondary boom a drive limit switch a 1900 psi 131 bar 2 Connect a 0 to 3000 psi 0 to 206 bar pressure gauge to the diagnostic nipple on the function manifold 3 Manually hold down the drive limit switch When the oscillate cylinder fully retracts the pressure will spike Note the maximum pressure reading Do not release the drive limit switch 4 Releas...

Page 198: ...g bolts are removed Specifications Lug nut torque 18 1 Drive Motor Repairs to the motor should only be performed by an authorized Sundstrand Sauer dealer How to Remove a Drive Motor A drive motor can only be removed from the inside of the chassis Access on older machines is even more restricted The brake and motor must be removed together and then separated for repair The work area and surfaces wh...

Page 199: ...r brake release and 2 speed motor shift 15 18 ft lbs 20 24 Nm 8 Pilot to open check valve D Left check in reverse 85 90 ft lbs 115 122 Nm 9 Pilot to open check valve B Left check in forward 85 90 ft lbs 115 122 Nm 10 2 position 3 way valve J Energized in high range to pilot open check valves 5 6 8 9 to bypass flow regulators and allow full flow to front wheel motors 8 10 ft lbs 11 14 Nm 11 Shuttle...

Page 200: ...Part No 29487 Genie Z 45 22 7 63 Service Manual First Edition Section 7 Repair Procedures 1 2WD DRIVE MANIFOLD 2 3 5 6 9 4 10 8 7 11 14 13 12 16 15 ...

Page 201: ...nections very slowly to allow the oil pressure to dissipate gradually Do not allow oil to squirt or spray 2 Start the engine from the platform controls 3 Drive the machine in either direction and observe the pressure reading on the pressure gauge 4 Turn the engine off Hold the relief valve and remove the cap index 14 5 Adjust the internal hex socket Turn it clockwise to increase the pressure or co...

Page 202: ...Part No 29487 Genie Z 45 22 7 65 Service Manual First Edition Section 7 Repair Procedures 2WD DRIVE MANIFOLD This page intentionally left blank ...

Page 203: ...J LR check in reverse 35 40 ft lbs 47 54 Nm 12 Check valve I LR check in forward 35 40 ft lbs 47 54 Nm 13 Pilot to open check valve N LF check in reverse 85 90 ft lbs 115 122 Nm 14 Pilot to open check valve M LF check in forward 85 90 ft lbs 115 122 Nm 15 2 position 3 way valve Q Energized in high range to pilot open check valves 9 10 13 14 to bypass flow regulators and allow full flow to front wh...

Page 204: ...Part No 29487 Genie Z 45 22 7 67 Service Manual First Edition Section 7 Repair Procedures 4WD DRIVE MANIFOLD 1 3 4 2 5 7 6 8 9 10 11 12 13 14 15 16 18 17 19 20 24 23 22 21 ...

Page 205: ...onnections very slowly to allow the oil pressure to dissipate gradually Do not allow oil to squirt or spray 2 Start the engine from the platform controls 3 Drive the machine in either direction and observe the pressure reading on the pressure gauge 4 Turn the engine off Hold the relief valve and remove the cap 5 Adjust the internal hex socket Turn it clockwise to increase the pressure or countercl...

Reviews: