background image

Positioning the Headset

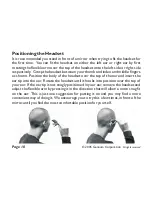
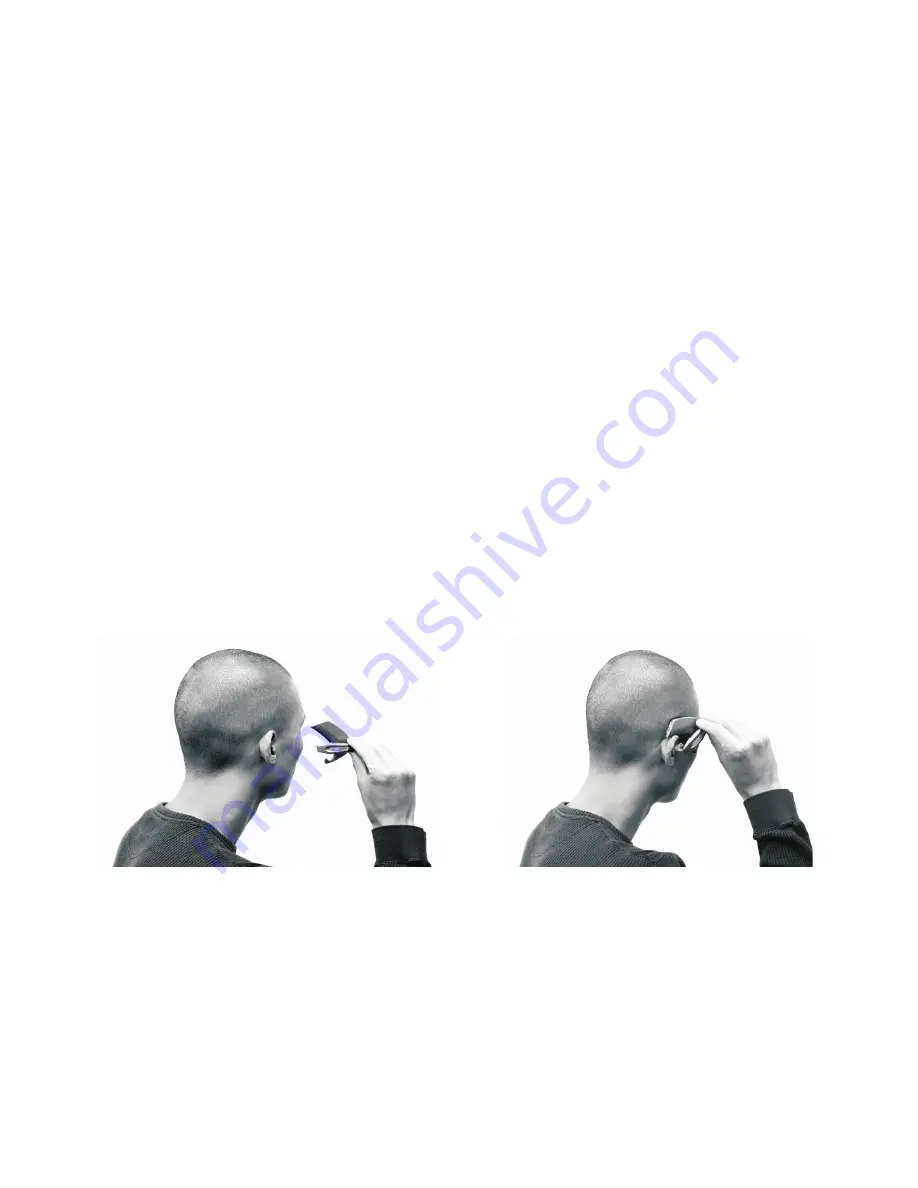
It is recommended you stand in front of a mirror when trying to fit the headset for
the first time. You can fit the headset on either the left ear or right ear by first
rotating the flexible arm over the top of the headset onto the left side or right side
respectively. Grasp the headset between your thumb and index and middle fingers
as shown. Position the body of the headset over the top of the ear and insert the
ear tip into the ear. Rotate the headset until it hooks into position over the top of
your ear. If the ear tip is not snugly positioned in your ear, remove the headset and
adjust the flexible arm by pressing it in the direction that will allow a more snug fit
on the ear. This is just one suggestion for putting it on and you may find a more
convenient way of doing it. We encourage you to try this a few times,in front of the
mirror,until you find the most comfortable position for yourself.

© 2005 Gennum Corporation

All rights reserved

Page 10

Summary of Contents for Z-350

Page 1: ...MULTI FUNCTION DIGITAL WIRELESS HEADSET USER S MANUAL Models Z 280 Z 350 Z 470...

Page 2: ...the Headset 13 DigitalVolume Control 14 Pairing the Headset 15 Multiple Pairings Features for Bluetooth Headset Profile 18 Features for Bluetooth HandsFree Profile 19 Call State 24 Low Battery State...

Page 3: ...hic Equalizer Minimizing Power Consumption 36 Troubleshooting 37 Limited Warranty 38 Safety Warnings 41 Trademarks and Registered Trademarks 41 FCC Notice 42 EU Notice 43 Specifications 43 Gennum Cont...

Page 4: ...hone audio using a 5 band Graphic Equalizer In addition the user is also able to increase the volume level of their transmitted voice The Models Z 350 and Z 470 allow the user to plug in a PC CD or MP...

Page 5: ...Package 1 Z E N DigitalWireless Headset 1 Mini Bag of ReplacementTips 1 Installation CD 1 User s Manual 1 Fitting Guide 1 Audio Interface Cable 1 ACWall Charger TM 2005 Gennum Corporation All rights...

Page 6: ...EARTIP PINCH BUTTON BLUE INDICATOR LIGHT SIDE BUTTON EAR HOOK 2005 Gennum Corporation All rights reserved Page 6...

Page 7: ...FLEXIBLE ARM CHARGING PORT AUDIO INPUT PORT DIGITAL VOLUME CONTROL ROTATE ARM FOR RIGHT EAR FIT 2005 Gennum Corporation All rights reserved Page 7...

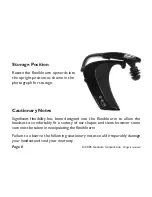
Page 8: ...graph for storage Cautionary Notes Significant flexibility has been designed into the flexible arm to allow the headset to comfortably fit a variety of ear shapes and sizes however some care must be t...

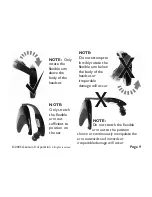
Page 9: ...body of the headset or irreparable damage will occur 2005 Gennum Corporation All rights reserved Page 9 NOTE Only stretch the flexible arm out sufficient to position on the ear NOTE Do not stretch th...

Page 10: ...he headset over the top of the ear and insert the ear tip into the ear Rotate the headset until it hooks into position over the top of your ear If the ear tip is not snugly positioned in your ear remo...

Page 11: ...eadset it is important to ensure that the ear tip is inserted snugly into the ear A snug fit will provide the best possible sound quality as well as good isolation from external background noise allow...

Page 12: ...tug To replace the ear tip reverse this procedure by aligning the hole in the ear tip and pushing it on the end of the flexible arm until it is firmly seated in position Charging the Headset The head...

Page 13: ...ll eventually stop flashing Charging is automatically stopped in order to protect your headset Turning On Off the Headset To turn ON the headset the SIDE button and you will see 2 flashes of the Blue...

Page 14: ...on your headset is synchronized to the volume on your phone As you change the volume you will see the volume bars on your phone change accordingly However if you change the volume control on your phon...

Page 15: ...the Bluetooth function on your phone refer to your phone s user manual Turn the headset on the PINCH button until you hear or 4 flashes if you are not wearing the headset then release the button Veri...

Page 16: ...the headset with up to 3 phones or devices supporting the headset or hands free profile by repeating the pairing procedure described above The headset cannot be used with all three devices simultaneo...

Page 17: ...uetooth Connection using the phone This can be achieved by selecting connect to Bluetooth device from your phone s menu options refer to your phone s user manual or for some phone models by the PINCH...

Page 18: ...coming call you will hear a series of ring tones in the earpiece of the headset Headset Profile linked To answer the call the SIDE button To end the call the SIDE button Dial the number you are callin...

Page 19: ...call has been un muted press and hold 1 beep briefly press and release 1 beep briefly press and release Mute Unmute FEATURES FOR PHONES SUPPORTINGTHE BLUETOOTH HANDSFREE PROFILE Answering a Call Whil...

Page 20: ...our headset is to your phone Dial the number you are calling on your phone s keypad and the call will be automatically transferred to the headset If your headset is to your phone you can still transfe...

Page 21: ...tter results If you want to reject an incoming call the PINCH button until you hear then Press and hold 1 beep Press and hold 3 beeps NOTE Press and hold 2 beeps Press and hold 2 beeps the PINCH butto...

Page 22: ...seconds delay before the call is transferred This feature may not be supported on all phones and you must use your phone s menu option to transfer the sound While on an active call and your phone noti...

Page 23: ...ar then immediately release the button to release all held calls While on an active call To MUTE the call the PINCH button You will hear indicating the headset has been muted To UNMUTE the call the PI...

Page 24: ...f battery time are left Warnings will increase to every 10 seconds when battery time is 5 minutes or less When the battery expires the unit will power itself off To re charge the headset Turn off the...

Page 25: ...continuously wear the headset without plugging their ear L E A P 2 is set up to provide additional amplification and noise reduction L E A P 2 has been designed for challenging noisy environments TM...

Page 26: ...a call On an incoming call the music will be muted to allow the user to hear the ring tones and answer the call At the end of the call the music will be un muted To select this mode the SIDE button fo...

Page 27: ...on press will continue playing Hi Fi music through your headset The graphic equalizer allows you to customize the sound you hear in each mode of operation L E A P Model Z 470 only Hi Fi Music Model Z...

Page 28: ...r Device During the pairing procedure when asked for a Password PIN code Open and read the README txt file on the CD to ensure your computer is properly set up for the installation prior to installing...

Page 29: ...NOTE The windows shown above are for theWindows 2000 operating system and may appear different for other operating systems such as Windows XP however the basic procedure remains the same When the hea...

Page 30: ...ort and enter the COM port value noted above Click Update to save the COM port value Enter PIN code Select the next to the Connect button Application Setup drop down menu COM Port Selection 2005 Gennu...

Page 31: ...setup for music listening Click the Presets button and a drop down menu will appear Click on the appropriate tab Hi Fi Music L E A P 1 L E A P 2 or Phone to select the mode you want to program There...

Page 32: ...ammed into the headset Individual sliders can be changed to further tune the settings to your liking Hi Fi Music Presets L E A P Mode Presets Model Z 470 only Click the Presets button and a drop down...

Page 33: ...e headset Individual sliders can be changed to further tune the settings to your liking L E A P Mode Presets Phone Mode Programming and Presets TM Phone Mode Programming To listen to changes that you...

Page 34: ...volume level on the PC is not muted Click the Play Test Call button and you will hear the test call audio If necessary increase the volume level on your PC TM You can dynamically change the settings w...

Page 35: ...their voice For each tab selection you may customize and save the equalization settings as follows Phone Mode Presets Click the Presets button and a drop down menu will appear similar to the L E A P...

Page 36: ...Equalizer application Click the Save button and save the file with a zen extension You may save as many files as you like There are two ways to disconnect from the headset Switch off the headset if y...

Page 37: ...presses on the headset are accompanied by a flash of the Blue Indicator Light If you don t see a flash this is a definite indication of a dead battery Generally this is an indication that the ear tip...

Page 38: ...dset it may at its sole option refund the purchase price paid for the headset THESE ARETHE SOLE AND EXCLUSIVE REMEDIES FOR BREACH OF WARRANTY BY GENNUM IN NO EVENT SHALL GENNUM BE LIABLE FOR DAMAGES E...

Page 39: ...l not be responsible for failures or defects due to misuse neglect abuse accidents alterations improper or unauthorized installation or service unauthorized removal or repairs failure to follow instru...

Page 40: ...ware and software wall charger with adapters replacement tips and written materials Your exclusive remedy is repair replacement or refund as stated herein In no event shall Gennum s liabilities exceed...

Page 41: ...ation of your vehicle Do not attempt to use this device if it is submerged in liquid Immediately unplug all electrical connections Users with pacemakers or other electrical medical devices should cons...

Page 42: ...wo conditions 1 This device may not cause harmful interference and 2 This device must accept any interference received including interference that may cause undesired operation Changes or modification...

Page 43: ...and the other relevant provisions when used for its intended purpose Please refer to the zen gennum com website for more information TypicalWeight 22 grams TypicalTalkTime 8 hours Typical StandbyTime...

Page 44: ...zen gennum com Gennum Corporation 970 Fraser Drive Burlington Ontario L7L 5P5 www gennum com CorporateAddress For latest revisions to this manual customer assistance or inquiries about the Z E N head...

Reviews: