background image

23

Finished Warning Beep

The.press.can.sound.a.beep.on.the.last.
3.seconds.of.the.timer.or.Prepress.timer.
countdown.. This. is. useful. if. the. press.
is. automatic. and. the. operator. needs. a.
warning.that.the.press.is.about.to.finish,..
open,.or.pop-up.dramatically.

After.entering.the.user.menus.(see.top.
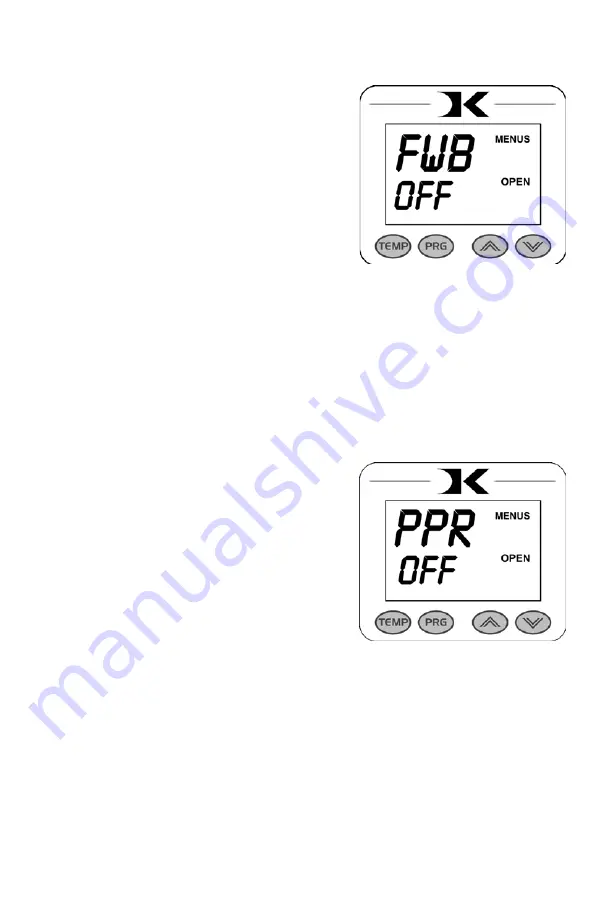
of. page. 18),. Press. PRG. until. FWB.
displays..Use.the.arrow.keys.to.set.it.to.
ON.or.OFF.

Press.PRG.to.move.to.the.next.menu.item.

Prepress Timer

The. press. can. cycle. back. and. forth.
between. two. distinct. timer. settings:.
the.normal.countdown.timer,.and.a.2nd.
Prepress.timer..(see.page.6)..This.menu.
item. turns. the. Prepress. timer. ON. or.
OFF.

After. entering. the. user. menus. (see.
top. of. page. 18),. Press. PRG. until. PPR.
displays..Use.the.arrow.keys.to.set.it.to.
ON.or.OFF.

If.PPR.is.set.to.OFF,.pressing.PRG.will.return.to.the.normal.operating.
mode.

If.PPR.is.set.to.ON,.pressing.PRG.will.move.to.the.next.menu.item.

Summary of Contents for DC16AP

Page 1: ...1 Digital Combo 14x16 Automatic Digital Swinger Version 5 18...

Page 2: ...ttachment 14 Pressing Ceramic Tile 14 Programmable Presets 15 How Presets Work 15 Loading a Preset 15 Editing Programming a Preset 16 A Walkthrough Tutorial for using Presets 17 User Menus 18 Entering...

Page 3: ...easy as possible Please take the time now to thoroughly read through this manual to become acquaint ed with them It will explain some key features concepts and methods that will save much time and ef...

Page 4: ...8 or 1 4 ID hose will provide enough air volume for this press Attach the power cord from the rear to the underside of the top head There is a power inlet under the top head that the modular cord wil...

Page 5: ...t temperature is within 5 degrees of the set point temperature The right side of the screen will also indicate the timing status by stating OPEN TIMING or DONE Thepressurebargraphisnotusedontheautomat...

Page 6: ...pressed for 5 seconds before a main pressing cycle of 20 seconds the Prepress timer can be set for 5 secs and the main timer for 20 When the operator activates the press the 5 sec time counts down Whe...

Page 7: ...o the right clockwise The top head will lower toward the pressing table Setting Platen Height Gap Actuating the Press To actuate the machine simply press both black buttons together This will cause th...

Page 8: ...and reduce the life of the silicone pad When pressing rigid substrates plastics metals woods etc be sure that any protective films or laminates are removed before heating Always check that the transfe...

Page 9: ...e that warns the operator of a possible thermal run away of the press This means the press relay may be locked in a heating position where it will never stop heating to a possibly harmful temperature...

Page 10: ...he machine on However thermal gloves or oven mitts must be used when handling hot heat platens Unplug the modular connector This is done by unscrewing the safety lock and pulling the connectors apart...

Page 11: ...uide pin in the back post of the frame This holds the heat platen in a straight position and keeps it from rotating Reattach the quick release pin through the linkage and the heat platen shaft Reconne...

Page 12: ...r to adjust its position The pedestal can also be slightly rotated in order to align with the upper platen Loosen all 4 screws holding the gibb plates in place position rotate the pedestal to the desi...

Page 13: ...smaller undersized mugs The cap attachment works the same as a cap press The only difference is that the swing away style Digital Combo press allows complete access to the cap when the heat platen is...

Page 14: ...icone pad and permanently stick it to the tray The purpose of the black circular pad is to automatically center the plate under the heat platen It also provides cushioning when pressing plates Set the...

Page 15: ...urrent settings This is simply a reference a reminder of what pressure setting the operator must adjust for that preset Thereare2mainfunctionstousingthepresets LOADINGandEDITING the preset LOADING a p...

Page 16: ...Prepress time will flash Use the Arrow Keys to set the Prepress time Set the Prepress time to 00 if only one timer is to be used for that preset Setting Prepress to 00 will disable the Prepress featur...

Page 17: ...re ref to 8 with the arrow keys Press TEMP Press PRG to leave the preset mode Presets SET 01 and SET 02 have now been programmed Part 2 Loading the presets Let s say we are powering on the machine and...

Page 18: ...ature setting or preset modes may be activated instead Turn the press off and then on and try again Fahrenheit Celsius The current and set temperature can be displayed in F or C After entering the use...

Page 19: ...normal countdown timer display is replaced by this odometer instead The arrow keys no longer adjust the countdown timer but instead are used to set the countdown odometer When OFF the timers are visi...

Page 20: ...n be set to alarm if the temperature drops a certain range below the set temperature This is useful to warn the operator if the press is too far out of temperature range during excessive use After ent...

Page 21: ...ature drops below the set temperature by that many degrees the timer will not operate and therefore on an automatic press the press will not activate The press will unfreeze once the temperature is wi...

Page 22: ...displays Use the arrow keys to set it to OFF or 1 through 10 Press PRG to move to the next menu item denotes a short beep _ denotes a longer beep denotes infinite loop Alarm Alarm Pattern Off No alarm...

Page 23: ...e arrow keys to set it to ON or OFF Press PRG to move to the next menu item Prepress Timer The press can cycle back and forth between two distinct timer settings the normal countdown timer and a 2nd P...

Page 24: ...e set to ON for this menu to be visible Use the arrow keys to set AL2 to OFF or 1 through 10 Press PRG to move to the next menu item denotes a short beep _ denotes a longer beep denotes infinite loop...

Page 25: ...ally helpful with hard to load applications Interchangeable Tables Maintenance The majority of the press has been designed to be as maintenance free as possible There are only a few aspects of the mac...

Page 26: ...OFF SWITCH W SCREWTERM SHN DKPHOOD DK20SP FRONT ACTIVATE PANEL HOOD DCP CYLADP DC AIR CYL HBAADAPTER COUPLER DKP HDHNDL DK20SP DCAIR HANDLE BAR W KNOB CAN DKKNOB DK DC BLACK KNOB FAS EM5818 5 8 18 HEX...

Page 27: ...27 Wiring Diagram...

Page 28: ...yellow grey wires lead to is fully plugged into all 6 gold pins on the circuit board If the timer still does not count down or the press still does not activate check the rear pivot switch safety box...

Page 29: ...ponse from the controller A Confirm that the Operator Lockout feature has not been turned on Check the connection of the keypad to the controller This is inside the top panel Unplug the power cord Rem...

Page 30: ...ective press to the factory for repairs if on site component replacement is deemed not possible by Geo Knight Co A return authorization must be granted by Geo Knight Co prior to its return If a press...

Reviews: