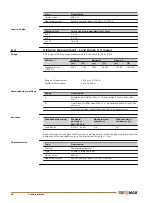
The following instrument parts can be adjusted mechanically:
•
Circular level on instrument and tribrach
•
Optical plummet - option on tribrach
•
Allen screws on tripod
To get precise measurements in the daily work, it is important:
•
To check and adjust the instrument from time to time.
•
To take high precision measurements during the check and adjust procedures.
•
To measure targets in two faces. Some of the instrument errors are eliminated by averag-
ing the angles from both faces.
During the manufacturing process, the instrument errors are carefully determined and set to
zero. As mentioned above, these errors can change and it is highly recommended to redetermine
them in the following situations:
•
Before the first use
•
Before every high precision survey
•
After rough or long transportation
•
After long working periods
•
After long storage periods
•
If the temperature difference between current environment and the temperature at the last
calibration is more than 20°C
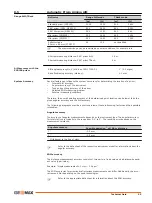
Instrument
error
Effects Hz
Effects V
Elimination
with two face
measurement
Automatically
corrected
with proper
adjustment
c - Line of sight
error
ü
-
ü
ü
a - Tilting axis
error
ü
-
ü
ü
l - Compensator
index error
-
ü
ü
ü
t - Compensator
index error
ü
-
ü
ü
i - Vertical index
error
-
ü
ü
ü
AiM Collimation
error
ü
ü
-
ü
6.2.2
Preparation
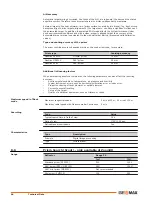
Before determining the instrument errors, the instrument has to be levelled
using the electronic level.
The tribrach, the tripod and the underground should be stable and secure
from vibrations or other disturbances.
Torsion in the tripod head can influence the calibration outcome. Make sure to
perform the calibration on a heavy-duty wooden tripod or concrete pillar.
The instrument should be protected from direct sunlight to avoid thermal
warming.
It is also recommended to avoid strong heat shimmer and air turbulence. The
best conditions are early in the morning or with overcast sky.
Mechanical adjustment
Precise measurements
☞
Summary of errors to be
adjusted electronically
☞
☞
Apps
45


