Calibration Tools (Laser Pointer, adaptors & extension poles):
Important notes for initial setup & calibration
During calibration the system will
ask you to confirm that you‘re
going to use the „Calibration
Tools“ (means, the extension
poles) for setting up the laser
pointer during calibration.
Be sure to unlock the laser
pointer‘s pendulum (move front
switch to the left) before using it,
or the laser will not level!
The laser beam should NOT blink
while using the point laser.
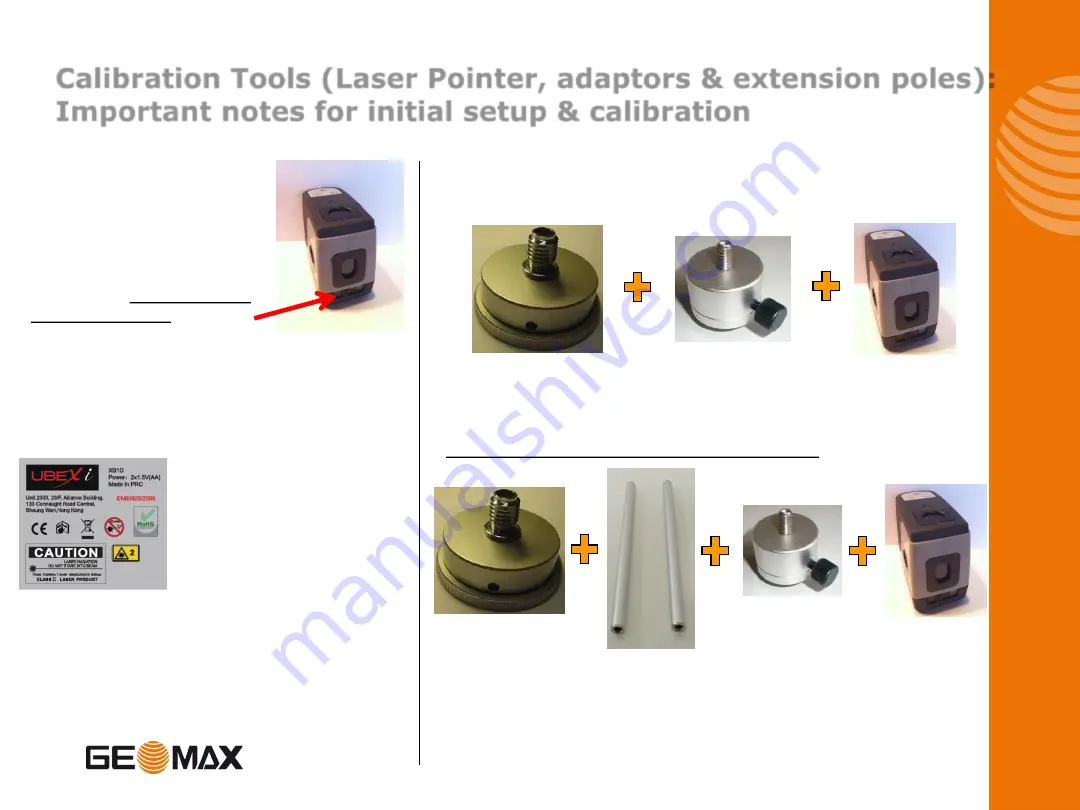
In case you prefer to set up the laser pointer without the Calibration Tool (2
Extension Poles), you have to measure and dial-in the height difference
between the low and high setup after the lower line. You may use the included
magnetic L-bar for the point laser‘s setup.
For the low line „A“ attach the „sandwich“ 5/8“ to 5/8“ adaptor, 5/8“ to 1/4“
adaptor, point laser on any tripod.
For the high line „B“ put the two extension poles between the big and the small
adaptor.
DO NOT change the tripod‘s location between line A & B
.
SAFETY LABELS
The One-Dot Laser used for first-
time setup is a Class 2 laser,
manufactured to comply with the
international rules of safety IEC
60825-1, 2001. Although the power
of the emission of the beam is less
than 5mW in Class 2, the following
cautions are recommended:
• Do not stare directly at the beam
• Do not set up the laser at eye
level
35
Summary of Contents for EZDig T
Page 1: ...Manual Version 2 00 Software Version 3 5 1 User Manual EZDig T Menu Language English 1 ...
Page 5: ...Digging a hole Method 1 Using the ground as reference 5 ...
Page 7: ...Digging a hole Method 2 Using surveyor stake as reference 2 50m Surveyor Stake 7 ...
Page 9: ...Digging a 5m wide hole 5m Surveyor Stake 9 ...
Page 15: ...Digging a trench with 2 slope Method 1 Using the ground as reference 15 ...
Page 26: ...Changing the elevation Method 2 Working with a rotating laser 0 10m 4 71m 4 61m 26 ...
Page 36: ...36 ...


