Accessing the Camera
96
2
Chapter 2 Accessing the Camera
Once installed, the IP camera is accessible on a network. Follow these steps to configure the
network settings and access your surveillance images.
2.1 Installing on a Network
These instructions describe the basic connections to install the camera on the network.
1. Using a standard network cable, connect the camera to your network.
2. Connect to power using one of the following methods:
⚫
Use the optional power adapter to connect to power.
⚫
Use the Power over Ethernet (PoE) function in which power is supplied over the
network cable.
3. You can now access the Web interface of the camera.
⚫
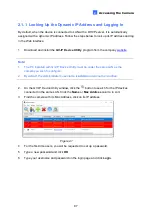
If the camera is installed in a LAN with DHCP server, use GV-IP Device Utility to look
up the camera’s dynamic IP address. See
2.1.1 Looking up the Dynamic IP Address
and Logging In
.
⚫
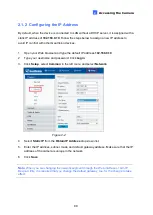
If the camera is installed in a LAN without DHCP server, the default IP address
192.168.0.10
is applied. To assign a different static IP address, see
2.1.2 Configuring
the IP Address
.
Note:
You must set your browser to allow ActiveX Control and perform a one-time
installation of the ActiveX component onto your computer upon your first login.
Summary of Contents for CV-ADR2702
Page 161: ...148 Figure 3 36 ...

