Introduction
37
1
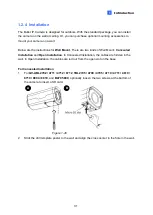
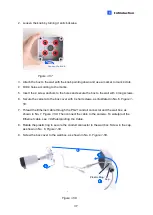
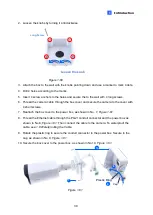
2. Loosen the knob by turning it anticlockwise.
Loosen the knob
Figure 1-57
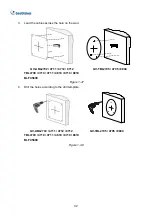
3. Attach the box to the wall with the knob pointing down and use a marker to mark 4 dots.
4. Drill 4 holes according to the marks.
5. Insert the 4 screw anchors to the holes and secure the box to the wall with 4 long screws.
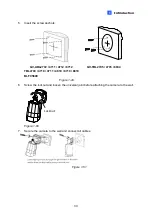
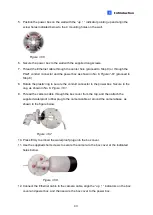
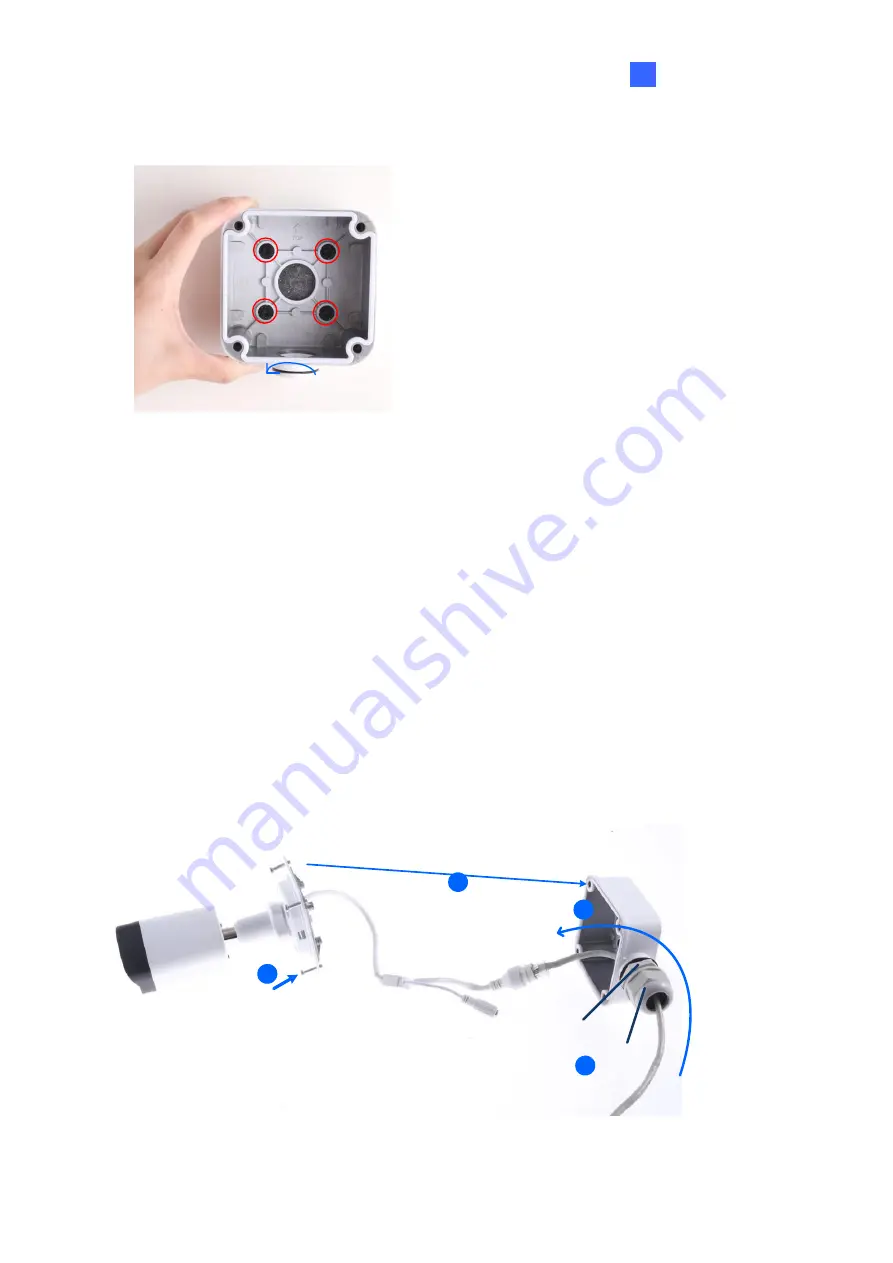
6. Secure the camera to the box cover with 4 short screws, as illustrated in No. 6,
Figure 1-
58
.
7. Thread the Ethernet cable through the PG21 conduit connector and the wall box, as
shown in No. 7,
Figure 1-58
. Then connect the cable to the camera. To waterproof the
Ethernet cable, see
1.8 Waterproofing the Cable
.
8. Rotate the plastic ring to secure the conduit connector to the wall box. Screw in the cap,
as shown in No. 8,
Figure 1-58
.
9. Screw the box cover to the wall box, as shown in No. 9,
Figure 1-58
.
6
Plastic Ring
Cap
9
7
8
9
7
6
Figure 1-58
Summary of Contents for CV-ADR2702
Page 161: ...148 Figure 3 36 ...

