4
1. Open your web browser, and type the default IP address
http://192.168.0.10
2. In both Login and Password fields, type the default value
admin
. Click
Apply
.
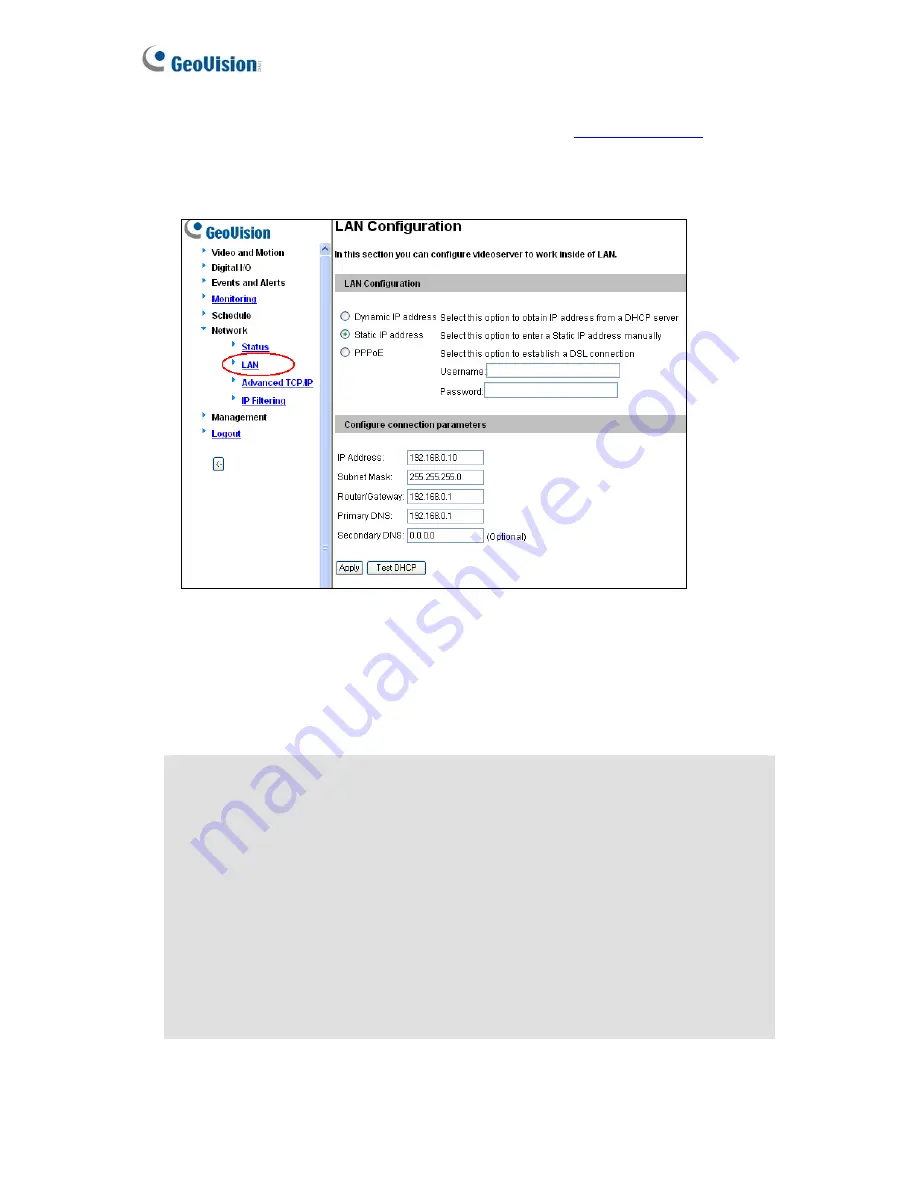
3. In the left menu, select
Network
and then
LAN
to begin the network settings.
Figure 2-1
4. Select
Static IP address
. Type IP Address, Subnet Mask, Router/Gateway, Primary DNS
and Secondary DNS
in the
Configure connection parameters
section.
5. Click
Apply
. The GV-IP Camera is accessible by entering the assigned IP address on the
web browser.
Important:
•
Dynamic IP Address
and
PPPoE
should only be enabled if you know which IP
address the GV-IP Camera will get from the DHCP server or ISP. Otherwise you
must use the Dynamic DNS service to obtain a domain name linked to the GV-IP
Camera’s changing IP address first.
For details on Dynamic IP Address and PPPoE, see
4.6.2
Advanced TCP/IP.
•
If
Dynamic IP Address
and
PPPoE
is enabled and you cannot access the
GV-IP Camera, you may have to reset it to the factory default and then perform
the network settings again.
To restore the factory settings, see the
Reset
button in
1.4 Back View
.


