

P.19
P.18
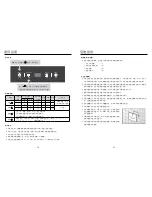
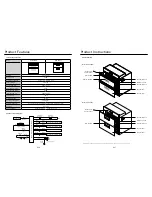
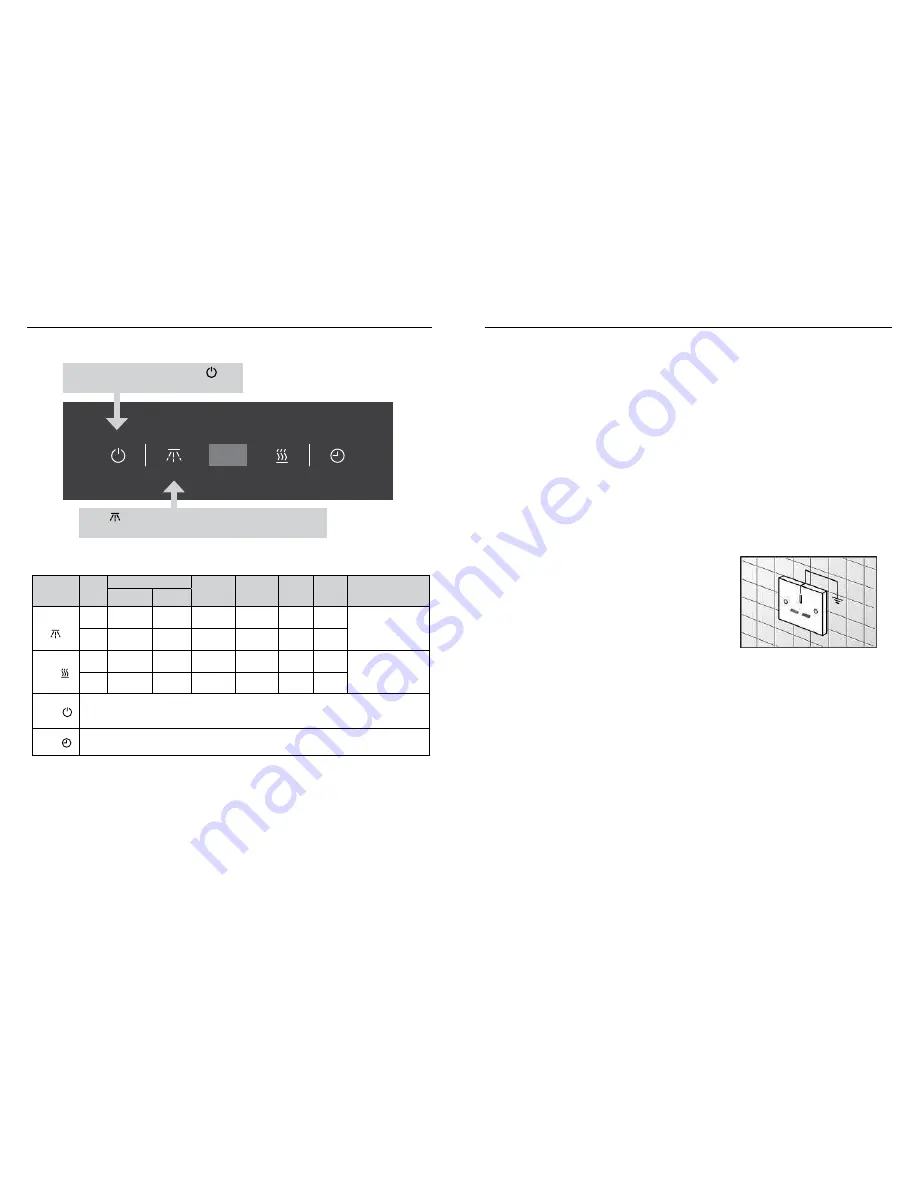
Function Mode Diagram
Function Mode Reference
Operation Instruction
Disinfect
消 毒
Heat
烘 乾
Timer
定 時
Power
電 源
Press Key to start the 150-minute standard sterilizing process
(75-minute ultra-violet sterilizing and 60-minute drying)
Operation Procedures
●
Press the function key within 5 seconds to select function, or the function will be locked.
●
To change the function, press “Power” key for at least 2 seconds to turn off the Sterilizer. Then, select the
function after restarting.
●
There is a 5-second delay before the Sterilization process begins.
●
Press and hold Power key for 2 seconds to unlock door.
●
To set timer after the function has been selected, press “Timer” key to set operation to start within a range
of 1 to 12 hours.
Function
key
No. of
times
Signal
Time
required
(mins)
Sterilizing Interval Drying
Description
Sterilizing
Drying
Disinfect
1
ON
150
75
15
60
After sterilizing,
drying will be carried
out after a time
interval.
2
ON
180
90
15
75
Heat
1
ON
60
60
Drying only.
2
ON
30
30
Power
1. Press “Power” key and hold for 2 seconds. LED display lights up and stand-by mode is on.
2. In the stand-by mode, choose “Sterilizing” or “Drying” function.
3. After choosing the function key, lock function will be released after pressing “Power” key.
Timer
After function is set, press “Timer” within 5 seconds and set time within the range of 1 to 12
hours to start operation.
After closing the door, press and hold
Key
for 2 seconds until the LED display lights up.
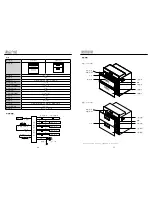
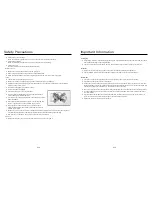
Product Parts
●
Product parts include:
1. Built in Dish Sterilizer X 1
2. Operation and Installation Instructions X 1
3. Screws X 4
4. Warranty card X 1
Safety Precautions
●
Avoid putting the Sterilizer in a room full of chemical solvents which will damage the surface of the Sterilizer.
●
When the power cord is damaged, purchase a replacement from the manufacturer and have the manufac-
turer or a qualified technician perform the repair.
●
Handle with care during transportation. Do not hold the handle when lifting.
●
Do not place the Sterilizer and power socket in humid or damp area.
●
Place the Sterilizer near the power socket.
●
Do not connect the Sterilizer with a plastic gas tube. Metal pipe must be used.
●
Do not submerge the Sterilizer in or spray it with water to avoid short-circuiting or electric shock.
●
The Sterilizer has been manufactured in compliance with all
related safety regulations.
●
The Sterilizer must be earthed.
●
Make sure the power supply of your home corresponds with the
power rating of the Sterilizer.
●
Only use fuse that fits the specifications of the Sterilizer.
Installation Instructions
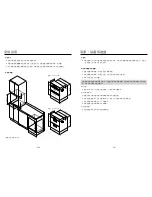
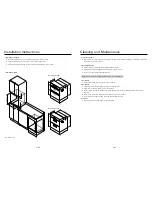
Summary of Contents for DSR-409BK
Page 3: ...P 5 P 4 4 20...


