P.15
P.14
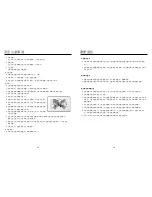
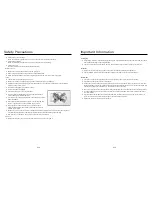
Safety Precautions
●
Prevention of ozone leakage
When the Sterilizer is in operation, do not open the door to prevent ozone leakage.
●
Prevention of scalding
When the Sterilizer is in operation, do not open the door to avoid scalding.
●
Prevention of fire
Do not put flammable substances inside the Sterilizer.
Before first use
●
Make sure the 4 installation screws are firmly in place.
●
Remove the binding wires on the baskets and Dish Rack Track.
●
Clean the baskets with water before using the Sterilizer for the first time or after a long idle.
In use
●
The sterilizer must be earthed at all times.
●
Make sure the door is closed during operation to prevent ozone or UV leakage.
●
Children and people with reduced physical capabilities must not operate the Sterilizer to avoid scalding,
electric shock or other injuries.
●
Do not touch the power plug with wet hands.
●
Pull out the power plug gently.
●
Utensils must be put in the utensil basket.
●
Do not put plastic kitchenware onto the Lower Dish Rack to
prevent damage by infrared radiation.
●
Only microwave-safe plastic kitchenware should be put onto the
Upper Dish Rack.
●
Stop operation immediately when there is ozone leakage, and
contact a qualified technician to perform repair works.
●
If UV light can be seen omitting from the UV Tube, cease
operation immediately, and contact a qualified technician to
perform repair work.
●
Make sure there is no residue water in kitchenware before putting them into the Sterilizer. Open the Door
only after the Sterilizer stops operation for 20 minutes to avoid ozone leakage and scalding.
●
Non-utensils such as towels, shoes, etc must not put into the Sterilizer.
After use
●
Disconnect the power supply if the sterilizer will not be in use for a long time.
Important Information
Packaging
●
All packing materials are environmentally-friendly and recyclable. Please dispose separately from household
waste when discarding the packing materials.
●
The plastic wrap and cardboards are not toys, keep children away to prevent injuries or suffocation.
Disposal
●
Disconnect any electrical supply and cut the power cord before disposing old appliances.
●
Any recyclable materials from old appliances should be recycled to conserve the environment.
Before Use
●
This product is designed for kitchen use only, and should not be used for any other purposes.
●
This product is designed for built in installation.
●
Please read this user manual and any enclosed documents for installation and operation instructions, and
safety precautions before use. Please keep this booklet for reference. The manufacturer shall not indemnify
anyone for any damages inflicted due to the violation of the instructions.
●
To ensure correct and safe usage of the sterilizer, please read the instructions of this user manual carefully.
●
In case of damages, do not connect the sterilizer to any electrical supply, and contact customer service or
your local dealer.
●
Only qualified or authorised technicians should perform repair works on the appliance. Do not attempt to
repair on your own to avoid further damages or possible personal injuries.
●
Please use and maintain the product properly.
Summary of Contents for DSR-409BK
Page 3: ...P 5 P 4 4 20...


