background image


10 


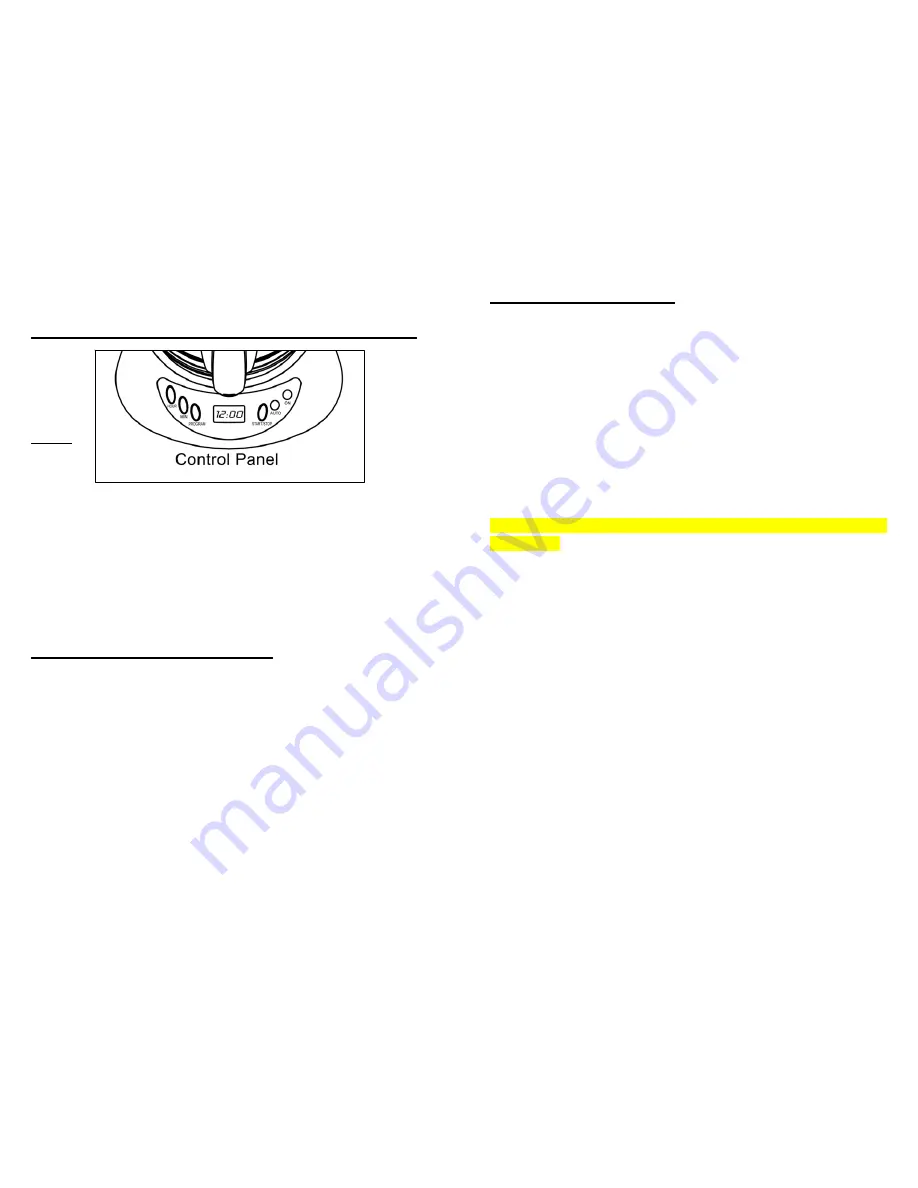
SETTING YOUR CLOCK AND USING THE PROGRAMMABLE TIMER: 


Figure C 


z

 AM=Morning 

z

 PM=Afternoon/Evening 

z


To set the hour: Press the "HOUR" button repeatedly until desired hour is set. 

z


To set the minutes: Press the "MIN" button repeatedly until desired minutes are set.   

NOTE: Unplugging the unit will reset the clock to 12:00. 


SETTING YOUR PROGRAMMABLE TIMER: 

z


Hold down the "PROGRAM" button. 

z


Press the "HOUR" button to the desired hour. 

z


Press the "MIN" button to the desired minute.   

z


Release the “PROGRAM” button. 

z


Make sure your current time is set correctly. 

z


Press the "START/STOP" button ONLY ONCE, the red AUTO light will go on. 

Your Coffeemaker is now set to start brewing at the programmed time. 


11

OPERATING INSTRUCTIONS:


1.  Place your drip Coffeemaker on a flat, level surface such as a countertop. Plug the 

Coffeemaker into a 120 volt 60 Hz AC outlet. 

2.  Fill the Water Reservoir.  Flip open the Filter Basket Lid and insert a No. 4 Gevalia 

cone-shaped paper filter into the Filter Basket. Place the desired amount of ground 

coffee into the paper filter.    Brew Gevalia Kaffe with the coffee water ratio you normally 

use when you prepare ground coffee. If you prefer strong coffee, we recommend the 

following European method, which produces rich, full-bodied flavor. Use one level 

Gevalia scoop for each cup (6 fluid ounces) or 12 level scoops per full pot of coffee. 

(Experiment with the amount of coffee used in order to adjust the flavor to your taste.) 

3.  Be sure that the Filter Basket is seated properly in the Filter Basket Holder, by placing 

it securely into place.    Make sure the flip top lid is completely closed on the top of the 

Filter Basket Holder.    Ensure there is water in the Water Reservoir. 

IMPORTANT: 

Do not operate your Coffeemaker if the lid on the top of the unit is not 

securely closed. 

4.  To brew coffee immediately, push the “START/STOP” button twice.    The green “ON” 

light will illuminate and after a few moments the coffee will start to brew.    NOTE:    If 

you have just plugged in the Coffeemaker, you may need to push the button three 

times to illuminate the green “ON” light and start the brewing process. 

5.  To set the Coffeemaker to start brewing at a certain time, hold down the “PROGRAM” 

button.  While holding down the “PROGRAM” button, push the “MIN” and “HOUR” 

buttons to set the timer.    Release the “PROGRAM” button.    Once the timer is set to 

the correct time, you must set the unit to auto.    To do this, push the “START/STOP” 

button once until the red “AUTO” light illuminates.    NOTE: If you have just plugged in 

the Coffeemaker, you may need to push the button twice to illuminate the red “AUTO” 

light.    Now the unit is set to brew at the desired time. 


Summary of Contents for XCC-1

Page 1: ...is guarantee This guarantee expressly excludes glass and thermal carafes broken by accident or misuse However replacements can easily be ordered by calling Gevalia Kaffee Imports Service at 1 800 438 2542 This warranty gives you specific legal rights and you may also have other rights which vary from state to state FOR SERVICE Call the Gevalia Kaffe Import Service 1 800 438 2542 for further inform...

Page 2: ...g over edge of table or counter or touch hot surfaces 10 Do not place on or near a hot gas or electric burner or in a heated oven 11 Always plug cord into the wall outlet before turning on any controls To disconnect make sure the power is off the ON light will not be illuminated then remove plug from the wall outlet 12 Always use cold filtered or bottled water for best results Warm water or other ...

Page 3: ...er 6 This glass carafe is designed to be used with this Coffeemaker only 7 Do not use this appliance for other than intended use SAVE THESE INSTRUCTIONS Household Use Only 5 SAFETY FEATURES 1 A short power supply cord is provided to reduce the hazards resulting from entanglement or tripping over a longer cord 2 An extension cord may be used if care is exercised in its use 3 If an extension cord is...

Page 4: ... off feature In both regular and auto start modes the Coffeemaker shuts off automatically 2 hours after the brewing cycle is completed To restart simply press the START STOP Button until the ON light illuminates z ON Light The ON light lets you know when the Coffeemaker is turned on and ready for safe operation will be illuminated green z Cord Storage Hidden cord storage allows you to hide excess ...

Page 5: ...servoir with the desired amount of cold filtered or cold bottled water Refer to the water level markers on the sides of the Reservoir to let you know how much water is in the container Return the Water Reservoir to its position at the back of the Coffeemaker making sure the groove in the Water Reservoir slides snugly over the back of the plastic guide at the back of the Coffeemaker See Figure D NO...

Page 6: ...d which produces rich full bodied flavor Use one level Gevalia scoop for each cup 6 fluid ounces or 12 level scoops per full pot of coffee Experiment with the amount of coffee used in order to adjust the flavor to your taste 3 Be sure that the Filter Basket is seated properly in the Filter Basket Holder by placing it securely into place Make sure the flip top lid is completely closed on the top of...

Page 7: ...YOUR COFFEEMAKER z CAUTION Always make sure Coffeemaker is unplugged before attempting to clean it To protect against electric shock do not immerse cord plug or unit in water or other liquid z The outside of your Coffeemaker can be cleaned by wiping the surface with a damp soft cloth z IMPORTANT Never immerse the Coffeemaker in water or other liquid z When cleaning the carafe DO NOT put your hands...

Reviews: