26
27
G6P
G6P
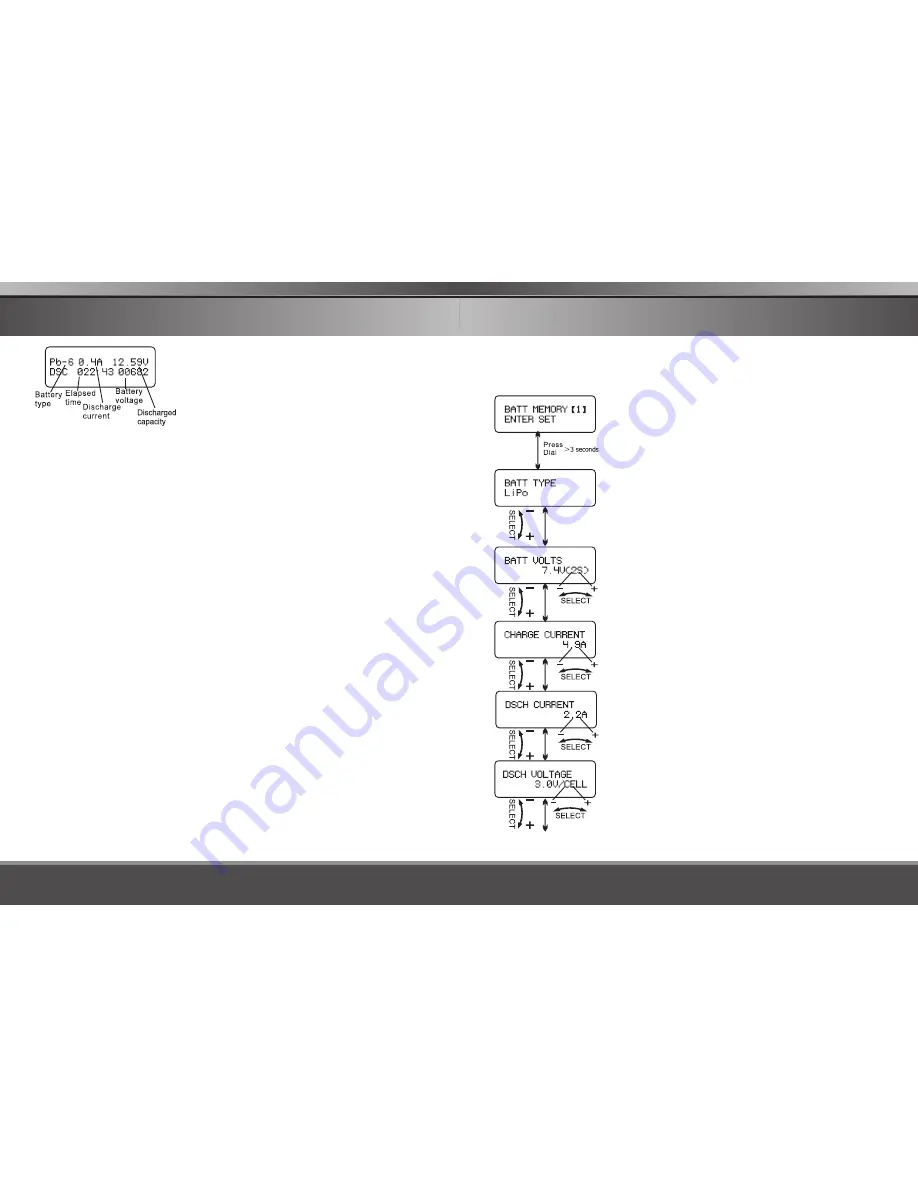
BATTERY MEMORY SET
The charger can store up to 10 different charge/discharge profiles for
your convenience, and the stored profiles can be recalled quickly
without having to go through the setup process.
Enter the battery memory program, you can
change the battery type(LiPo, LiFe, LiIon, NiMH,
NiCd, Pb battery), voltage, charge current by
pressing the Start/Enter dial to make the value
blink, then rotate the Start/Enter dial clockwise or
counterclockwise to alter the value, and repress
Start/Enter dial to store the value and move to the
next value or screen.
Note:The battery used for this example is a
2S(7.4V) Lipo battery.
Set the discharge current, which can be adjusted
(0.1A-5.0A).
Set the discharge voltage, which can be adjusted
(3.0-3.3V/Cell).
Set the voltage and number of cells, along with
the normal voltage (1S-6S).
Set the charge current, which can be adjusted(0.1-
10.0A).
The screen displays the current state of
discharge. You can alter the discharge
current by pressing Start/Enter dial during
the process. Once you find the desired
current value by rotating the dial, store it by
repressing the dial.
To stop discharging, press Mode/Stop button
once. The audible sound indicates the end
of process.
The free “Charge Master” software gives you unparalleled ability to
operate the charger through the computer. You can monitor pack
voltage, cell voltage and other data during the charging, view charge
date in real-time graphs. And you can initiate, control charging and
update firmware from “Charge Master”.
In order to connect the charger to the computer and use the “Charge
Master”, you are required to use a USB cable which is not included in
this package. The cable must be terminated on one end with “A” plug
and the opposite end is terminated with “Micro USB” plug which can
connect to charger directly.
The “Charge Master” can be download from www.gforce-hobby.jp
USING THE CHARGE CONTROL SOFTWARE
“CHARGE MASTER”
USING THE CHARGE CONTROL SOFTWARE
“CHARGE MASTER”


